Showing posts with label yogurt. Show all posts

Friday, July 5, 2013

Farm Fridays: Zucchini and Garlic Scape Latkes with Creamy Basil Sauce


I'm getting the impression that this is going to be a great year for cucumbers and summer squash. I have two enormous yellow squash plants in my garden (not producing yet, but huge and vigorous) and my cucumber vines have already started churning out some big ones. We've been getting large quantities of cucumbers and squash from the farm as well.

My favorite way to eat any summer squash is to grill it (just cut it into long planks, rub with oil and season with salt and pepper). Unfortunately, the weather hasn't been very cooperative for grilling lately. It seems like every time we so much as lift a corner of the grill cover, the skies open up.  I chose this recipe as an alternative to grilling my crisper drawer full of zucchini.

I was a little trepidatious because, while Jeff and I have made latkes several times, we never seem to get it right: either they're soggy or falling apart or more egg than potato. Yet I still persist in trying new recipes, hoping we'll figure it out eventually. Jeff raised his eyebrows when I proposed this recipe, but gamely went along with it. Good thing, too, because these are probably the most successful latkes we've ever made. Perhaps our problem is with starchy potatoes, because these zucchini latkes came together like a dream. I think our success came from squeezing a ton of water out of the zucchini (one of the pictures below shows how dry we were able to get it) before we mixed the batter. That ensured the latkes weren't soggy. While they didn't crisp up like potato latkes do (when done correctly, by people other than us, that is), the flavors and textures were delicious. The basil was a stand-out flavor in both the latkes and the sauce, complementing the zucchini and garlic beautifully. Isn't it great how seasonal flavors work so well together?

Zucchini and Garlic Scape Latkes with Creamy Basil Sauce
Adapted from Sassy Radish

1 1/2 lbs zucchini
1 1/2 tsp kosher salt
scant 2/3 c flour
1/4 c basil, slivered
2 eggs, lightly beaten (the local eggs we used were very large and our latkes turned out just slightly too eggy - try not to overdo it on the egg)
2 garlic scapes, thinly sliced (about 3-4 tbsp)
1/2 tsp baking powder
1/4 tsp black pepper
olive oil

1 c Greek yogurt
1/4 c basil, slivered
zest of 1 lemon
juice of 1/2 lemon
kosher salt and black pepper to taste

Trim one end off of each zucchini then shred using a box grater (don't cut off the other end - use it as a handle and add it to the stock bag when you're done!). Transfer to a large colander and toss with salt. Position the colander over a large bowl and let sit 15 minutes.


Meanwhile, make the creamy basil sauce. Add the yogurt, basil, lemon zest and lemon juice to a small bowl and stir well to combine. Add salt and pepper to taste, stirring to combine once more. Set aside to let the flavors meld.


After 15 minutes, transfer the shredded zucchini to a clean cheesecloth or kitchen towel. Twist and squeeze well to remove as much water as possible. 

Pour enough oil into a cast iron skillet (or other large, heavy pan) to cover the bottom completely. Heat over medium-high, until shimmering.

Meanwhile, add the zucchini to a medium bowl and combine with flour, basil, eggs, garlic scapes, baking powder and pepper. Mix to form a batter.

Reduce heat to medium and drop 1/4 cupfuls of batter into the skillet, arranging them into firm patties with a fork (we fit three large latkes at a time in our 9" skillet). Gently flatten the tops and tuck in any straggly bits on the sides.


Cook 3-4 minutes, then flip gently with a spatula and cook another 3-4 minutes until golden brown and cooked through. Remove to a paper bag or paper towel-lined plate to drain while the next batches cook (this recipe made three batches for us - nine latkes in all).

Serve nice and hot with creamy basil sauce on the side!

Wednesday, April 24, 2013

Baked Potato with Deborah Madison's Watercress Yogurt Sauce


I am in love with Deborah Madison's new cookbook, Vegetable Literacy. My sisters-in-law were astute enough to get it for me for my birthday earlier in the month, unaware that I had been salivating over online previews for months. Excellent call, ladies.

I brought the book home and read it cover to cover over the course of a few weeks. It really is a wonderful book just to read, with reams of information on every vegetable under the sun. Madison explains each vegetable in turn, including which parts are edible, what different varieties taste like, and what oils, herbs and spices pair well with it. By grouping them into plant families, Madison makes it simple to understand how to substitute one vegetable for another. And, on top of all that, she includes several wonderful recipes for each one.

This is the sort of book that makes me fearless in the kitchen. Madison has me excited about all sorts of vegetables and herbs that I wouldn't otherwise have known what to do with. I'm sourcing things like lovage and sorrel for my new herb garden, confident that I'll love them based on her thorough descriptions. I won't be afraid to pick up a bunch of cardoons in the market, since she explains just how to handle them. And there's no need to have a recipe already planned, since her "good companions" suggestions provide guidance for some kitchen improvisation.

Perhaps the best thing about this book is how effortless Madison makes growing and cooking these vegetables seem. Her descriptions of scattering seed aimlessly in corners of her own garden and enjoying luscious harvests months later make me want to get out and find likely corners of my own backyard for growing good things (if there are any corners I haven't already scoped out). And nearly all of her recipes come together in minutes, allowing me to feel like a total expert in the kitchen.

This watercress yogurt sauce is no exception. The cress gets blanched, whizzed in the food processor with some other ingredients, then folded into the cold, creamy yogurt. Spooned over a hot baked potato, this made for a healthy and satisfying dinner. And the sauce was so delicious that I was tempted to coat my salad in it as well (I might try that for lunch today)! It's fairly similar to the mustard cream that goes with her cabbage and leek gratin - both have shallots, vinegar, mustard and yogurt at the base. The watercress adds a nice peppery finish and the parsley makes it taste delightfully fresh.

I would love this book even without the recipes, but if the one that I've tried is any indication, I'm going to absolutely adore it once I get to know more of them. I think this is going to be a staple cookbook in my kitchen for many, many years.

Baked Potato with Watercress Yogurt Sauce
Sauce from Deborah Madison's Vegetable Literacy.

2 russet potatoes
1 tbsp olive oil
kosher salt and black pepper to taste
1 bunch watercress, stems removed (I ended up with a bit more than 1/2 c of leaves from my small bunch)
2 tbsp parsley
1 shallot
1 c Greek yogurt
2 tsp white wine vinegar
1 tsp Dijon mustard

Preheat oven to 425° F.

Scrub the potatoes clean and dry thoroughly. Rub the skins in olive oil and sprinkle with kosher salt and black pepper. Place in the oven (you can use a baking sheet if you'd like - I just put a little foil under them, with the edges turned up, to catch the oil drips) and bake 45-60 minutes, until tender.

Meanwhile, set a small pot of salted water to boil on the stove. Add the watercress until wilted and bright green - about five seconds - and then rinse under cold water. Gently squeeze excess water from the watercress. Add the watercress, parsley and shallot to a small food processor and pulse for a few seconds until everything is finely chopped.

Add the watercress mixture, yogurt, vinegar, mustard and salt and pepper to taste to a small bowl. Mix well and refrigerate until ready to serve.

When the potatoes are finished baking, split them with a fork and spoon generous amounts of the watercress yogurt sauce over the top. Serve with a small salad for a lovely light dinner!

Tuesday, December 4, 2012

Cabbage and Leek Gratin with Mustard Cream


We're in full-fledged Christmas mode around here. I wanted to get all the decorations up this week, but I couldn't bear to decorate a dirty house. We've been skimping on the cleaning for a while now - a deep clean is overdue. My solution has been taking the house one room at a time, cleaning really well, then decorating as we go. So far we've tackled . . . three rooms. One of them was the kitchen, though, so I consider it a triumph. The Christmas tree just went up and will be decorated later tonight, so we'll have to handle the rest of the rooms later in the week. However long it takes, I am determined to have everything sparkling before Christmas.

A clean, festive house requires comfort food, doesn't it? But if you're anything like me, you're probably trying to avoid too much heavy winter fare. There will be enough time for splurging and treats at all the holiday parties that are coming up - in between, we need to keep things light. This is a great meal for that. Despite its name, this gratin is cheese-less. I've lightened up the dairy called for in the original recipe, so the final result is a healthy but satisfying dinner option.

Cabbage and Leek Gratin with Mustard Cream
Adapted from Deborah Madison's Vegetarian Suppers.

1 1/2 lb green cabbage, chopped into bite-sized chunks
3 large leeks, sliced into half-moons
1/3 c flour
1 c skim milk
1/3 c fat free Greek yogurt
3 eggs
3 tbsp dill, chopped
1 small shallot, minced
1 1/2 tsp white wine vinegar
2/3 c fat free Greek yogurt
1 tbsp Dijon mustard
1/2 tsp prepared horseradish
salt

Preheat oven to 350° F and lightly coat a 6 c gratin dish with cooking spray.

Bring a large pot of salted water to a boil. Add cabbage and leeks. Boil for 5 minutes, drain in a colander and press out remaining water. Return the cabbage mixture to the empty pot.


Whisk together flour, milk, yogurt, eggs and herbs, then add to the cabbage and leek mixture. Sprinkle with 3/4 tsp salt and fold together with a rubber spatula.


Transfer to prepared dish and bake 45 minutes, until firm and browned.


Meanwhile, mix the shallot and vinegar in a small bowl with 1/8 tsp salt and let stand for 5 minutes. Add yogurt, mustard and horseradish. Mix well to combine, then serve with gratin.


(If any of you end up trying the mustard cream, let me know what you think! I think it tastes exactly like the sauce Burger King uses on the Whopper. Who would have thought that pickled shallots were the secret ingredient?)

Tuesday, November 13, 2012

Sweet Curry Carrots with Yogurt Sauce


I was invited by Cathy Elton of What Would Cathy Eat? to participate in her Healthy Thanksgiving Challenge. I first found Cathy's blog earlier in the year, after I'd been diagnosed with high cholesterol and was frantically looking for heart-healthy recipes. There are some totally delicious recipes on her blog - I definitely recommend checking it out. I may even be making her Caramelized Onion Tart with Greens and Cashew Cream to bring to my in-laws for Thanksgiving!


As my family has learned over the past several years, dealing with my dad's heart condition (and now my cholesterol), making a fantastic, healthy holiday meal isn't as difficult as it sounds. Of course you should treat yourself - no Thanksgiving table is complete without pie - but you don't have to make every dish a special (read: diet-busting) treat.

Fall vegetables should be at the center of every holiday meal. Sweet potatoes, winter squash, cauliflower, kale and Brussels sprouts are some of my favorite things and all quite delicious without much adornment. Naturally, I had a very difficult time deciding what to make for this challenge. How could I choose? What ultimately happened was my CSA chose for me. Last Friday, part of my last farm share of the season was a bunch of gorgeous baby carrots - adorable, delicious and photogenic. This was the inspiration I was looking for. They brought to mind this recipe I'd pulled out of Better Homes and Gardens back in April. While this recipe was meant to grace an Easter table, it will do just as well for Thanksgiving.

The carrots are soft and delicious, the honey-curry glaze sweet and savory all at once, and the yogurt sauce adds a creamy finish. Jeff and I sat down and nearly finished off the platter by ourselves (of course, they'll go farther at a Thanksgiving table with several other side dishes - the original recipe claims it serves 8-10). I just hope I can get my hands on some more of these sweet babies to make for my own Thanksgiving dinner!

Sweet Curry Carrots with Yogurt Sauce
Better Homes and Gardens April 2012

1-1 1/2 lbs baby carrots (the tops should be trimmed down but still on)
1 tbsp olive oil
1/2 tsp salt, divided
3 tbsp honey
1 tbsp curry powder (a heaping tablespoon, if you know what's good for you!)
2/3 c plain fat free Greek yogurt
1/4 c thinly sliced green onions (darker green ends only - reserve the white parts for something else)

Preheat oven to 425° F. Line a baking sheet with aluminum foil. Spread the carrots on the baking sheet, drizzle with oil and sprinkle with 1/4 tsp salt. Roll the carrots around with your hands to coat them in oil. Roast for 15 minutes.


Meanwhile, put the honey in a microwaveable bowl and heat for about 30 seconds, until nice and runny. Whisk in the curry powder. When the carrots are done, remove the tray from the oven and drizzle with the honey. Roll the carrots around in it to coat. Return to the oven for 10 minutes, until all the carrots are tender.


While the carrots finish roasting, combine the yogurt, green onions and remaining 1/4 tsp salt in a bowl. Serve alongside carrots for dipping.

Friday, August 31, 2012

Farm Fridays: Cucumber-Yogurt Gazpacho


Leeks! Sunflowers! Edamame! Two watermelons! This week's CSA share is going to be fun. There's also a nice bunch of cilantro that I plan on using to can some heirloom tomato salsa this weekend! 


I've been in a bit of a rush today, since I'm going up to Rutherford tonight (soon, actually) but I stumbled upon the perfect recipe to blog on a busy day. This cucumber-yogurt gazpacho is really quick and easy. Just five ingredients and a whisk in the blender. It's the perfect cool, refreshing meal for a hot day like this. Hopefully my family will like it as much as I do!

Cucumber-Yogurt Gazpacho
Based on a recipe from Cooking Light: Way to Cook Vegetarian. ("Based on" means I glanced at the recipe and then did things my own way.)

2 large cucumbers
3 c Greek yogurt
2 c vegetable stock
3 tbsp lemon juice
1 clove garlic, minced
salt and pepper to taste 

Peel and seed your cucumbers (I find a melon baller really handy for tasks like this - I should start calling it my seed-scooper, since I've never even considered using it to make melon balls!), then chop them roughly.


Throw everything into a blender (my blender couldn't fit it all, so I divided everything into two mostly-even batches) and blend to your heart's content. Serve chilled, with minced cucumber for garnish.


Friday, June 22, 2012

Farm Fridays: Tzatziki


It feels like summer outside, but my CSA share hasn't gotten there yet. We're still working on the spring greens. So many greens.


Today I got a ton of lettuce (no surprise there), chard, collard greens, a head of cabbage, a huge bunch of scallions and some cucumbers. Too many greens for two people to eat in a week. Even though I love chard, I decided that this wasn't its week. This afternoon, I took the half pound from the farm plus another half pound I picked out of our garden, blanched the leaves and froze them. Chard goodness will have to wait for another day, later in the summer or fall, when I'm starved for greens. Until then, I'll focus on the others.

Today's dinner actually didn't include any of the produce from this week - we made some pork wasabi tacos to use up some of the Napa cabbage I had left over from last week's share. I plan on posting that quick, tasty recipe sometime soon.

Since it's so hot out, I'm not feeling these greens right now. I'm ready for summer flavors. And what tastes like summer more than tzatziki? Back in March, there was a lady at Whole Foods giving out samples of hummus and tzatziki. I tasted some and was immediately transported to a lazy summer afternoon. When yogurt and cucumber combine their powers, they distill the essence of summer into a form that can be easily scooped up on a crisp pita chip. So what better way to celebrate summer than to whip up a nice bowl of this refreshing dip? I can't think of any.

Tzatziki
Adapted from Cooking Light: Way to Cook Vegetarian.

1 c cucumber (I used two small ones - about 8 oz total)
1 c Greek yogurt
3 fresh mint leaves, minced
1 clove garlic, minced
1/4 tsp salt
1/4 tsp black pepper

Grate the cucumber and gently squeeze some of the liquid out. (The recipe says to peel them first, which I did, but in retrospect, I think I'd rather have the peels on for a little color and texture).


Combine the cucumber, mint, garlic, salt and pepper in a small bowl and mix well.


Add the yogurt and mix well to combine. For the best flavor, let it sit in the fridge for about an hour. (If, like me, you can't wait to taste it, know that it's pretty good right away, too!)


Wednesday, May 23, 2012

Lemon-Yogurt Potato Salad with Fresh Herbs


Since I teased you about my awesome potato salad in some previous posts, I thought I should be nice and post the recipe. I was never a potato salad person until I started making my own, because I can't stand mayonnaise. But when it occurred to me that, if I did it myself, I could do it without mayonnaise, potato salad became the greatest thing ever.

I've made yogurty, herby potato salads before and enjoyed them, but this one is special. I think it's because of a little trick Jamie Oliver uses in the original recipe. He says to boil the potatoes and then mix them with the dressing while they're still hot. When you do this, the starches from the potatoes seem to blend with the dressing, making it thicker and making it stick to the potatoes more effectively. The result is a pile of yummy, gooey, herby, lemony goodness. I've eaten it hot right after mixing and cold from a night in the fridge. I've had it on my deck with a turkey burger straight from the grill and packed in a cooler for a picnic in the park with some of my neighbors. It never fails to be delicious. The next time I'm invited to a summer barbecue, you know this is what I'm bringing.

Lemon-Yogurt Potato Salad with Fresh Herbs
Adapted from Jamie Oliver's Evolution Potato Salad in Jamie's Food Revolution.

1 1/2 - 2 lbs potatoes
3 tbsp olive oil
2 tbsp lemon juice
1/4 c plain yogurt
2 - 3 tbsp fresh herbs (this time, I used parsley, oregano and garlic chives)
salt and pepper to taste


Put a large pot of water to boil over high heat. Salt well.

Chop the potatoes into (relatively) evenly sized chunks. (Since we all know there is no way to make a knobbly potato into even cubes without a ton of waste. Mine tend to be an inch or so at their wides - as long as they're not too big for your mouth, they're fine.) When the water is boiling, carefully add them to the pot. Boil 10-12 minutes, until tender.

Meanwhile, make the dressing. In a large bowl, whisk together the olive oil, lemon juice and yogurt until well blended. Season to taste.


Wash and chop your herbs, then add them to the dressing and whisk together.


When the potatoes are tender, drain them in a colander and add them to the dressing and toss until combined. Taste and season more, if necessary (and try not to eat it all yourself!). Serve immediately or chill for later.


Monday, November 14, 2011

Garlic Naan


I am vindicated!

I have not made a yeast bread since this debacle last year. I found it much more disappointing than I acknowledged in that post. I have been reticent to use yeast again, since it takes so much time out of my day to get such a mediocre result.

When I saw this recipe in the Vegetarian Times that I got from my neighbor (thanks, Marie!), I knew I had to give it a shot. I planned a nice Indian dinner for Sunday afternoon, determined to conquer the naan. To my extreme delight (no, seriously, I was bouncing around and grinning the whole time), it went beautifully. The dough rose perfectly, was easy to roll out, and started sizzling as soon as it hit the pan. As soon as the first one was flipped, I knew we had it. It looked like naan! It looked like something you could buy at the grocery store or be served at an Indian restaurant. It was perfect - bubbly on the outside, light and fluffy on the inside. If I weren't so stuffed, I'd grab another right now!

From now on, there will be no fear. I will plan to make fresh bread on a weekend. There is no reason I should not make my own pizza dough and flatbreads. I will even go back to making sandwich bread. I can do this! Although in the near future, while I still have a huge tub of plain yogurt to use up, I may be sticking with this naan!

Garlic Naan
From Vegetarian Times November 2011.

1/4 oz active dry yeast
3 1/3 c bread flour
2 tsp sugar
1 tsp salt
1/2 c whole-milk yogurt, at room temperature! (I neglected to notice this direction before proofing my yeast, so we had to jump through hoops trying to warm it up a bit.)
3 tbsp olive oil, divided
1 tsp garlic, minced

Stir yeast into 1/4 c warm water (105-115°F). Let stand 10 minutes.

Whisk together 3 c flour, sugar and salt. (If using a stand mixer or food processor to knead, combine these things in your machine. I preferred to do this one by hand. If not kneading by hand, include all the flour.)

Combine yogurt, 2 tbsp olive oil and 3/4 c warm water (105-115°F). Pour this mixture and yeast mixture into flour mixture. Stir with a wooden spoon to combine (or use your machine!). When the dough forms a ragged ball, pour it out onto a floured surface (using that remaining 1/3 c flour) and knead until all the flour is absorbed and the dough has become a smooth ball (or use your machine). Place your kneaded dough into an oiled bowl, cover and allow to rise 45 minutes to an hour, until doubled (I used the proofing setting on my oven and it was perfect in 40 minutes or so).


Deflate the dough and turn it out onto a lightly floured counter or board. (Sorry, but in my haste to get it divided, I neglected to get a picture of the risen dough.) Divide dough into eight roughly equal pieces. Form each one into a ball, then press into a small disk. Cover with a kitchen towel and allow to rest 10 minutes.


Combine 1 tbsp olive oil with minced garlic and let stand, so the oil begins to absorb the garlic flavor. Preheat a cast-iron skillet over medium-high heat, until a drop of water evaporates on contact.

After the dough has rested, on a lightly floured surface, roll each ball into an 8" round.

Transfer to the piping hot skillet and cook 1-2 minutes, until the bread begins to bubble up and the bottom begins to turn golden brown (you can lift the edge with tongs to check its progress).


Flip and cook for another minute, pressing down with a spatula to deflate any big air bubbles, until black blistery patches begin to appear on the bottom (and it looks like naan!).


Transfer to a serving plate, brush with garlic-oil mixture and serve with a nice curry!

Saturday, March 12, 2011

Dill Yogurt Dip


I love vegetable dips. I actually learned to like raw broccoli (well, again - apparently I loved it as a toddler) in high school when I realized it was the perfect vehicle for a nice dip. The problem is that I can't handle that sort of fat in my diet anymore. I'm apparently getting too old to be shoveling full-fat sour cream and mayonnaise down my gullet without my body protesting.

But I have the perfect solution. Last year, I purchased some Greek yogurt for some recipe or other. Now I've never been a huge yogurt fan - I think it's the goopy texture - but this was different. It still has a yogurty tang, but the texture is closer to sour cream. So a lightbulb went off in my head - what if I exchanged the sour cream in my favorite dips for Greek yogurt? A gut-busting indulgence now becomes a healthy snack! It's seriously good and good for me. And it got me to eat tons of raw vegetables this summer - in fact, this was usually my lunch.

This is also a great way to use some dried herbs. What, you don't dry your own herbs? I think this is the easiest do-it-yourself kitchen project. Fresh herbs from the grocery store are expensive and go bad quickly. When I'm compelled to buy some, I use what I need and then hang the rest up to dry. After forgetting about them for a few weeks, I take them down, strip the leaves from the stems and put them into my handy magnetic containers. Below you can see my basil, thyme, dill, marjoram and sage.


I have parsley and rosemary as well, but they're in ceramic pots on my counter (I have more than will fit in the magnetic containers). Most of these came from store-bought herbs. Hopefully by the end of the summer, my own herb garden will be thriving both indoors and out, and I won't need to be buying herbs at the store again any time soon. I'll definitely need plenty of dill on hand for this dip!

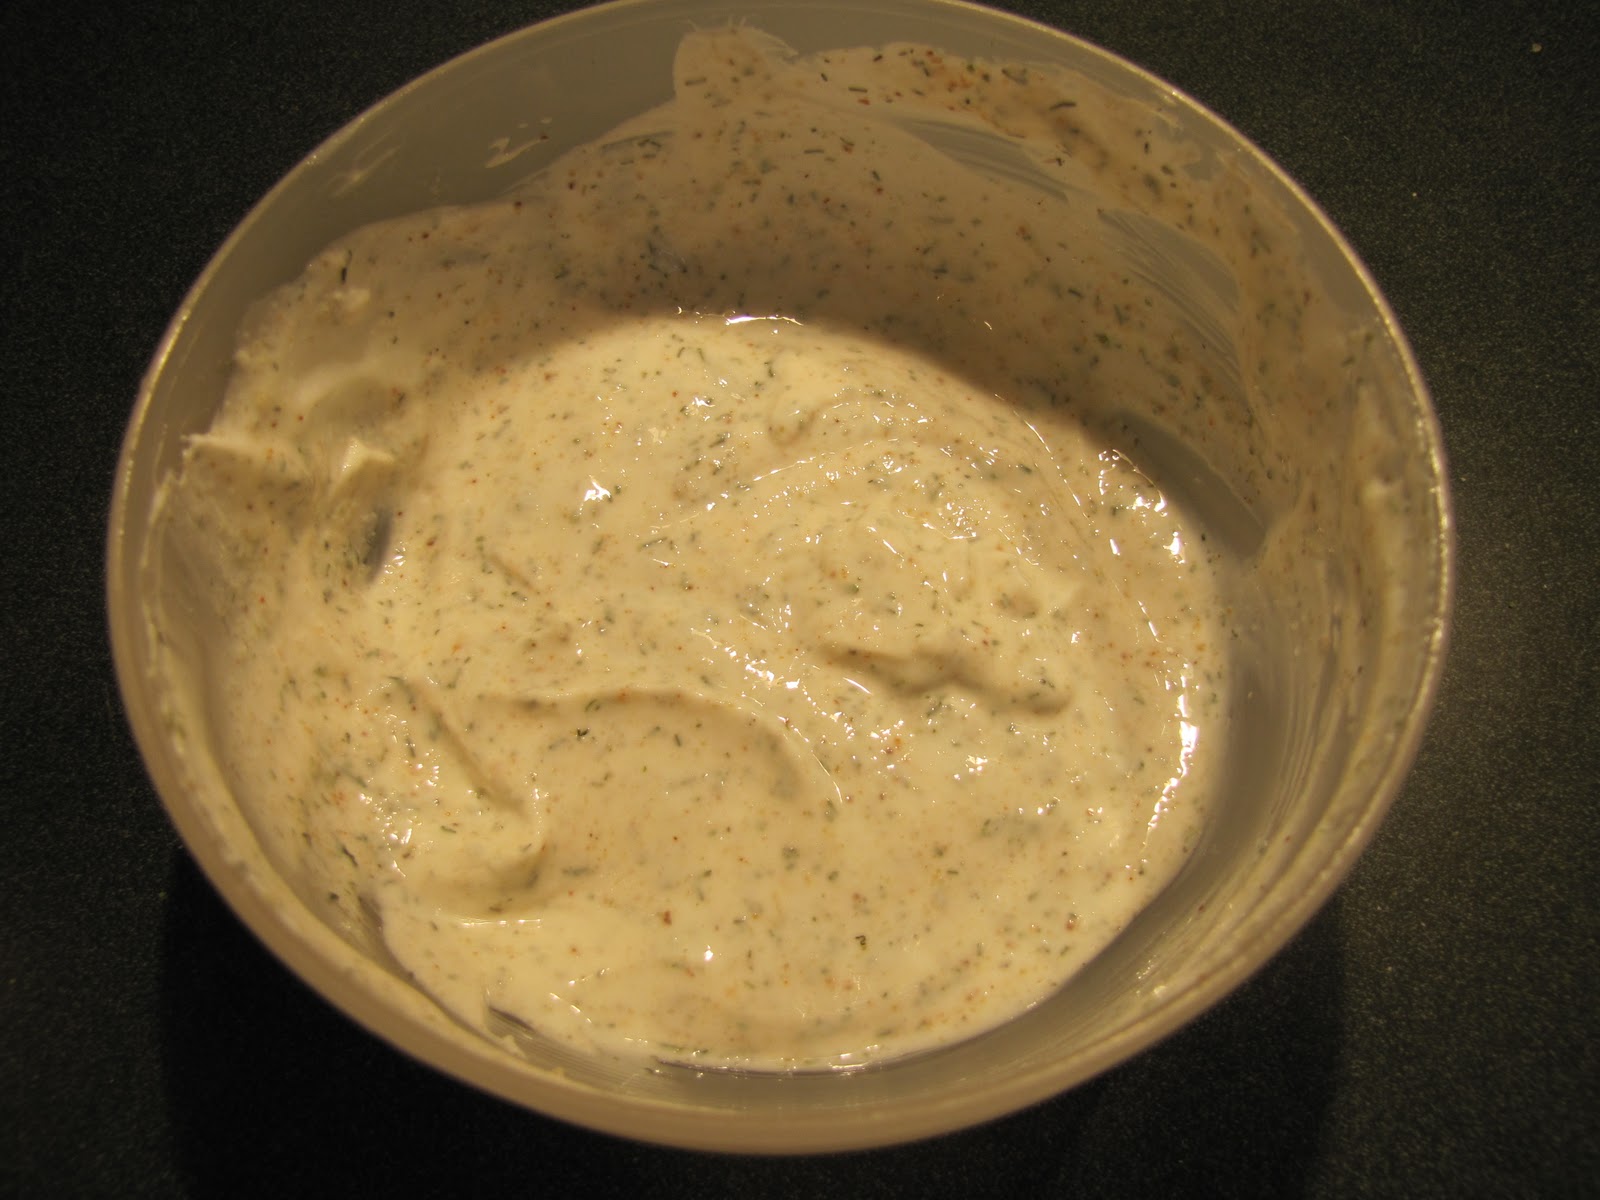
Dill Yogurt Dip
1 - 1 1/2 c Greek yogurt
1 tbsp fresh dill (is you're using dried dill, 2 tsp should be plenty)
1 tsp dried parsley
1 tsp seasoned salt (why? my original recipe called for it - this is actually the only reason I keep it in my pantry!)
1 tsp onion powder
dash garlic powder

Combine all ingredients in a bowl and stir (and don't confuse garlic and onion powder like I did - I had to spend some time trying to fish out most of the garlic! That would have been super-strong!).


While you can eat it right away (I certainly did when I made this batch), it's at its best if you put it in the refrigerator for an hour or so to let all the flavors meld. Also, I've found that the Greek yogurt can separate a bit when refrigerated - the herbs and things will all float to the top. There's nothing wrong with it when this happens. Just give it a quick stir and it will be as good as new. Serve with your favorite veggies!