Showing posts with label dessert. Show all posts

Tuesday, July 2, 2013

Roasted Cherry Brownies

Yeah, I stole one before I took the picture. I had to make sure these were good before I blogged about them!

I had some trouble with these brownies. Specifically, I forgot to set a timer so I have no idea how long they baked for. Clearly, I was doing too many things in the kitchen at once. Normally, I have enough of a sense of time to be able to guess, but when I realized there was no timer running for these I truly had no clue how long it had been. When I examined them, I thought they might be nearly done, so I started setting the oven timer for 5-7 minutes at a time, checking them, and popping them back in the oven. After twenty plus minute of this, after they finally puffed up, I remembered what brownies look like when they're done and decided they were close. A few minutes later, I finally removed them out of sheer exhaustion. The bad news? They're a bit underdone. The good news? They're a bit underdone.

These brownies are deliciously fudgey and moist. The added moisture from the incomplete baking process is not a problem in my book. The cherries add a wonderful richness - the flavor manages to permeate most of the brownie (perhaps from the extra juice from roasting?). I take some credit here because out of the eight varieties of cherries we picked last week, I chose the richest ones for this recipe. The result is a moist, extremely chocolatey but richly fruity treat. Definitely a winner. I'm really sad I have to pack these into the freezer, since we're suffering (wink wink nudge nudge) from a surfeit of cherry-laden treats right now.

Roasted Cherry Brownies
Slightly adapted from Tracey's Culinary Adventures. 

2 c fresh cherries
1 1/4 c + 2 tbsp sugar, divided
5 oz bittersweet chocolate (I used my preferred chocolate chips - Ghirardelli 60% cacao)
2 oz unsweetened chocolate (I used some Scharffen Berger that I've been trying to get rid of - it's not my favorite chocolate because it has a strange fruity aftertaste, but I (correctly) assumed it would work well with actual fruit)
1/2 c butter, cut into 8 pieces
3 tbsp unsweetened cocoa powder (I used Ghirardelli)
3 eggs
2 tsp vanilla extract
1/2 tsp salt
1 c flour

Preheat oven to 450° F. Line a small baking dish with foil. 


Halve and pit the cherries, then toss with 2 tbsp sugar. Spread inside the foil-lined baking dish.


Roast the cherries 9-10 minutes until they are softened and juicy. Set aside to cool. Reduce the oven temperature to 350° F.

Meanwhile, finely chop your chocolate (chocolate chip-sized pieces are fine) and combine with the butter in a heatproof bowl set over a pot of simmering water (I prefer to bring the water to a boil first, turn off the heat, and melt the butter and chocolate with the remaining steam). Stir with a rubber spatula until the butter and chocolate have melted and are well combined. Whisk in the cocoa powder, then set aside to cool slightly.

In a large bowl, whisk together sugar, eggs, vanilla and salt. Slowly whisk in the cooled chocolate mixture until well combined. Fold in the flour with a rubber spatula, then carefully fold in cherries.


Transfer the batter to an 8 x 8" baking dish lined with foil (make sure the foil overhangs the edges for easy removal later). Bake 35-45 minutes, until tester comes out relatively clean (or leave a little underbaked, like me, and have super-fudgey brownies!). Remove to a wire rack and completely cool before cutting.


Sunday, April 7, 2013

House of Cupcakes, Princeton, NJ


My birthday passed rather uneventfully this year. No crazy complicated recipes were attempted. No cake was made. I didn't want to add to the chaos (and the sugar high) of Easter weekend by adding further demands on my time once I got back home. I also wanted to take advantage of Jersey Shore restaurant week, which started on Friday. I can only justify so many calorie splurges in one week.

Instead, Jeff and I stayed home, grilled up some turkey burgers and went out for dessert. I demanded some cupcakes, so we drove up to the House of Cupcakes in Princeton shortly before they closed for the day. We'd been inside once before just to check it out, but this was our first time sampling their wares. The online reviews I read were pretty positive, although one lamented their use of a pre-made frosting base. I figured I'd check things out and draw my own conclusions.

Jeff and I decided to get three cupcakes and split them (from left to right in the above picture): salted caramel, Boston cream and peanut butter cup. When I went to cut them, I noted the sticky, gooey frosting on the first two. The cake itself was light and fluffy with a gorgeous even crumb, but it wasn't really substantial enough to hold up to that heavy frosting. Their top-heaviness showed when I cut them in half and they attempted to flip over.


I went for the salted caramel first. The frosting was gooey and too sweet, but had a nice caramel flavor. I didn't really get a salty flavor from it, but the crunchy peanuts on top were a nice touch. The cake was deliciously soft and chocolatey. Because the frosting was trying to secede from the cupcake, I ended up tearing off the bottom and making a cupcake sandwich, thus improving the cake-to-frosting ratio.

I tried the Boston cream next. It, too, had a very thick, overly sweet frosting but with a deep, rich chocolate flavor. Jeff said it reminded him of the frosting layer on a Hostess cupcake. The cake was, again, delicious and light and the cream wasn't bad. I thought it was a little insubstantial for pastry cream, but a good consistency for the cake that surrounded it. It was a decent cupcake, but a better frosting would have made it pretty awesome.

The peanut butter cup was by far my favorite of the three. Its chocolate frosting was not thick and gooey, but light and fluffy to better match the cake beneath. The crumbles of peanut butter cup on top were a perfect compliment to the chocolate layers below. I'm glad I saved it for last, because that was a great cupcake.

I would definitely go to the House of Cupcakes again - the cake itself was outstanding - but I think I will be a bit more discriminating in the future. The thick, shiny frosting looks nice in the case, but is too gooey and sweet for my taste. Next time, I'll be picking out the ones with fluffier frosting and going home happy.

Sunday, March 17, 2013

Pecan Cornmeal Biscotti


Happy St Patrick's Day! I should be offering you Irish soda bread or some kind of cabbage. I did make a soda bread today, although I'm still feeling around for a really great recipe. I do have some Irish roots on the murkier side of my family tree, but whoever those ancestors were, they didn't pass down any recipes. My cooking talents seem to have come from some of my other ancestral ethnicities.

Take my Italian side. I can make a mean tomato sauce, a perfect pesto and killer biscotti. These particular biscotti aren't as Italian as they could be - there's much more of a Southern vibe going on here. The anise and almond flavors have been replaced with pecans and cornmeal. Yes, cornmeal. I had some doubts when I first saw the recipe , but it turns out that the cornmeal offers a beautiful buttery flavor. I know that cornbread tastes buttery, but I always assumed it was from all the butter. Apparently not. Add some pecans to those buttery notes and you have yourself a pretty good cookie.

I'm not a huge fan of biscotti - I like them, but I normally don't freak out over them. I decided to make these to keep in my pantry in case of cookie cravings. I thought they'd be the sort of dessert I'd go after as a last resort, when I really wanted a cookie and nothing better was available.

Maybe this is true with normal biscotti, but not with these. I devoured them very, very quickly. These are now on my list of dangerous cookies to have around. Either I'm a biscotti convert or these particular biscotti are pretty awesome. Either way, it's worth a try.

Pecan Cornmeal Biscotti
Adapted from the Southern Living Farmers Market Cookbook.

1 c chopped pecans
1 1/2 c flour
1/2 c yellow cornmeal
1 1/4 tsp baking powder
1/4 tsp salt
2 eggs
3/4 c sugar
1/2 c canola oil
1/2 tsp vanilla extract

Preheat oven to 350° F.

In a pan or toaster oven, toasts the pecans, stirring occasionally (watch them closely so they don't burn!).

In a large bowl, whisk together the flour, cornmeal, baking powder and salt. When the pecans are done, add them, too. In another bowl, lightly beat the eggs, then combine with sugar, oil and vanilla. Gradually pour this over the flour mixture, stirring until dry ingredients are moistened and a dough forms.

Turn the dough out of the bowl and divide it in half. Shape each half into a log of approximately 12 x 2". Place logs on a parchment-lined baking sheet.

Bake for 25 minutes, then set aside 10 minutes until cool (or, if you're impatient like me, you can move on and risk burning your fingertips). 


Slice each log diagonally into 1" thick slices with a serrated knife (you'll end up with some wonky, oddly-shaped end pieces - just eat them). Remove the parchment from the baking sheet and place the slices back on it, with one of the cut sides down. Return to the oven for 7-10 minutes, until lightly toasted. Flip onto the other side and toast 7-10 minutes more. Cool on wire racks. Enjoy right away or store in a covered container. (Biscotti seem to store well anywhere - I've stored them in tupperware without them getting soggy and I've stored them in tins without them getting stale. They're hardy little cookies.)


Wednesday, February 13, 2013

Dark and Milk Chocolate Brownies


This blog post is killing me. I really wanted to get a nice Valentine's Day recipe posted before the day, but writing about brownies while I'm fasting for Ash Wednesday is agonizing.

Fasting is not my cup of tea. I spend my whole day thinking about food, especially when I'm home by myself. I keep flicking my eyes up to the clock, wondering when it would be appropriate to have another snack. I snack a lot. Confining myself to three meals is really hard. Confining myself to two small meals and one regular-sized meal is even harder. Especially when that "regular-sized meal" is a bowl of butternut squash soup that probably doesn't top 250 calories.

I'd like my delicious brownies back, please.

Fortunately, I don't have to fast tomorrow. Tomorrow will be about chocolate hearts, Triumph Brewing Company and the secret treat I made for Jeff. I just have to get through tonight . . .

Maybe I'll stay up until midnight and have a snack then!

Dark and Milk Chocolate Brownies
From Baking Bites.

1/2 c butter, cut into chunks
2 oz unsweetened chocolate, chopped
1 c sugar (I ran out  of granulated sugar so I substituted light brown - I didn't notice a big difference)
2 eggs
1 tsp vanilla extract
2/3 c flour
3 tbsp cocoa powder
1/4 tsp salt
1/2 c milk chocolate chunks

Preheat oven to 350° F.

In a double boiler (aka a heatproof bowl set over boiling water), combine the butter and the unsweetened chocolate.


Melt the butter and chocolate together, stirring with a rubber spatula until they form a smooth mixture. Set aside to cool.


Meanwhile, prepare an 8 x 8" baking pan. (I lined mine with parchment paper, later using the overhangs to lift the brownies out, but I'm not sure they needed that treatment - cooking spray might work fine on its own.)

In a small bowl, whisk together the sugar, eggs and vanilla. Slowly pour in the chocolate mixture, whisking constantly, until smooth. In a medium-sized bowl, whisk together the flour, cocoa powder and salt. Add the wet mixture to the dry and stir until moistened. Stir in milk chocolate pieces.


Pour into prepared pan and bake 35-40 minutes, until set. Cool in pan 10 minutes, then transfer to a cooling rack. Slice when completely cooled.


Sunday, December 23, 2012

Classic Pizzelles


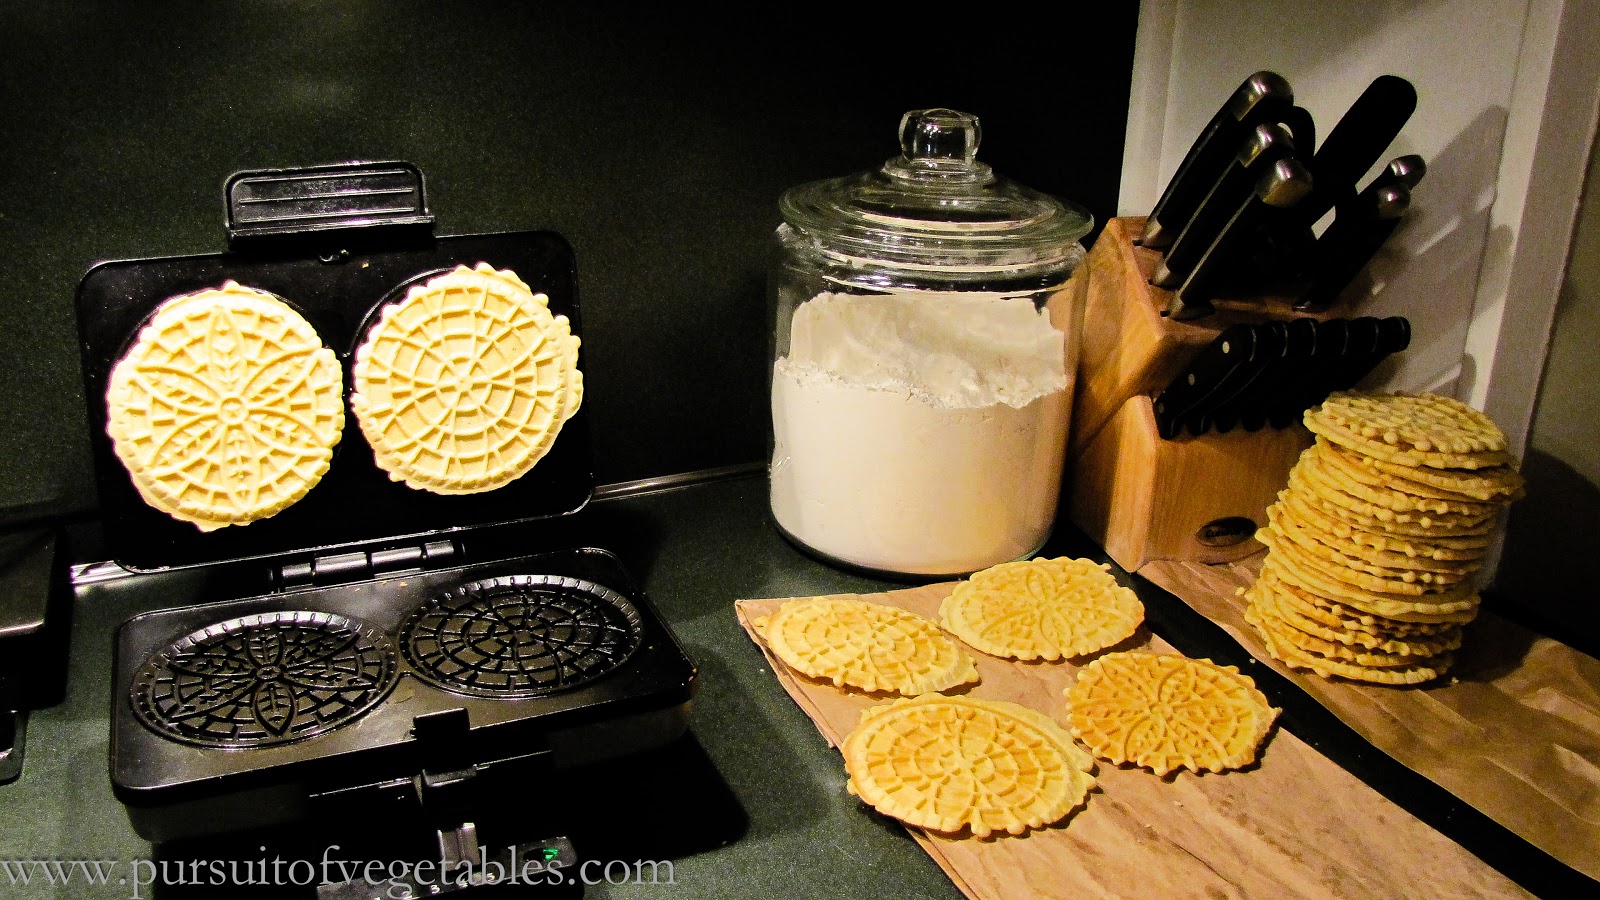
It's not Christmas without some pizzelles! I shared my chocolate pizzelle recipe with you a few years ago. This year, I thought it was time to share the real deal. I've made several pizzelle flavors over the years - vanilla, chocolate, chocolate hazelnut, pumpkin - but vanilla is always my favorite.

My mom has always limited pizzelle-making to the holidays because it can be a time-consuming process. Most presses only make two cookies at a time - the number that I used to eat as a kid would keep my mom busy for hours. I don't mind taking the time as much, since they're my favorite cookies, but I've still been saving them for special occasions. But now that we have a TV in our kitchen (merry Christmas to us!), pizzelle-making is no longer a chore. I can sit in the kitchen, monitoring the press and watching a good movie. It was seriously easy. I may be making these far more often in the future - especially since they store so well!

Classic Pizzelles

1 3/4 c flour
2 tsp baking powder
3 eggs
3/4 c sugar
1/2 c butter, melted and cooled
1 tbsp vanilla

First, set up your work station. You'll need an electric mixer for the batter, a hot pizzelle press, and a paper bag or some paper towels for the pizzelles to cool on. (Why not a cooling rack? This is the way my mom always did it. But I think the paper bags help draw the moisture out of the cookies as they finish cooking, creating a crispier result.)

Whisk together the flour and baking powder in a small bowl. Combine the eggs and sugar in the mixer bowl. Mix on medium speed for about a minute. Add the butter in a slow stream, then repeat for the vanilla. Add the dry ingredients and mix for another 20 seconds or so, until everything is moistened. The batter will be thick.


Drop the batter onto the pizzelle press in teaspoon-sized portions (my press came with a special little plastic spoon for this). Make sure you center each dollop on the pattern (I also find that positioning it slightly to the back of the press works well, since the batter is squeezed forward as the press closes). Close the press and cook 1-2 minutes until slightly golden, or until the press tells you they're done (mine has a convenient green light that goes off).


When the cookies are ready, gently peel them off (it shouldn't be too difficult - the vanilla ones are the easiest to work with of any pizzelles I've made) and place them on the paper bag or towel to harden (I stack them when they're cool to conserve space). Repeat with the rest of the batter (you'll probably want to find a good TV show to watch). These can be stored in a box or tin for several weeks - avoid air-tight containers, which might make them soggy.


Friday, December 21, 2012

Fudge-Dipped Cherry Shortbread Sandwich Cookies


I've been wanting to make these cookies for years. They've made it on my Christmas to-do list before, but somehow they never happen. I guess I thought they would be really time-consuming, what with the shortbread, the filling and the fudge dipping sauce. As it turns out, however, there is not much hands-on time at all. The recipe is extremely easy to throw together in little stages. The shortbread is tasty, the cream is awesome, and the fudge sauce is luscious.

The one problem I have with this cookie is the fudge sauce. It tastes delicious, but it's not very practical. It remains soft and drippy even after a night in the freezer. I placed some cookies on a plate for a few minutes in order to take the above picture, and they'd already left chocolate smears all over it. In the future, I think I'll dispense with the fudge sauce (who wants to eat corn syrup anyway?) and go for a hard chocolate coating, like what you would use on a truffle. I'm still including the fudge recipe here, but I'll update it when I come up with a better solution.

Fudge-Dipped Cherry Shortbread Sandwich Cookies
From Better Homes and Gardens November 2009.

Shortbread:
1/2 c dried cherries
1 1/2 c flour
1/2 c sugar
2 tbsp cornstarch
1/2 tsp salt
1/4 tsp baking powder
3/4 c butter, cold and cut into 1/2" pieces

Fudge:
1/2 c heavy cream
3 tbsp light corn syrup (I did find an organic, GMO-free one!)
4 oz semisweet chocolate chips

Cream:
1/2 c heavy cream
3 oz cream cheese, softened
1/4 c powdered sugar
1/2 tsp vanilla extract

Preheat oven to 325° F. Add the cherries to a small bowl and cover with boiling water. Let sit ten minutes, then drain.

In a food processor, combine flour, sugar, cornstarch, salt and baking powder. Pulse until combined. Add the butter and soaked cherries and pulse until the dough begins to clump together. Dump out onto a sheet of parchment paper. Mold the dough into a square, cover with another sheet of parchment paper, and roll into a 12 x 9" rectangle (I don't know how you roll things into rectangles - mine was more oval, so I sliced the edges off and rolled them out separately. That's what caused the different-sized rectangles in the picture below). Remove the top parchment and use a knife to slice the dough into 3 x 1" pieces (but don't separate them!). Slide the parchment onto a baking sheet.


Bake the shortbread for 30-35 minutes, until lightly golden. Remove and cool completely on a wire rack. Then use a knife to separate the rectangles and match them into evenly-sized pairs.

Meanwhile, make the fudge sauce. In a small saucepan, combine the cream and corn syrup. Cook over medium-high heat until hot. Remove from heat and add the chocolate chips, stirring with a spatula until the chocolate is melted and combined. Let cool for about an hour, until thickened.


To make the cream filling, combine the cream, cream cheese, sugar and vanilla in a medium bowl. Beat with an electric mixer until stiff peaks form. Refrigerate until ready to use.

When everything is ready, assemble the cookies. Pick up a pair of shortbreads. Use a small spatula to spread the cream onto the flat side of one cookie. Top with the other cookie, flat side down. Dip one end into fudge sauce, then place on a piece of parchment paper to dry (since I was making these a week or so in advance, I put the parchment on a baking sheet which I could slip in the freezer. Once frozen, I removed them to tupperware containers). Repeat with the rest of the cookies.


Wednesday, December 19, 2012

Cranberry-Pecan Oatmeal Cookies


It's cookie-making time! I started the week with an intimidating list of Christmas cooking and baking projects. So far, though, everything is going swimmingly. Most of my cookie baking is complete, both for desserts and edible gifts, and what's left is definitely do-able in the time I have available.

I look forward to holidays and family gatherings as a time to bake some of the new, fun recipes that I've been stockpiling. However, this seems to please me more than everybody else. When it comes to gifting, I fall back on the old standards that my family always asks for. These oatmeal cookies are one of my specialties. This batch is for my Grandma - she insists that I shouldn't buy her any presents and that she doesn't need anything, but these cookies always bring a smile to her face.

These cookies are just as good for gifting as they are for munching on a weekday afternoon. It's a great all-purpose recipe to have around. I think Santa would appreciate it if you left some out for him, too!

Cranberry-Pecan Oatmeal Cookies
Adapted from Southern Living Best of Barbecue cookbook.

1 c butter, softened
1 c sugar
1 c brown sugar
2 eggs
1 tbsp vanilla extract
2 c flour
1 tsp baking soda
1/2 tsp baking powder
1/2 tsp salt
1 1/2 c rolled oats
1 c dried cranberries
1 c chopped pecans

Preheat oven to 375° F. 

In a stand mixer, beat the butter until creamy, then add the sugars. 


Add the eggs and vanilla and mix until combined. In a separate bowl, whisk together the flour, baking soda, baking powder and salt. Gradually add this to the butter mixture until everything is well moistened. Stir in oats, raisins and pecans. Drop in teaspoon-sized pieces (mine are probably a bit larger) onto greased baking sheets. Bake 8-10 minutes, until lightly browned.


Cool on a wire rack. These can also be frozen if you want to make them ahead of time.


Monday, October 29, 2012

Vegan Chocolate Cake with Un-Vegan Peanut Butter Glaze


What to do when a hurricane is raging outside? Cook! At least, that's what I chose this morning. To be fair, we were driving up and down I-95 all weekend, so some of these are weekend projects we never got to - I wouldn't normally plan to do all this during a storm. Still, it was a great way to use my time earlier this morning when the storm wasn't so intense. Now I have a new batch of vegetable stock (soup tomorrow), a batch of white beans (dinner today), a loaf of whole wheat bread, another of banana bread, and a batch of granola. I also cleaned and prepped most of the greens that are in my fridge. We're definitely prepared to spend several days holed up at home.

I did not make this recipe today, but I easily could have. It's a wonderful quick cake using ingredients you probably have on hand already. Jeff and I first made the cake a few weeks ago when, half an hour before Monday night football, we decided we wanted dessert. It came together and went into the oven before the game and was ready to eat by halftime. We made it again for a Halloween party on Friday, this time with a peanut butter glaze to give it a little orange-and-black Halloween spirit. Again, the cake was ready in under an hour, and the glaze took seconds to whisk together. If you're looking for a nice dessert to throw together with little mess and no fuss, whether before a football game or in the middle of a hurricane, this is it!

Note: while the cake is vegan, the glaze does have a little milk. You could easily sub in soy milk or almond milk to make it vegan as well.

Vegan Chocolate Cake with Un-Vegan Peanut Butter Glaze
Cake is barely adapted from Joy the Baker. Glaze is adapted from Pixelated Crumb.

cake:
2 1/4 c flour
1/2 c cocoa powder
1 1/2 c sugar
1 tsp baking soda
1/4 tsp baking powder
1/2 tsp salt
1 c warm water
1/2 c + 1 tbsp canola oil
2 tsp vanilla extract
1/3 c bittersweet chocolate chips

glaze:
3/4 c powdered sugar
2 tbsp skim milk
2 tbsp smooth peanut butter
1/2 tsp vanilla extract

Preheat oven to 350° F. Coat a 9" bundt pan with cooking spray and dust with cocoa powder.

In a large bowl, whisk together flour, cocoa powder, sugar, baking soda, baking powder and salt. In a smaller bowl, whisk together water, oil and vanilla.


Add the wet ingredients to the dry ingredients and fold together until just moistened. Stir in chocolate chips, then spoon the thick batter into the prepared pan.


Bake for 30-35 minutes, until a cake tester comes out clean. Cool in the pan for ten minutes or so, then invert onto a rack to cool completely.


Once the cake is baked, whisk the glaze ingredients together in a small bowl (you may need to sift the powdered sugar to remove chunks). Pour over the top of the cake, letting it drizzle down the sides. The glaze will harden a bit after a minute or two. Serve and enjoy!

Wednesday, October 10, 2012

Baked Oatmeal Pudding


I don't usually make complicated breakfasts. I like the eat as soon as I get up in the morning, so something with a lot of prep doesn't appeal to me. Normally, breakfast is just some cereal or granola and milk.

Now that the mornings are getting colder, I'm craving something warm and comforting. I love oatmeal - as a kid I was addicted to those horrible sugary Quaker Oats packets. I've gotten used to plain quick oats sweetened with a bit of maple syrup, but it's not the same for me. I still want something a bit more interesting. This baked oatmeal fits the bill perfectly. It's packed with fruit and nuts and some brown sugar to amp up the flavor. The eggs and oats make it firm, while the milk makes it slightly creamy. It's a delicious and healthy dish to start the day with.

It makes a nice healthy dessert as well! Since it's more work than I would want to do first thing in the morning, I made this as a late-night treat, then had plenty of servings left to reheat for breakfast over the next several days. It reheats beautifully, whether in the microwave or the oven. 

Baked Oatmeal Pudding
From Whole Grains for Busy People.

3 bananas
1 c water
1 c rolled oats
1/4 tsp salt
2 tbsp butter
2 eggs, beaten
1 1/2 c 2% milk
1 grated apple
1/4 c + 2 tbsp brown sugar 
1/3 c dried cherries
1 tsp vanilla extract
1 tsp ground cinnamon
1/2 tsp ground ginger
1/2 c pecan halves
fresh berries, to serve

Preheat oven to 350° F.

Spray a 9 x 9 baking dish with cooking spray. Slice the bananas and layer them across the bottom of the dish. 


Pour the water into a medium saucepan and bring to a boil. Stir in the oatmeal and salt. Cover the pan, turn off the heat and let sit for 5 minutes. Then stir in the butter.

Meanwhile, combine the eggs, milk, apple, 1/4 c brown sugar, cherries, vanilla, cinnamon and ginger in a medium bowl. When the oatmeal is ready, add to the bowl and whisk well to combine all the ingredients.


Pour the oatmeal mixture into the baking dish over the bananas. Bake for 25 minutes, then remove and sprinkle the pecans and 2 tbsp brown sugar over the top.


Return to the oven for another 30 minutes, until the center is set. Cool 10 minutes, then spoon into bowls and serve, topped with fresh berries.


Wednesday, August 29, 2012

Pear Reminisces and Pear Bread


Pears have never been my favorite fruit. I've never disliked them, they've just never thrilled me. I probably just knew too much about them to find them appetizing.

You see, when I was growing up, we had a pear tree in our backyard. Not only that, but my grandparents, who lived a few miles away, had two more of them. In my present canning-crazy state, I keep  fantasizing about how wonderful it would be to have a fruit tree in the yard, with piles of free fruit to can and preserve every year. I have to keep reminding myself that I have had a fruit tree, and that parts of it really sucked.

My ambivalence to pears comes from having seen them in every possible state of decay. Picking up the fallen pears was a task that generally fell to me and my brother (often with a monetary reward per pear we collected - as my mom recently pointed out to me, she had to pick up pears through her whole childhood as well and was sick of it by the time we came along). It meant braving the swarms of yellow jackets to pick up gooey, bug-ridden fruit and hurl it into garbage cans (to which the swarms of yellow jackets quickly moved). I did not enjoy this.  When I smell a pear today, while I can appreciate the floral juiciness, it also reminds me of that familiar too-sweet smell of fruit decay.

I guess I remember the icky parts so well because there weren't many good parts to compensate for them. Picking pears was fun, on those occasions when the squirrels left them in the trees long enough to ripen. Once, in a particularly productive year, my brother and I had a pear stand in front of our house. That was cool, too. But eating them was too much of a chore to be fun. One of my grandparents' trees began to fruit in mid-August. A few weeks later, our tree was ripe, as was their second one. From that point, it was a pear-eating marathon. You know how pears ripen - one minute they're hard as rocks and then the next they're sitting in a pool of their own juices snickering at you. Imagine whole baskets of pears doing this at once. Since my family didn't can, there wasn't any good way to get rid of them, other than the ubiquitous pear pies (and back then I didn't like fruit pies at all). Pear season was more of an ordeal than a pleasure, most of the time.


Fast forward to today. My parents' pear tree is gone - my brother and I cut it down six or seven years ago. Its production had really dipped - the squirrels had been getting most of the pears for some years - and the trunk had begun to rot. A few years later, my grandparents' big tree was also cut down. For the most part, I forgot about the pears, since I don't live near enough to have them unloaded on me. But last week, I visited Grandma (who is recovering from a broken hip and has finally moved back home) and the surviving pear tree - the early one - was in full swing. I came home with sixteen pounds of pears and a new appreciation for them. Now that I'm canning, the idea of a vast supply of free fruit is thrilling once again (and I guess I've had nearly a decade to get over the pear glut of my childhood).

A few days later, Jeff and I made a batch of pear sauce. I had planned to use nine pounds of my pears for this, and perhaps another few pounds for some jam. The pears did not sign on to these plans. I washed them and separated them into two piles: rotting and hard as rocks. I decided to cut up the ones that were most ripe, discarding the ugly bits, and see how much I had to work with. Somehow, many of the pears were rotten from the inside (rotten to the core?), leaving very little usable material. I ended up with three pounds of chopped pears to make into sauce, returning seven or eight pounds of unripe ones to the back room for another day. (I had planned to blog about the pear sauce, but the process was long, annoying and fraught with difficulty - not because sauce is hard to make, but because of the pears themselves and our cheap food mill which keeps falling apart during use.)

Somehow, despite these memories and setbacks, I still haven't abandoned my dream of a fruit tree. I know parts of it suck, but the idea of free fruit, in whatever state, hasn't ceased to be alluring. Despite the difficulties the pears are giving me, I keep wondering if there will be more for me to take when I visit later this week. And maybe I'm being a bit dramatic in saying that pear season was an "ordeal." As a kid, it was just part of my routine (I'm serious about disliking picking them up, though - it was pretty gross). I keep looking at that pile of pears in my back room and seeing the possibilities. Yes, it's possible that half of them will turn out to be rotten inside like the others, but maybe they won't. And if they're not, think of all the tasty  things I can make with this free fruit . . . like this pear bread.

I've delayed this post so long that I'm already on my second batch of pear bread (and sauce, too - the second batch came out much better). I played with the original recipe a bit, to fit my materials better. The original called for grating the pears, but I've had to cut so many rotten spots out of these I didn't want to risk it. Instead, I used regular chunks of pears. Also, I used canola oil rather than butter or olive oil (which I was out of). That cuts the saturated fat down in the recipe. While I'm not a huge fan of canola oil in baking (it can make a batch of brownies unappealingly gooey - not mmm gooey but sticks-to-everything gooey). In this case, though, it worked nicely. The bread forms a crispy outer crust while the insides stay soft and moist. I just hope it freezes well!

Pear Bread
Adapted from Smitten Kitchen.

3 c flour
1 tsp baking soda
1/4 tsp baking powder
1 tsp salt
1 tbsp cinnamon
1/2 tsp ground ginger (optional)
1 c chopped pecans
3/4 c canola oil
3 eggs, lightly beaten
2 c sugar
3-5 pears (the number of pears will depend on the pears' size and how much usable flesh is available after peeling - in my first batch, I used all five pears that appear in the picture)
2 tsp vanilla extract

Preheat oven to 350. Spray loaf pans with cooking spray (the recipe says this fills one 10" tube pan or two regular loaf pans. I made eight mini-loaves and had enough batter left over for six muffins).

In a large bowl, whisk together the dry ingredients: flour, baking soda, baking powder, salt and spices. Remove 1/4 c of the flour mixture to a small bowl and toss the nuts in it.


In another bowl, whisk together the oil, eggs, sugar and vanilla. Peel, core and slice the pears into 1" chunks, tossing each chunk into the wet mixture as you cut it (I found this kept the pears from browning, which they surely would have done if I'd chopped them before preparing the rest of the recipe, since I'm a slowpoke in the kitchen). When the pears are all added, add the nuts to the wet mixture and stir to combine.


Pour the wet mixture over the dry mixture and stir until everything is just moistened.


Pour into prepared pans and bake 30 minutes (for muffins and mini-loaves) or 55-60 minutes (for full loaves) or possibly longer (for a tube pan). Cool on a wire rack (or your stove top) for ten minutes, then remove the breads from the pans to finish cooling (mine seemed a bit sticky at first, but every one came out cleanly with a little prodding).


Tuesday, January 10, 2012

Double Chocolate Ice Cream


I am loving my new ice cream maker. The process is easy and the results are fabulous. Above all, I appreciate having control over the ingredients. As we learned with this batch, high quality ingredients make a stupendous ice cream!

This ice cream was thick and rich and set up well in the freezer. I had some a little early on the first night and it was rather melty, but since then it has stayed at the perfect firm but scoopable consistency. I must warn you, though, that the chocolate flavor was rather intense - it actually gave me a caffeine buzz! (Bear in mind that I don't drink any caffeinated drinks, so I'm more susceptible.) Jeff, who professes to dislike plain chocolate ice cream, has also been savoring this batch. Definitely a winner in my book. I know I'll be making this recipe over and over again.

Double Chocolate Ice Cream
From Cooking Light January 2012.

1 1/3 c sugar
1/3 c cocoa powder, unsweetened (I used Valhrona)
2 1/2 c 2% milk, divided (the milk I buy is low-temperature pasteurized, which lets it retain its creaminess and flavor - I think the quality of the milk made an enormous difference in the quality of the ice cream)
3 egg yolks
1/3 c heavy cream
2 1/2 oz bittersweet chocolate, chopped (I used Valhrona 66%)

In a heavy saucepan over medium heat, whisk together the sugar and cocoa powder. Add 1/2 c milk and egg yolks and whisk well to fully combine.


When there are no lumps left, stir in the remaining 2 c milk. Cook until a thermometer registers 160°F, about ten minutes, stirring constantly. Remove from the heat.


Place cream in a microwave-safe bowl (I used my pyrex measuring cup for this entire step) and microwave about 90 seconds, until it comes to a boil. Add the chopped bittersweet chocolate and stir until smooth. Add this to the hot milk mixture and stir to combine. Place pan in a large ice-filled bowl (I transferred mine back into the Pyrex cup first, so I wasn't starting with a hot pot that would melt the ice instantly). Cool completely, stirring occasionally (when it gets down toward room temperature, you might want to place it in the fridge to speed things up).


Pour the mixture into your ice cream machine and freeze according to the instructions (mine needed to churn for about 35 minutes). Transfer into a freezer-safe container and freeze for a few hours, until firm (the original recipe says at least an hour, but mine was still rather soupy at that point). Enjoy!

Thursday, January 5, 2012

Foodie Resolutions and Double Chocolate Cookies


2011 was a great year for food. It will be hard to surpass.

2011 was the year when I shifted to organic, became a militant locavore, and taught myself to can. After trying out a vegetarian diet for Lent, I found ways to drastically reduce my household meat consumption. Inspired by my 30 by 30 list, I left behind my lifetime of picky eating to explore a whole new world of foods. I joined an organic CSA, which helped with most of the above enterprises. I endeavored to make whatever I could from scratch.

On the negative side, that very willingness to try things was stymied at the end of the year when stomach problems forced me to eliminate acid from my diet. Fortunately (considering my pantry full of high-acid canned goods), acid was not ultimately the problem, and I can eat tasty things again. A separate issue with my gall bladder, however, limits my diet in a good way: I can't eat fatty, processed meats and cheeses. This experience has shown me how important my dietary changes have been. The local, organic meats and cheeses I normally buy don't bother me - it's the factory-produced, chemical-ridden meats and cheeses of the supermarket that I have to avoid. That three half-dollar-sized Purdue chicken nuggets could ruin my New Year's Eve says a great deal about how harmful our industrial food system has become to our collective health.

2012 does not come with any new food resolutions for me. Rather, it comes with a reaffirmation of the course I embarked upon last year. There will be more vegetables, particularly the fresh, local variety. When those vegetables are in season, I will work harder to preserve some for later (no more binging on quarts of fresh-picked snow peas - some will go to the freezer!). I will make whatever I can from scratch so that I know exactly what I am putting into my body. I will buy local organic meats as much as possible, regardless of price, because my health is worth it.

These resolutions ought to be followed by some light, colorful vegetable dish, rather than a rich, decadent batch of cookies. But cookies, the last holdover from my holiday baking, are what I have for you. I made these as a gift for my brother-in-law-to-be. Although he chose not to participate in the family gift exchange this year, I thought he deserved a little something. Something chocolate.

Rich and decadent seem like soft words to describe these cookies. Just look at the ingredients - 24 oz chocolate, 3 eggs and 1/3 cup of flour?!?! I was skeptical that this would even work. There is barely enough flour to hold the dough together. The recipe makes up for this by refrigerating the dough (more like a batter, really) in plastic wrap to form sliceable logs. The slicing is still a bit difficult and sloppy, but the cookies bake up so beautifully that the struggle is worth it. They have a delicate crispy crust, almost gooey interior and deep chocolate flavor. The leftovers that didn't fit into my cookie tin disappeared lightning-fast.

While these don't quite fit with the January purge everyone seems to be on, you might want to keep them in mind for your Valentine!

Double Chocolate Cookies
Adapted from a Ghirardelli ad.

12 oz bittersweet chocolate chips (I used Valhrona 66%)
6 tbsp butter
3 eggs
1 c sugar
1/3 c flour
1/2 tsp baking powder
12 oz semisweet chocolate chips (I used Whole Foods generic brand - there was no Ghirardelli to be had in the store after Christmas)
1 c chopped walnuts

In a double boiler, melt the bittersweet chocolate and butter, stirring with a rubber spatula until smooth. Set aside to cool slightly.


In a large bowl with an electric mixer, beat the eggs and sugar until thickened.


Slowly stir in cooled chocolate mixture. In a small bowl, whisk together flour and baking powder. Stir into chocolate mixture. Gently mix in semisweet chocolate and walnuts.


Using a sheet of plastic wrap, form the dough into two or three logs, two inches in diameter. The "dough" has more of a batter-like consistency, so use the plastic wrap to force it into the shape you want, then twist the ends tightly closed (mine had big air bubbles as I wrapped them, but while twisting the ends, I forced them into a more compact shape). Refrigerate for several hours until firm (freezing might be even better, but I didn't try it myself).


When the dough is firm, preheat the oven to 375°F. Remove the plastic wrap, slice the dough into 3/4" rounds and place on a greased baking sheet (my dough sliced very poorly - my knife was a sticky mess! - so a number of my cookies were hand-formed on the baking sheet, which worked fine). Bake 12-14 minutes, until shiny on top and soft in the middle (12 minutes in my convection oven was perfect). Cool and indulge!