Showing posts with label corn. Show all posts

Friday, July 19, 2013

Farm Fridays: Scallion, Chard and Corn Pizza


Man, has it been HOT around here! I normally enjoy hot summer weather, but a heat index of 102 is outside my comfort zone. When I went to the farm, I was relieved that there wasn't much available in the pick-your-own fields. I was dripping with sweat just from picking a few dozen flowers. I feel for all the farm workers who had to be out in this weather all week. Farm work is hard on a good day - this week must have been brutal for them!

I first made this recipe a few weeks ago when Jeff was out of town, so I had it all to myself. I appreciated getting to eat it all (not in one sitting, of course), but I was also sad that I didn't get to share the wonderfulness that is awesome food. So I was happy to be able to make this again when Jeff was actually at home, so we could enjoy it together.

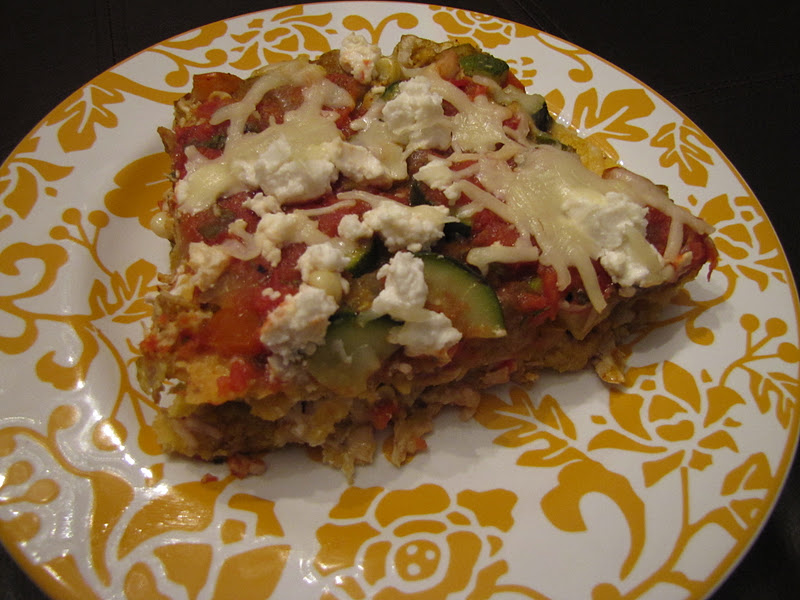
I also kicked things up a notch (not that any Smitten Kitchen recipe really needs alteration - but I felt like making it more of my own). I changed up the crust to a whole wheat dough with some dried basil and made it more of a pizza than a flatbread. I switched up the leeks for the scallions I picked up at the farm and added a final sprinkle of paprika over the top of the pie. The result was a really lovely summer vegetable pizza. I didn't even miss the sauce!

Be aware that this recipe makes enough dough for two pizzas - one for now and one for later!

Scallion, Chard and Corn Pizza
dough:
1 c bread flour
1 c whole wheat flour
1 1/2 tbsp dried basil
1/2 tsp salt
1/2 tsp sugar
1/4 oz instant yeast (sometimes labeled "bread machine" yeast)
3/4 c warm water (ideally 115-125° F)
1 tbsp olive oil

topping:
1 tbsp olive oil
3 large scallions (about 1 1/2 c), sliced
6 oz chard, sliced into 1/2" ribbons
1/4 tsp salt
1/4 tsp black pepper
1 ear corn, kernels sliced from cob
1/4-1/2 tsp paprika
2-3 oz goat cheese


Add the flours, basil, salt, sugar and yeast to a large bowl and whisk well to combine. Add the olive oil to the water and pour into the bowl, mixing until all dry ingredients are moistened. Knead dough for 5-8 minutes, until it forms a smooth, flexible ball (you can use a stand mixer here, but I always find the dough stays too sticky and I end up hand kneading it for a while anyway).


Cover dough and put in a warm place to rise until doubled, about 45 minutes. Meanwhile, get your pizza stone in the oven and preheat to 500° F (yes, now - when the stone preheats in the oven for a long time it gets hot enough to deliver a quick-cooked pizza with a nice crispy crust).


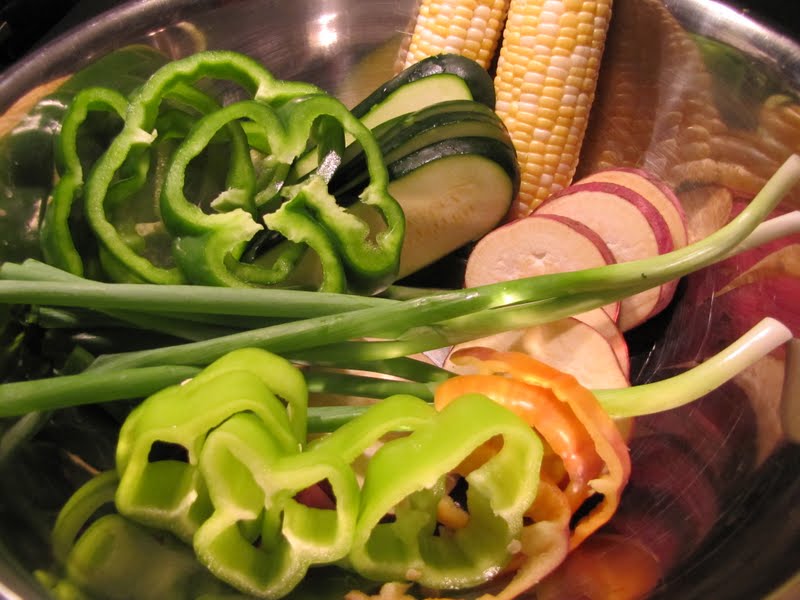
Shortly before the dough is fully risen, chop your vegetables. Preheat a large skillet over medium heat. Add the oil. Add the scallions to the heated oil and saute 5-6 minutes, until softened.


Add the chard and cook 2-3 minutes, until wilted, then add the corn for about a minute. Season with salt and pepper to taste.

Remove your dough from its bowl, punch down slightly and divide in half. Reserve one half of the dough for a future use (I put it in a ziplock bag and toss it in the freezer - the next pizza's a lot less work!).

Take the other half of the dough and roll and stretch it into a circle as large as your pizza stone (mine was slightly larger so the edges hung off a bit - if this happens to you, you can roll the edges slightly to create a more emphatically raised crust)


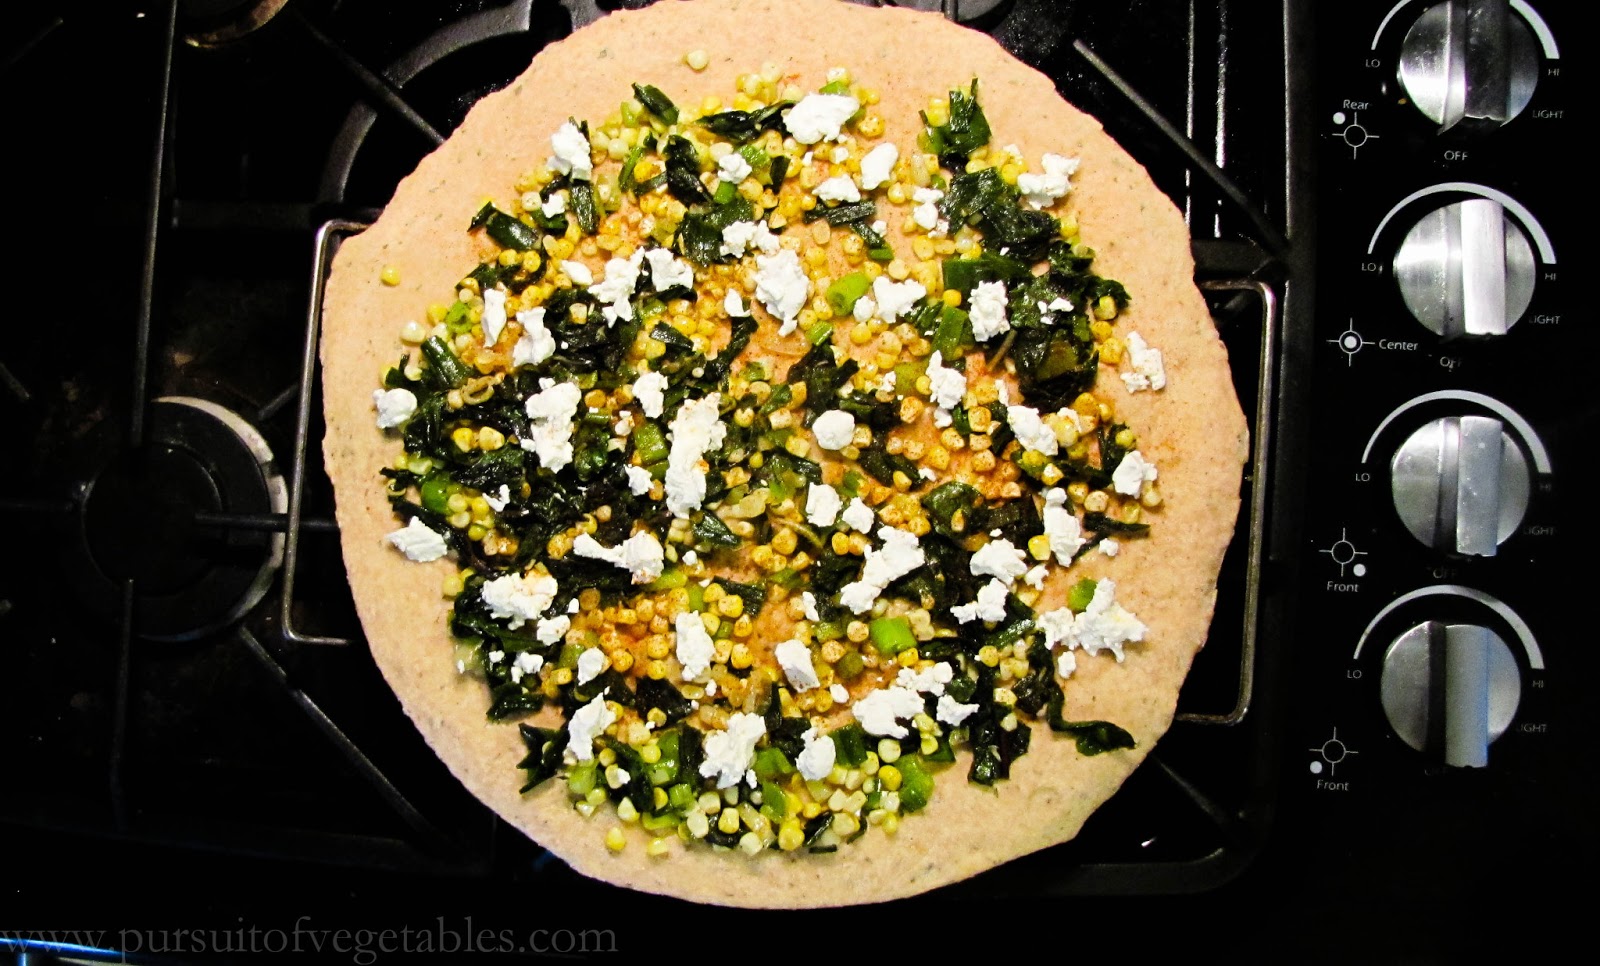
Transfer the crust to the pizza stone (if it's nice and hot, you don't need cornmeal or oil underneath - it will cook very quickly and just slide off when it's done). Spread the topping evenly over the surface of the pizza, leaving an inch or so around the edges. Sprinkle the pizza with paprika, then crumble the goat cheese over the top.

Bake 8-9 minutes, until crust is crispy and cheese turns slightly golden. Slice and enjoy!


Friday, July 12, 2013

Farm Fridays: Black Bean and Corn Salsa


Last week I was very sad to see the bottom of the last jar of salsa that we put up last fall. I absolutely adore our homemade salsa and I've been savoring it all winter long. I was saving that last jar for a rainy day, almost afraid to use it, knowing that tomato season was so far off.

(In case you haven't caught on yet, I'm a bit dramatic about food. Obviously, salsa can be purchased at the grocery store in all seasons - but that's not the salsa I crave. I have a small fear of running out of the food I like best. This same fear carries over to traveling - I rarely leave the house without some snacks, in case . . . all the stores and restaurants are closed? I don't know. Suffice to say, breaking the seal on the last remaining salsa jar was a stressful moment for me. Delicious, but stressful.)

Anyway, even though tomato season is just barely kicking off around here, I realized this week that fresh salsa season has totally begun. I got a huge bunch of cilantro from the farm last week and it got me thinking about salsa making. The black beans in my pantry started calling to me. I had never made my own black bean salsa before, but I've had it a few times and really enjoyed it, so I cracked open an old cookbook and found a recipe. This particular recipe didn't require me to go out and buy anything - I had a giant heirloom tomato (the first of this year's harvest!) and some corn from the farm this week, half a red onion in my crisper drawer, and a jalapeno and some bell pepper strips in the freezer from last fall. (The bell pepper strips are really past their flavor prime, but I hate wasting anything, so I decided to use them - this salsa will only be that much better when fresh peppers are in season!)

Salsa is always simple to make - just toss some stuff in a bowl, stir, and set aside while the flavors get to know one another. This particular salsa took a bit more of my time than usual because it makes a TON - the recipe says seven cups, but I think I used more beans than it called for. I was actually a little concerned as I made it, wondering how we were going to use so much salsa. After I tried some, though, all those thoughts went away. I've actually been eating this salsa all afternoon. I've been hard pressed to keep myself away from it. It's totally delicious, pretty as a picture, and makes an excellent healthy snack. Someone just needs to invite me to a barbecue so I have an excuse to make another giant batch!

Black Bean and Corn Salsa
Adapted from Southern Living: Secrets of the South's Best Barbecue cookbook. 

3 ears corn
1/3 c lime juice (fresh is preferable, but I used bottled juice for this one because all the limes in my refrigerator were already spoken for)
1/4 c olive oil
1 tsp salt
1/2 tsp ground cumin
1/4 tsp red pepper flakes
1/3 c cilantro, chopped
~3 c black beans (I cooked 1 c dried beans and used them all)
1/4 red onion, chopped
1 giant tomato, chopped (about 1-1 1/2 c)
1 c bell pepper, chopped (I used frozen strips of red and green peppers)
1 jalapeño, seeded and finely chopped

Bring a large pot of water to a boil. Salt well, add the corn and cook 3 minutes. Remove to an ice bath to stop the cooking process.


In a large bowl, whisk together the lime juice, oil, salt, cumin and red pepper flakes. Stir in chopped cilantro.


Slice the corn kernels off of their cobs and add to the bowl along with the beans, onion, tomato, peppers, and jalapeño. Stir well to combine, tossing with dressing.


Refrigerate for 4-8 hours to allow the flavors to meld. Enjoy!

Wednesday, March 6, 2013

Pumpkin and Black Bean Soup


I hope you don't think I've been ignoring you guys. I've just been having some technical difficulties. While I was working on my desktop one day last week, I returned from a half hour break to find it unresponsive. Upon restarting, it asked me for a boot disk. It no longer thinks it has a hard drive.

Fortunately, I was prepared for this sort of disaster on the dissertation front. I use Dropbox for all my files - not only does that make it easier to work on the same files on multiple computers, but it also means that all my stuff is backed up online. I didn't lose a word of the work I had been doing. The files that are potentially lost (though I've been told there is a possibility that they might be recovered at some point) are all my pictures. I also lost access to my photo editor, Adobe Lightroom.

After a week or so of inactivity (one day I'll give in and take the computer over to Best Buy), I decided that I need to move on. I loaded Lightroom onto my laptop and uploaded the contents of my camera (gotta love memory cards - those pictures go back to October!). In addition to recovering some great family photos, I found five blog posts' worth of shots waiting to be prettied up. You'll be hearing more frequently from me in the coming days.

I'm sure you're wondering why I'm giving you a pumpkin recipe in March. Well, as I mentioned in my last post, we've been working on clearing out our pantry and freezer, trying to feed ourselves using what we already have on hand. That includes multiple pumpkins that have been sitting down in the basement since the fall. I've been impressed at just how well these babies store - the last two have been hanging out down there for four months! I've primarily been using them for pumpkin puree, which I freeze and use in baked goods, but I set aside some whole chunks for this recipe.

This is a good one - warm, hearty and healthy. It's fairly similar to the New World Chili I posted back in October, but without the meat. The pumpkin is less sweet than most winter squash, so the soup gets a bit more depth.

Pumpkin and Black Bean Soup
Slightly adapted from The Rolling Prairie Cookbook.

3 tbsp olive oil
3 c pumpkin, peeled, seeded and cut into 3/4" chunks
1 onion, diced
4-5 cloves garlic, minced
1 jalapeno pepper, seeded and minced
3/4 tsp ground cumin
1/2 tsp ground cinnamon
1/2 tsp ground cloves
1 tsp chili powder
1 tsp salt
1 quart whole tomatoes, roughly chopped (I just slide a knife around in the jar to chop them a little, then break them up with a spoon once they're in the soup)
4 c vegetable broth
4 c cooked black beans
2 c frozen corn kernels
Greek yogurt and cilantro for garnish

Heat 2 tbsp olive oil in a heavy skillet over medium heat. Add the pumpkin and saute 8-10 minutes, until browned.


Meanwhile, in a large soup pot, heat the remaining 1 tbsp oil over medium heat. Add the onion and saute 4-5 minutes, until tender. Add the garlic and jalapeno and cook, stirring, for another minute. Add the cumin, cinnamon, cloves, chili powder and salt and stir to combine. Add the pumpkin to the onion mixture, then pour in the whole jar of tomatoes and the broth. Bring to a boil, then reduce the heat and simmer, uncovered, for 20 minutes. Add the beans and corn and simmer for another 20 minutes. Serve topped with Greek yogurt and cilantro.


Tuesday, September 4, 2012

Festive Summer Cabbage Salad


Summer isn't over until you let it be over. As long as you can manage to wear your shorts and flip flops, use your grill and eat dinner outside on the deck, summer is still around.

Even though the calendar says September, summer vegetables haven't dropped off the map. Throwing them together in a salad like this one will keep you in a summery mood for a few more weeks. I put this together when I was inspired to try fresh lima beans from the farmers market. I associate lima beans with icky, mushy frozen vegetable mixes from the grocery store. Fresh ones are much nicer. The texture is firm and pleasantly beany. I'm definitely a convert.

This salad came from my endeavor to find something to do with my lima beans. I decided to make a succotash recipe I found in my Southern Living Farmers Market Cookbook. But that salad was just lima beans and corn, and I had a lot of vegetables in my fridge that wanted to be used. So I threw in a red Hungarian pepper (my favorites!) and a tiny, baseball-sized head of red cabbage. The result was a beautiful mixture of colors and textures - the sort of dish that just makes me smile. (Note: it's best eaten as quickly as possible, because the red cabbage will start turning all of those other pretty colors purple by the next day!)

Festive Summer Cabbage Salad
Adapted from the succotash salad in the Southern Living Farmers Market Cookbook.

1 c fresh lima beans
2 ears corn
2 tbsp extra virgin olive oil
2 tbsp lemon juice
1/2 tsp hot sauce
1/4 tsp salt
1/4 tsp black pepper
3 tbsp fresh chives, chopped 
1 red pepper, diced
3 cups red cabbage, chopped (from one tiny head)

Bring a large pot of well-salted water to a boil. Add lima beans and cook 17 minutes. Add corn to the pot and cook another 3 minutes, until corn is heated and beans are tender. Remove the corn, drain the beans and rinse under cold water (to stop the cooking).


In a large bowl, whisk together oil, lemon juice, hot sauce, salt and pepper. Slice the corn kernels off the cobs and add them to the bowl with the beans, chives, peppers and cabbage. Toss well to combine and coat everything with some dressing. Serve room temperature or chilled.


Friday, June 29, 2012

Farm Fridays: Farro Salad with Basil and Corn


What a day! I can't believe I have the energy to post right now. After finishing the second-to-last week of my class - a week that, work-wise, was the roughest of them all - I ended up getting sick. I tried to brush it off, ascribing my symptoms to allergies (which may well be the cause), but it evolved into an earache which landed me at the doctor this morning. He confirmed that not only were both ears infected, but I was also running a fever, so I should take some antibiotics, go home and rest.

Rest, unfortunately, was not on the agenda for the next five hours. Since Jeff is not home tonight, I had to race around doing all of my end-of-the day chores (I contemplated not watering the garden, but it was 95 degrees out today - it was pretty necessary). Only now am I finally collapsing on the couch, with time to write up this awesome recipe.


I started my morning at the farm, picking up my share: three heads of lettuce (I keep taking the red romaine because the heads are relatively small), half a pound of lacinato kale, a pound of rainbow chard, a bunch of green onions, a bunch of basil and assorted peas. The crop of snap and snow peas was not good this year. Today was the first time I got any, and it was a gleaning day. I took advantage of the gleaning. I spent a good forty minutes in that field sifting through the weeds to find any reasonably mature pea left on the plants. I ended up with three-quarters of a pint, although none of them were very good quality.

When I was planning my recipes, I focused on using up the basil. Basil goes in a lot of things, but not in the sort of quantity I have (except for pesto, which I didn't feel like making this time around). After considering several recipes, I decided on a farro salad from June's Cooking Light. Good decision. I'd been wanting to expand my whole grain repertoire, and farro sounded like a good option. It is quick-cooking (just 20 minutes), pleasantly chewy and slightly nutty. I'm a big fan. And combined with sweet corn, aromatic basil and a zingy vinaigrette, it was a great summer side dish. I served it today with leftover tandoori chicken on a bed of lettuce, but I can see it working as a side dish with a summery meal off the grill as well. Maybe next time I'll even add some grilled zucchini to the salad! 

Farro Salad with Basil and Corn
Adapted from Cooking Light June 2012.

9 oz farro 
2 ears corn
1 1/2 tbsp sherry vinegar
1 tbsp olive oil
1 tsp Dijon mustard
1/2 tsp salt
1/4 tsp black pepper
1 garlic clove, minced
1/2 c basil leaves

Cook the farro according to the package directions (mine was cooked 20 minutes in salted boiling water). Four minutes before the farro is done, pop the corn into the same pot. When cooked, remove the corn from the water, then drain the farro and cool it under running water.


Meanwhile, make the vinaigrette. In a small bowl, whisk together the vinegar, oil, mustard, salt, pepper and garlic. Set aside.

When the corn has cooled a little, slice the kernels off the cobs. Thinly slice the basil.


In a large bowl, toss together the farro, corn, basil and vinaigrette. Serve room temperature.

Friday, October 7, 2011

Mexican Chicken Casserole


I watched an episode of Good Eats today in which Alton Brown used leftover tortillas to make a Mexican version of lasagna with enchilada sauce. I was very amused, because I have leftovers from just such a recipe in my refrigerator right now. His recipe was startlingly similar to the one we used (from Cooking Light), although ours contains a much higher proportion of vegetables (just the way I like it). In fact, this time I really overloaded on the vegetables, using up what I had rather than following the recipe. More veggies = more healthy, right?

I originally pulled out this recipe because it sounded interesting, but I didn't actually make it for another nine months, and then only because it fit the ingredients I was trying to use up (a surplus of plum tomatoes from the farm). It turned out to be a keeper - delicious layers of fresh produce, grilled chicken, enchilada sauce, corn tortillas and cheese all melded together. I particularly like the way the corn tortillas - which can be dry on their own - get all mushy and moist in the final product. ("Mushy" is perhaps not a word with a positive connotation when it comes to food, but in this case, it's a good thing!) The fact that this can be put together a day ahead of time makes it even better - perfect for football Sundays when you just want to toss something into the oven at half time!

Mexican Chicken Casserole
Adapted from Cooking Light January/February 2011.

salsa:
8 plum tomatoes, halved and seeded (I used Plum Dandies, which seed easily and have a lot of firm flesh)
3 garlic cloves, peeled and crushed
1 small onion, peeled and roughly chopped
1 jalapeno pepper, seeded and quartered
cooking spray
1/3 c fresh cilantro (the cilantro I had waiting for this decided to kick the bucket a day early, so I used a bunch of partially-dried parsley that I had on hand - it's not the same, but sometimes you have to roll with the punches in the kitchen!)
3 tbsp lime juice (fresh tastes best, but I went with the bottled juice I had on hand)
1/8 tsp black pepper
rest of casserole:
1 c onion, chopped
1 c corn kernels (I used one ear)
1 c zucchini, diced (I used two very small ones - probably about 2 c)
1 c red bell pepper, chopped (I used the whole thing)
3 c chicken breast, cooked and shredded (I used two organic chicken breasts)
1 tbsp garlic, minced
2 tsp chili powder
1 tsp ground cumin
10 oz can green chile enchilada sauce
4 oz can chopped green chiles
12 6" corn tortillas
1 c (4 oz) shredded Monterey Jack cheese
1 c (4 oz) crumbled goat cheese

For salsa:
Preheat broiler. Coat a baking sheet with cooking spray (I lined mine with foil as well), and put tomatoes, crushed garlic cloves, small onion and jalapeno on it. Broil 20 minutes, until lightly charred. Remove from oven and cool slightly. Put the mixture in the food processor with cilantro, lime juice and black pepper. Process until smooth.


Preheat oven to 350° F. To prepare the primary casserole filling, heat a large nonstick skillet over medium-high heat. Lightly coat the pan with cooking spray (off the heat, please!). Add onion, corn, zucchini and bell pepper and saute until tender (~6 minutes). Add the chicken, garlic, cumin, chili powder, enchilada sauce and green chiles. Saute a few more minutes until heated through. (It's really tasty - I might eat it on its own, or over rice, as another option!)


Coat a 9x13 baking dish with cooking spray. Spread about 1/2 c of salsa along the bottom of the pan (this prevents the tortillas from sticking). Arrange six tortillas over the salsa. Spread half the chicken mixture on top. Top with half the remaining salsa, then half of each cheese. Repeat layers, starting from the tortillas.


Bake at 350° for 25 minutes, until nice and bubbly. Cool slightly before serving. (The leftovers are great, too - just reheat them in a toaster oven!)

Monday, August 29, 2011

Roasted Corn and Cream Cheese Baked Potstickers


When Hurricane Irene first got on my personal radar, I knew it meant no grilling outside this weekend. (Seriously, that was my first thought - only later did I realize that this storm was going to be more than just a rainy day or two.) Instead, I pulled out some of the awesome indoor recipes I've been meaning to try.

There are quite a few delicious summer recipes in my stockpile that require me to be inside at the stove. But since I generally think it's a waste not to take advantage of the grill on beautiful summer evenings, most of these recipes just gather dust. In fact, most of the time I've spent at the stove this summer has been making sauce with my bounteous harvest of tomatoes (some from the backyard, the rest from the CSA). But with lingering rain and high winds all through Sunday afternoon, it was the perfect time to delve into my neglected recipe files!

These potstickers were awesome. Roasting the corn brings out a delicious, super-concentrated flavor that melded well with the tangy Parmesan. Fresh rosemary adds an aromatic element and the smooth cream cheese binds it all together. What a delicious combo! And to make it better, since we had just finished making a pork tenderloin on the stove, we brushed the potstickers with rendered pork fat rather than olive oil, to add an extra level of flavor (and to recycle!). I have to warn you, though, that despite being baked, these are not a low-calorie treat. I put this recipe into the calorie-counting website I use and the four potstickers that I ate (a quarter of the recipe) came out over 500 calories. Yikes! But a month of record rainfall plus a destructive hurricane should count as a special occasion, right?


Roasted Corn and Cream Cheese Baked Potstickers
Slightly adapted from Naturally Ella

12-16 wonton wrappers (we got 16 out of them)
1/2 tbsp olive oil
2 ears corn, sliced off the cob
1/2 c green onions, diced
2 oz cream cheese (1/4 package)
1/2 tbsp rosemary, chopped (to release the oils)
1/2 c Parmesan
salt and pepper
water for sealing
olive oil for brushing (or whatever fat or drippings you might have on hand!)


Preheat oven to 400° F. Toss the olive oil, corn and green onions together in a bowl. Line a baking sheet with parchment paper. Arrange the corn mixture in a single layer on it, then roast for 15-20 minutes (corn kernels are small - be careful not to let them burn!). Let cool slightly. Turn the oven down to 350° F.


In a food processor, combine the cream cheese, rosemary, Parmesan, salt and pepper. Pulse until combined. Once the corn mixture has cooled a bit, add that and pulse a few times to mix. (I made the mistake of tossing everything in at once, so my corn is a bit more chopped up than it ought to be.)


Get your wonton wrappers and sealing-water ready. Spoon about 1 tbsp filling into a wrapper. With the tip of your finger, wet the edges of the wrapper, then fold to seal. My method was to bring two sides together to a peak, then fold the remaining two sides in to fill the gaps. (I had never worked with wonton wrappers before, and I didn't know how to seal them properly. And still don't, really. After a few missteps, I came up with this method which worked pretty well. A few had filling oozing out in the oven, but it wasn't a big deal. If I was planning to deep fry them, though, I think I'd have to seal them more effectively.) Repeat with the rest of the wrappers until the filling is gone.


Line up the potstickers on a parchment-lined baking sheet. Brush with olive oil (or pork drippings! You don't have to have as heavy a hand as Jeff did here, but they were delicious!).


Bake for 15-20 minutes, until golden brown (15 was enough to get mine looking like the picture below). Enjoy!

Sunday, August 21, 2011

Grilled Vegetable Salad


I'm back! I survived three weeks in London without cooking facilities (the prepared foods section of the local supermarket was my salvation) and am now back and raring to go in my own kitchen. The problem is that I'm still all discombobulated from being out of town and dealing with some family issues, so lately our meals have been patched together from whatever is on hand. Fortunately, it being mid-August, there's plenty on hand!

This recipe is a good way to tap into that bounty. I think grilled vegetables are hard to beat any day, but top them with this dressing and they become something else. And I love the flexibility of this recipe - just use whatever vegetables you have on hand. The dressing will meld them all together into a coherent dish.

I know, the picture doesn't look very impressive. I was starving and in a hurry (also, we didn't watch the grill closely enough so several items were overcooked). But trust me, this is worth a try. Maybe yours will come out looking prettier - either way, it tastes fantastic!


Grilled Vegetable Salad
 My recipe card says I got this from Proud Italian Cook, but I can't find the original recipe on her site. Either way, I've changed it up a bit.

sweet potato, cut into 1/2" thick rounds (this time we used one very large, fat one - the middle one in the above picture)
corn on the cob, husked (we used two ears)
peppers, sliced into 1/2" rings(I used two bell peppers and half a cubanelle)
green onions, trimmed to a reasonable length for your grill
zucchini, sliced into 1/4" thick slabs
(*you could also use plenty of other veggies: I've done asparagus and green beans, and I'm tempted to throw some red onion rings in next time)

1 1/2 tbsp olive oil
1 tbsp red wine vinegar
1 1/2 tsp Dijon mustard
1 clove garlic
1 large stalk fresh oregano (I used Greek oregano)
14 tsp dried parsley (fresh is good, too, but I didn't feel like another trek out into the garden)
juice from half a lemon
salt and pepper

Fire up your grill! 

Toss your veggies with a little olive oil, salt and pepper (be gentle or your peppers will break like mine did - and you will probably need to rub the corn with oil separately, unless you have an enormous bowl). Spread the veggies on the grill and cook, turning once (they will each need different amounts of time, depending on their size and shape - just keep a better eye on them than we did!).


Meanwhile, prepare the dressing. Toss the garlic and herbs into a small food processor and mince. Add the rest of the ingredients and blend. (I prepared this by taste, so these measurements are approximate - I think the vinegar and mustard should be the strongest flavors, but do what tastes best to you).

Remove your vegetables from the grill. Cut the corn kernels off of the cob. Toss the vegetables together with the dressing in a large bowl and serve. (The recipe also suggests garnishing with fresh chives, but I forgot in my hurry to start eating!)

Thursday, July 14, 2011

Farmers Market Pizza


Sometimes a pizza is more than just a pizza.

Now, I'm a bit finicky when it comes to pizza (and many other things, as you may have caught on to). I love bread and sauce. I am not such a fan of cheese. I prefer shredded cheese in limited quantities, preferably browned (which changes the texture to something I'm happy with).

When I make pizza for dinner, I typically play to my own taste: heavy on the sauce, skimpy cheese, and generally a nice vegetable topping (which almost always ends up being broccoli, peppers and onions). I do not think outside the box. I definitely do not venture into the realm of the sauceless.

So perhaps it was surprising that this recipe caught my eye. There is no sauce on this pizza and there is a ton of cheese. But I chose to overlook those issues in favor of the ton of fresh vegetables that are involved. I'm very glad I did. If there were a sauce, it would overwhelm the wonderful delicate veggie flavors. The corn is a brilliant addition, adding a delightful sweetness. The fresh mozzarella, rather than distracting me with its goopiness, sort of blended into the crust - all the flavor without the texture I dislike. And the Parmesan added a nice salty note.

This pizza will overwhelm you with its freshness. The beautiful in-season ingredients are really allowed to shine here. The only thing that could have improved it would have been freshly made pizza dough. I did try - you might notice my dough in the picture of my ingredients, hiding in the measuring cup - but the recipe I used made far too little dough, so I had to send Jeff out for store-bought dough at the last minute (I have yet to find a go-to pizza dough recipe - if you've got a good one, let me know!) But the dough isn't my biggest regret - it is rather that we didn't think to enjoy this outside, as part of a lazy summer's evening, on perhaps the coolest day we're going to have for some time. Definitely next time.

Farmers Market Pizza
Adapted from Cooking Light July 2011.

1 tbsp extra-virgin olive oil
2 c onion, thinly sliced
1 tsp fresh thyme, chopped
2 c bell pepper, thinly sliced (this would be great with red bell pepper, but green is what's currently in season at the farmers market)
5 garlic cloves, thinly sliced
1 c fresh corn kernels (I only needed one medium-sized ear)
1/4 tsp salt
1/4 tsp pepper
1 pizza dough (the recipe called for 16 oz - to be honest, I didn't even look at the size of mine - if it's too big or small, just adjust your toppings)
cooking spray
5 oz fresh mozzarella, thinly sliced
1/3 c Parmesan cheese, grated
1 c grape tomatoes, halved
1/3 c fresh basil leaves, chopped

Preheat oven to 425° F. Position an oven rack in the next to lowest setting (I just used my small top oven). Place a pizza stone on the rack to preheat.


Heat a large nonstick skillet over medium-high heat. Add olive oil to the pan. Add the onion and thyme and cook 3 minutes, until the onion is tender. Add bell pepper and garlic and cook 2 more minutes. Add corn, salt and pepper and cook 1 minute more, until thoroughly heated. Remove pan from heat.


Roll out your pizza dough on a lightly floured surface. Remove the pizza stone from the oven. Coat the pan with cooking spray, and place the dough on the pan (I forgot the cooking spray, but this was the first time I ever put a pizza on a hot stone, so as I moved it around and fussed with it, the little bit of cooking it did prevented it from sticking to the stone later on). Spread the mozzarella slices over the crust. Spread the corn mixture over that, and finally sprinkle the Parmesan on top. Bake for 23 minutes (why so precise? I have no idea).


Remove the pizza from the oven. Arrange the tomato halves evenly over the top.


Return to the oven for 5 more minutes. If the tomatoes aren't browned a bit, you can turn on the broiler for a minute or two (this made my crust a little extra brown, but that was fine by me). Remove from the oven, sprinkle with basil, and enjoy! (Just try to give it a few minutes to cool so you don't burn your mouth!)