Showing posts with label Farm Fridays. Show all posts

Friday, August 23, 2013

Farm Fridays: Heirloom Tomato Salsa


The tomatoes have really started coming in around here, so it's time for some serious canning.

I've found that we go through our canned goods rather slowly - so much so that I have to work at planning recipes that will use them up. For example, we put up fifteen quarts of canned tomatoes last year (plus a few pints), and five of them are still sitting in the basement. Somehow, despite going through applesauce like water the year before, most of last year's supply is still down on the shelf as well. While these things are delicious and useful, strategizing is often necessary to ensure they actually get used. However, there is one canned item that this does not apply to - in fact, I have to strategize about how to keep it  on the shelf. That item, my friends, is salsa.

I absolutely adore this heirloom tomato salsa recipe. I love how vinegary it is, the pretty mixture of colors, and how the assortment of heirlooms used gives each batch a slightly different flavor. Last month, I wrote about my sadness at cracking open the last remaining jar, which I had been jealously hoarding for months. But the time for sadness is past - now it's time to replenish those stores! We've made two batches of this salsa this month, and another one will likely go down this weekend. Since we were making this all the way into October last year, I think we've gotten a pretty good jump on things. This year, I hope to be able to give my salsa away freely and still have plenty to enjoy for my own afternoon snacks!

Heirloom Tomato Salsa
From Put 'Em Up, my go-to canning book. 
(The original recipe says that this makes 7 cups, but I like a thicker salsa, so I usually get about 5 out of it. I didn't cook this particular batch down far enough, so I ended up with 5 1/2.)
 
1 c distilled white vinegar
1/4 c sugar
1 tbsp salt
3 lbs heirloom tomatoes, seeded and diced (skins are fine here - how finely you chop them depends on how chunky you like your salsa)
1/2 lb onions, diced
1 jalapeno, seeds removed and minced
1 c cilantro, chopped

Combine the vinegar, sugar and salt in a large, nonreactive saucepan and whisk together. Bring to a boil (definitely put your vent fan on - boiling vinegar is hard on the eyes!).


Add the tomatoes, onions and jalapeno. Return to a boil for 15-20 minutes, until the salsa reaches the desired consistency.


Remove from heat and stir in cilantro.

Ladle into clean, hot half-pint canning jars, leaving 1/2" headspace. Process 15 minutes in a boiling-water canner.

Friday, August 9, 2013

Farm Fridays: Lemony Ricotta Summer Squash Galette


I meant to post this days and days ago, but I've been incapacitated by a terrible summer cold/sinus infection. I've been on the couch all week, hardly even picking up my laptop (which seems soooo heavy and requires me to actually sit up). I must be feeling a bit better, because I have the energy to work on this now. I'd better be recovering, because I really want to get going with some canning projects this weekend!

I did manage to drag myself up to the farm yesterday morning and was extremely pleased with all the produce. After several sparse weeks, things are finally picking up. The blackberries are ready for picking and they are gorgeous - all the bushes were absolutely laden with huge berries. I also picked up another delicious watermelon, lots of plump tomatoes and pounds of new potatoes. And, of course, the ubiquitous summer squash.

I know that a lot of people get sick of summer squash - once it starts coming in, it can smother you. But I'm more than happy to be drowned in squash. I really only started to eat it two years ago, and the honeymoon stage isn't over yet. There are still tons of great squash recipes out there that I haven't tried. (If the squash plants in my garden actually produced anything, I might be forced to eat my words.)

When this recipe showed up in my August Better Homes and Gardens, I knew it had to be made right away. I'm a big tart person, so a tart with summer squash sounded too good to pass up. While I do love a flaky, buttery crust, I went a bit more healthy with this one and tried out an olive oil crust. It was definitely tougher (on day one, it was difficult to bite through in places), but was much better the next day after it had softened. The filling was awesome - summer squash and ricotta cheese is a winning combination in my book. A slice of this tart and a salad makes for a delicious summer lunch.

Lemony Ricotta Summer Squash Galette
Adapted from Better Homes and Gardens August 2013. Tart dough is from Tamar Adler's An Everlasting Meal.

crust:
2 1/2 c flour
1/3 c quality olive oil
1/2 c ice water
1 tsp fine salt

filling:
2 zucchini or summer squash, thinly sliced (the recipe says two medium-sized squash, which will yield 2 1/2 c, but my two yielded much more than that - I added all the slices I could squeeze onto the tart and then saved the rest for another recipe)
3/4 c ricotta cheese
1/2 c Parmesan cheese
1/4 c shredded mozzarella cheese
1 clove garlic, minced
1 tbsp olive oil
2 tsp lemon zest
1 tbsp lemon juice
1/4 tsp salt
1/4 tsp black pepper
1 egg yolk

Mix together the flour, olive oil, and salt in a food processor. Pulse to combine. Slowly drizzle in the ice water until the dough clumps together into a ball. Remove the dough, divide in half, roll each half into a ball and flatten into a disc. Set one half aside for another project (I slip it into a ziplock bag and freeze it). Put the half you are using in the refrigerator to chill for about an hour.


Put the squash slices into a colander and sprinkle with salt, tossing to coat. Let drain for 15 minutes, then pat dry with paper towels.

Preheat oven to 400° F. Remove the tart dough from the fridge and place on a sheet of parchment paper. Roll it into a rough 12" circle (the dough will be tough to roll out, so I like to prep it with a Julia Child technique: literally beat the dough with your rolling pin until it begins to stretch out, then roll. This helps soften the dough without warming it with your hands). 


In a small bowl, mix together the cheeses, garlic, 1 tsp olive oil, lemon zest, lemon juice, salt and pepper. Spread the filling over the dough, leaving a clean 2" edge. Top this with the drained and dried squash slices (I piled three or four layers of squash on there). Drizzle the top with the remaining olive oil, then salt and pepper to taste.


Gently fold over the edges of the crust to keep in all the filling (I also took the opportunity to fold under all the rough, irregular edges from my clumsy rolling).

In a small bowl, combine the egg yolk with 1 tsp water. Using a pastry brush, brush the egg wash over the crust.


Slide the parchment and tart onto a baking sheet and bake for 35-40 minutes, until the crust is golden and the squash is tender. Enjoy!

Friday, July 26, 2013

Farm Fridays: Sauteed Kale with Bacon


My farm share has been looking pretty scanty lately. The crop loss and delayed plantings due to the eight inches of rain we had in June are finally having an impact on my basket. The quality of the produce hasn't suffered, though. I brought home two bunches of beautiful curly kale this week. One of them will be making its way into a casserole in a few days, but I decided that the rest of it ought to be used immediately, while it was still so wonderfully fresh and crisp. I had a single strip of bacon in the freezer, left over from something we made a few weeks ago, so this dish was a no-brainer.

Why is it that the dark greens - kale, spinach, collards - which are so wonderfully healthy and good go so well with bacon, which, despite its deliciousness, is one of the least healthy foods in the universe? And bacon is so efficient: cooking oil, flavor agent and meaty goodness all in one! Even better, I threw this dish together in my cast iron skillet, so that bacony flavor will be infused in future dishes. That one strip of bacon wears many hats (not to mention artery clogger and cholesterol raiser).

I'm not really trying to scare you off the bacon, though. Everything in moderation, right? It's just one strip of bacon, and its ill effects are (maybe) counteracted by the pile of vitamin- and fiber-full greens. We all want to be healthy, but we have to live a little, too. And somewhere in the midst of that compromise, my friends, this dish lies. So enjoy your bacon. And enjoy your kale.

Sauteed Kale with Bacon

1 strip thick-cut smoked bacon
1/2 onion
4 oz kale
salt and pepper to taste

Preheat a large skillet over medium heat. Add the bacon and saute 3-4 minutes, until the fat has rendered and the edges begin to crisp.


Add the onion and saute another 4-5 minutes, until softened and translucent.


Finally, add the kale (in batches, if necessary - I managed to squeeze it all into this pan at once, but it was a stretch). Cook, stirring occasionally, until wilted but still vibrantly green, about 7-8 minutes.

Friday, July 19, 2013

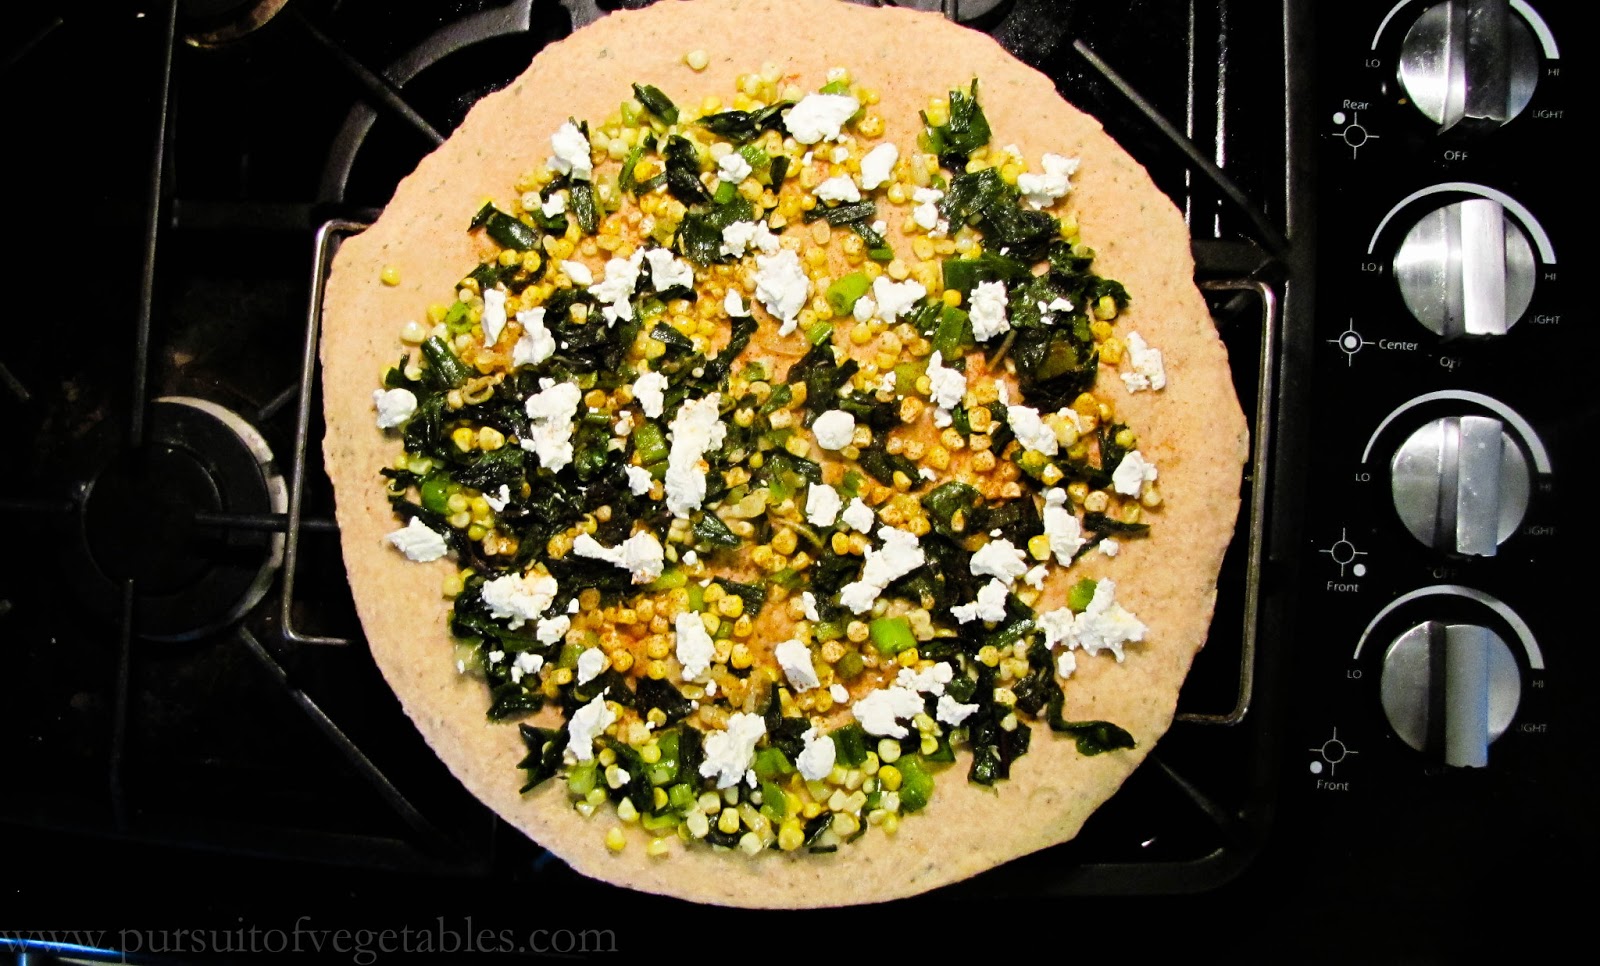
Farm Fridays: Scallion, Chard and Corn Pizza


Man, has it been HOT around here! I normally enjoy hot summer weather, but a heat index of 102 is outside my comfort zone. When I went to the farm, I was relieved that there wasn't much available in the pick-your-own fields. I was dripping with sweat just from picking a few dozen flowers. I feel for all the farm workers who had to be out in this weather all week. Farm work is hard on a good day - this week must have been brutal for them!

I first made this recipe a few weeks ago when Jeff was out of town, so I had it all to myself. I appreciated getting to eat it all (not in one sitting, of course), but I was also sad that I didn't get to share the wonderfulness that is awesome food. So I was happy to be able to make this again when Jeff was actually at home, so we could enjoy it together.

I also kicked things up a notch (not that any Smitten Kitchen recipe really needs alteration - but I felt like making it more of my own). I changed up the crust to a whole wheat dough with some dried basil and made it more of a pizza than a flatbread. I switched up the leeks for the scallions I picked up at the farm and added a final sprinkle of paprika over the top of the pie. The result was a really lovely summer vegetable pizza. I didn't even miss the sauce!

Be aware that this recipe makes enough dough for two pizzas - one for now and one for later!

Scallion, Chard and Corn Pizza
dough:
1 c bread flour
1 c whole wheat flour
1 1/2 tbsp dried basil
1/2 tsp salt
1/2 tsp sugar
1/4 oz instant yeast (sometimes labeled "bread machine" yeast)
3/4 c warm water (ideally 115-125° F)
1 tbsp olive oil

topping:
1 tbsp olive oil
3 large scallions (about 1 1/2 c), sliced
6 oz chard, sliced into 1/2" ribbons
1/4 tsp salt
1/4 tsp black pepper
1 ear corn, kernels sliced from cob
1/4-1/2 tsp paprika
2-3 oz goat cheese


Add the flours, basil, salt, sugar and yeast to a large bowl and whisk well to combine. Add the olive oil to the water and pour into the bowl, mixing until all dry ingredients are moistened. Knead dough for 5-8 minutes, until it forms a smooth, flexible ball (you can use a stand mixer here, but I always find the dough stays too sticky and I end up hand kneading it for a while anyway).


Cover dough and put in a warm place to rise until doubled, about 45 minutes. Meanwhile, get your pizza stone in the oven and preheat to 500° F (yes, now - when the stone preheats in the oven for a long time it gets hot enough to deliver a quick-cooked pizza with a nice crispy crust).


Shortly before the dough is fully risen, chop your vegetables. Preheat a large skillet over medium heat. Add the oil. Add the scallions to the heated oil and saute 5-6 minutes, until softened.


Add the chard and cook 2-3 minutes, until wilted, then add the corn for about a minute. Season with salt and pepper to taste.

Remove your dough from its bowl, punch down slightly and divide in half. Reserve one half of the dough for a future use (I put it in a ziplock bag and toss it in the freezer - the next pizza's a lot less work!).

Take the other half of the dough and roll and stretch it into a circle as large as your pizza stone (mine was slightly larger so the edges hung off a bit - if this happens to you, you can roll the edges slightly to create a more emphatically raised crust). 


Transfer the crust to the pizza stone (if it's nice and hot, you don't need cornmeal or oil underneath - it will cook very quickly and just slide off when it's done). Spread the topping evenly over the surface of the pizza, leaving an inch or so around the edges. Sprinkle the pizza with paprika, then crumble the goat cheese over the top.

Bake 8-9 minutes, until crust is crispy and cheese turns slightly golden. Slice and enjoy!


Friday, July 12, 2013

Farm Fridays: Black Bean and Corn Salsa


Last week I was very sad to see the bottom of the last jar of salsa that we put up last fall. I absolutely adore our homemade salsa and I've been savoring it all winter long. I was saving that last jar for a rainy day, almost afraid to use it, knowing that tomato season was so far off.

(In case you haven't caught on yet, I'm a bit dramatic about food. Obviously, salsa can be purchased at the grocery store in all seasons - but that's not the salsa I crave. I have a small fear of running out of the food I like best. This same fear carries over to traveling - I rarely leave the house without some snacks, in case . . . all the stores and restaurants are closed? I don't know. Suffice to say, breaking the seal on the last remaining salsa jar was a stressful moment for me. Delicious, but stressful.)

Anyway, even though tomato season is just barely kicking off around here, I realized this week that fresh salsa season has totally begun. I got a huge bunch of cilantro from the farm last week and it got me thinking about salsa making. The black beans in my pantry started calling to me. I had never made my own black bean salsa before, but I've had it a few times and really enjoyed it, so I cracked open an old cookbook and found a recipe. This particular recipe didn't require me to go out and buy anything - I had a giant heirloom tomato (the first of this year's harvest!) and some corn from the farm this week, half a red onion in my crisper drawer, and a jalapeno and some bell pepper strips in the freezer from last fall. (The bell pepper strips are really past their flavor prime, but I hate wasting anything, so I decided to use them - this salsa will only be that much better when fresh peppers are in season!)

Salsa is always simple to make - just toss some stuff in a bowl, stir, and set aside while the flavors get to know one another. This particular salsa took a bit more of my time than usual because it makes a TON - the recipe says seven cups, but I think I used more beans than it called for. I was actually a little concerned as I made it, wondering how we were going to use so much salsa. After I tried some, though, all those thoughts went away. I've actually been eating this salsa all afternoon. I've been hard pressed to keep myself away from it. It's totally delicious, pretty as a picture, and makes an excellent healthy snack. Someone just needs to invite me to a barbecue so I have an excuse to make another giant batch!

Black Bean and Corn Salsa
Adapted from Southern Living: Secrets of the South's Best Barbecue cookbook. 

3 ears corn
1/3 c lime juice (fresh is preferable, but I used bottled juice for this one because all the limes in my refrigerator were already spoken for)
1/4 c olive oil
1 tsp salt
1/2 tsp ground cumin
1/4 tsp red pepper flakes
1/3 c cilantro, chopped
~3 c black beans (I cooked 1 c dried beans and used them all)
1/4 red onion, chopped
1 giant tomato, chopped (about 1-1 1/2 c)
1 c bell pepper, chopped (I used frozen strips of red and green peppers)
1 jalapeño, seeded and finely chopped

Bring a large pot of water to a boil. Salt well, add the corn and cook 3 minutes. Remove to an ice bath to stop the cooking process.


In a large bowl, whisk together the lime juice, oil, salt, cumin and red pepper flakes. Stir in chopped cilantro.


Slice the corn kernels off of their cobs and add to the bowl along with the beans, onion, tomato, peppers, and jalapeño. Stir well to combine, tossing with dressing.


Refrigerate for 4-8 hours to allow the flavors to meld. Enjoy!

Friday, July 5, 2013

Farm Fridays: Zucchini and Garlic Scape Latkes with Creamy Basil Sauce


I'm getting the impression that this is going to be a great year for cucumbers and summer squash. I have two enormous yellow squash plants in my garden (not producing yet, but huge and vigorous) and my cucumber vines have already started churning out some big ones. We've been getting large quantities of cucumbers and squash from the farm as well.

My favorite way to eat any summer squash is to grill it (just cut it into long planks, rub with oil and season with salt and pepper). Unfortunately, the weather hasn't been very cooperative for grilling lately. It seems like every time we so much as lift a corner of the grill cover, the skies open up.  I chose this recipe as an alternative to grilling my crisper drawer full of zucchini.

I was a little trepidatious because, while Jeff and I have made latkes several times, we never seem to get it right: either they're soggy or falling apart or more egg than potato. Yet I still persist in trying new recipes, hoping we'll figure it out eventually. Jeff raised his eyebrows when I proposed this recipe, but gamely went along with it. Good thing, too, because these are probably the most successful latkes we've ever made. Perhaps our problem is with starchy potatoes, because these zucchini latkes came together like a dream. I think our success came from squeezing a ton of water out of the zucchini (one of the pictures below shows how dry we were able to get it) before we mixed the batter. That ensured the latkes weren't soggy. While they didn't crisp up like potato latkes do (when done correctly, by people other than us, that is), the flavors and textures were delicious. The basil was a stand-out flavor in both the latkes and the sauce, complementing the zucchini and garlic beautifully. Isn't it great how seasonal flavors work so well together?

Zucchini and Garlic Scape Latkes with Creamy Basil Sauce
Adapted from Sassy Radish. 

1 1/2 lbs zucchini
1 1/2 tsp kosher salt
scant 2/3 c flour
1/4 c basil, slivered
2 eggs, lightly beaten (the local eggs we used were very large and our latkes turned out just slightly too eggy - try not to overdo it on the egg)
2 garlic scapes, thinly sliced (about 3-4 tbsp)
1/2 tsp baking powder
1/4 tsp black pepper
olive oil

1 c Greek yogurt
1/4 c basil, slivered
zest of 1 lemon
juice of 1/2 lemon
kosher salt and black pepper to taste

Trim one end off of each zucchini then shred using a box grater (don't cut off the other end - use it as a handle and add it to the stock bag when you're done!). Transfer to a large colander and toss with salt. Position the colander over a large bowl and let sit 15 minutes.


Meanwhile, make the creamy basil sauce. Add the yogurt, basil, lemon zest and lemon juice to a small bowl and stir well to combine. Add salt and pepper to taste, stirring to combine once more. Set aside to let the flavors meld.


After 15 minutes, transfer the shredded zucchini to a clean cheesecloth or kitchen towel. Twist and squeeze well to remove as much water as possible. 

Pour enough oil into a cast iron skillet (or other large, heavy pan) to cover the bottom completely. Heat over medium-high, until shimmering.

Meanwhile, add the zucchini to a medium bowl and combine with flour, basil, eggs, garlic scapes, baking powder and pepper. Mix to form a batter.

Reduce heat to medium and drop 1/4 cupfuls of batter into the skillet, arranging them into firm patties with a fork (we fit three large latkes at a time in our 9" skillet). Gently flatten the tops and tuck in any straggly bits on the sides.


Cook 3-4 minutes, then flip gently with a spatula and cook another 3-4 minutes until golden brown and cooked through. Remove to a paper bag or paper towel-lined plate to drain while the next batches cook (this recipe made three batches for us - nine latkes in all).

Serve nice and hot with creamy basil sauce on the side!

Friday, June 21, 2013

Farm Fridays: Tangled Collard Greens and Sesame over Rice


I'm trying to get things back on track around here. My stupid, stupid cold is still hanging around. I thought I was over it last weekend, but as soon as I started going about my normal business (especially going to the gym again), things went back a few steps. I've been holding it together well enough to teach, but as soon as I get home from class, I crash. Very little is getting done around here, which is definitely not ideal this particular summer.

But I'm going to try to ignore it and get things done. First thing on the list is to work on my backlog of blog posts. I've managed to upload and edit the pictures I've been taking, so expect to hear more from me soon.

I know my last Farm Fridays post was about collards, too, but I just can't resist them. I love the thick, smooth leaves. This time I went with a more Asian direction, based on a recipe from Deborah Madison's Vegetable Literacy. With a little soy and a little sesame, these unassuming greens are kicked up a notch. This dish is really simple - the first time I had it was for a quick lunch with a few leftover leaves - and really delicious. This time I sized it up a bit - enough for dinner and leftovers. The fresh, thick greens are pleasantly toothy over the soft rice. If you have extra collards in your crisper, this is a great way to use them.

Tangled Collard Greens and Sesame over Rice 
Adapted from Deborah Madison's Vegetable Literacy.

1 c white rice
2 c vegetable stock
1 tbsp sesame oil (regular is fine - I used toasted sesame oil because I have so much of it!)
1 small shallot, minced
1 bunch collard greens (about 8 oz)
splash tamari
splash rice wine vinegar
2 tbsp toasted sesame seeds

To cook the rice, bring the stock to a boil. Add rice, reduce to a simmer and cook 15-18 minutes, until liquid is gone and rice is fluffy.

Remove the stems from the collard greens. Stack the leaves and roll into a cylinder, then slice into 1/2" thick ribbons.

Preheat oil in a large skillet over medium-high heat. Add the shallot and cook 1-2 minutes, until softened


Add the collards to the pan and cook, stirring, until wilted, about 4-6 minutes. When the greens are softened, add a splash of tamari, a splash of rice vinegar and sesame seeds. Drizzle with a bit more toasted sesame oil, if desired. Serve over rice.

Friday, May 31, 2013

Farm Fridays: Strawberry Rhubarb Jam


First canning project of the year! I must say that canning is pretty easy once you've got the hang of it. At the beginning of my third canning season I have no problem throwing down a batch of jam in the middle of the afternoon, working alone while also working on some bread dough. (Obviously, since I was making jam, I needed to bake some bread to slather it on. Isn't that how everyone does it?)

I learned that baking bread and canning jam actually go pretty well together. The heat and humidity produced by my boiling water canner created a wonderful environment near the top of my fridge for my dough to rise in. I've been having a lot of trouble lately with dead yeast, but this time either I got a really live batch or the conditions were ideal, because my dough rose like crazy! It's so big that it doesn't fit in any of my tupperwares (usually I have to squish the top of the loaf a little, but even squished, these loaves don't come close to fitting). I finally found a container to fit one loaf after Jeff suggested cutting large slices off to leave out for French toast tomorrow morning. (Did I mention that my husband is a genius?) But I digress . . .

Jam had to be made because I am now officially on a rhubarb kick. I'd never had it before last week - I'd been wondering what all the hype was about, so I decided to make a strawberry rhubarb crumble I found on smitten kitchen. It was glorious - the sour tartness of the rhubarb was a lovely complement to the sweetness of the strawberries. And the filling turned out rather jam-like, planting the seed of an idea in my brain. I found myself, late at night, combing the internet for a great strawberry rhubarb jam recipe to try. Lo and behold, I found one by one of my favorite bloggers, Marisa from Food in Jars, posted on Food52. The recipe was really simple - just strawberries, rhubarb and sugar - and straightforward. The jam cooked down exactly as she said it would, into a bubbly, rich red mass. I got so excited by my success that I failed to take any pictures of the jam before getting it into the jars. No matter how many times I do this, I can't get over how easy it can be. If I can do it beautifully in the middle of the afternoon, with no help, only half paying attention, I think there will be a lot of small-batch jam making this summer!


Strawberry Rhubarb Jam
Recipe by Marisa from Food in Jars, posting on Food52.

1 lb strawberries, cleaned, hulled and diced
1 lb rhubarb stems, cleaned and sliced into 1/2" pieces
1 1/2 c sugar


Add the strawberries and rhubarb to a glass or ceramic bowl and cover with sugar. Stir it around a few times so that all the fruit is coated. Let sit for at least an hour, until the sugar draws the juices out of the fruit.


Pour the contents of the bowl into a stainless steel saucepan. Bring to a rapid boil, then cook about 8-12 minutes (on my powerful burners in a wide skillet, I think it was done even before 8 minutes). Marisa says " It is done when it is quite thick; you can tell that it's ready when you draw your spoon or spatula through the jam and it doesn't immediately rush in to fill that space. It will also make a vigorous sizzling noise when stirred." (I knew I was done when that sizzling noise became more pronounced.)


(I wish I had pictures of the jam cooking to share, but as I said above, I got excited and filled my jars too quickly!)


Spoon the jam through a funnel into half-pint canning jars. Depending on how much moisture you got to evaporate, you may get three half-pints (I got just shy of three - you want 1/4" of headspace for jam, so that third jar was too low for me to try to seal). Process in a boiling water canner for 10 minutes.


Happy canning!

Friday, May 24, 2013

Farm Fridays: Strawberry and Arugula Salad with Gruyere Fricos


The CSA season has officially begun! I'm really psyched. In fact, I've been so excited to get back to the farm that when I finished gathering my share, I stood around lamely in the farm stand for a minute or so, looking for a reason to linger.

Because we've had this strange spring - alternating unseasonable cold with spurts of summer heat - there wasn't much available yet. I took home four heads of lettuce, some arugula, some herbs, and a quart of strawberries. The strawberries look great this year - in the preceding two years of my membership, the Pennington strawberry fields have had issues with fungus, resulting in very low production. Last year the existing fields were torn up and a new strawberry patch was planted. I think it's a huge improvement - the plants are small yet, but they are producing well and look very healthy. I'm looking forward to a great strawberry season! My own strawberries also look very promising - we picked the first two red ones today and they were delicious.

Since the ripening of the strawberries marks the beginning of Honey Brook's CSA season, I thought it fitting to inaugurate this season's Farm Fridays with a strawberry recipe. My last Better Homes and Gardens (which they persist in sending me even though I let my subscription run out in December) had a recipe for a strawberry-arugula salad with cheese crisps. We had it for dinner tonight (served with a balsamic, Dijon and garlic grilled chicken breast and some grilled asparagus), swapping out the recipe's Manchego for the Gruyere in our fridge, and it was every bit as good as it sounded. This salad is all about strong flavors: sweet, juicy strawberries, peppery arugula, crispy, salty Gruyere crisps and a rich balsamic dressing. The recipe is simple, but the flavors were complex. It's the sort of dish that celebrates spring (even when it's 50 degrees and drizzling outside).

Strawberry and Arugula Salad with Gruyere Fricos
Adapted from Better Homes and Gardens June 2013.

3 tbsp olive oil
3 tbsp balsamic vinegar
1/4 tsp kosher salt
1/4 tsp black pepper
4 c arugula
1 1/2-2 c strawberries, halved or quartered (depending on their size)
3 oz shredded Gruyere

Combine the oil, vinegar, salt and pepper in a small bowl and whisk to combine. Toss the arugula and strawberries together in a large bowl.


To make the fricos, heat a small nonstick skillet over medium heat. Quickly sprinkle 1/3 of the cheese evenly onto the pan.


Cook 2-3 minutes, until the edges are golden.


Remove the skillet from the heat for about 30 seconds, then carefully lift the frico out with a spatula. Remove to a wire rack to cool. Repeat with the remaining cheese. (Yes, each of these pictures is from a different frico - I had difficulty working quickly and taking pictures!)


Toss the salad with the dressing. Break the fricos into chunks to garnish. Enjoy!


Friday, October 26, 2012

Farm Fridays: Maple Roasted Fingerling Sweet Potatoes


If you're living in the Northeast, you've probably heard that we're going to take a pounding from Hurricane Sandy (aka Frankenstorm) early next week. Some of the tracks project a direct hit to Central Jersey.  I visited the farm this morning and the grocery store this afternoon - the fridge is stocked and we're ready to hunker down and weather this thing (hopefully without losing power).


Fortunately, we got a nice load of storage vegetables from the farm today, so whatever happens, I know I'll have some unspoiled food to work with. And I could honestly eat sweet potatoes every day without getting sick of them. In fact, I couldn't wait to have these - as soon as I'd unpacked my farm basket, I scrubbed some and roasted them for lunch.

Roasting is my favorite way to prepare most vegetables. Just toss them in oil and seasonings and throw them in the oven. Very little mess or fuss is involved. In this case, I decided to add a little maple syrup to liven things up a bit. This makes an easy, delicious side dish appropriate for anything from a Friday lunch to Thanksgiving dinner. I have five more pounds of sweet potatoes sitting in the basement, so I'm sure I'll be doing this again soon!

Maple Roasted Fingerling Sweet Potatoes

1 lb fingerling sweet potatoes, sliced into 1/2" rounds (really, any kind of diced sweet potato will do, but I had these cute long ones on hand)
1 tbsp olive oil
1 tbsp maple syrup
salt and pepper to taste


Preheat oven to 400° F.

Slice up your sweet potatoes and place them in a baking dish (or foil-lined baking pan - glass will clean up more easily than metal so foil is unnecessary). Drizzle with oil and syrup, season with salt and pepper, and toss well to combine.

Roast 30-35 minutes, stirring halfway through.


Friday, October 5, 2012

Farm Fridays: New World Chili


What a nice Farm Friday! The past two weeks (during which I was on a blogging hiatus) we took home enormous and diverse piles of produce (it's entirely possible that attempting to finish my dissertation chapter while dealing with those piles is the reason behind that hiatus). This week was much more manageable, perhaps because the variety has calmed down a bit. Don't get me wrong - I love variety! But trying to find ways to use up that many things over the course of a week stressed me out a bit.


This week I found menu planning much easier, due to the reduced variety, and I managed to use a whole lot of produce in one fell swoop when planning today's dinner. I had some squashes (one acorn, one carnival) languishing in the basement from two weeks ago - today I noticed some blemishes forming, so I knew they had to be used. Chili was the first thing that came to mind.

Chili is perfect for this time of year because it wants the exact vegetables that are peaking: tomatoes, peppers, and winter squash. I found a great recipe for black bean chili with butternut squash from What Would Cathy Eat?, but I decided to tweak it a little. And by "a little," I guess I mean "a lot." I turned it into a clear-the-fridge catch-all. I kinda overdid it.

This is still a tasty chili - sweet squash offset by hearty beans, meaty turkey and smokey chipotles - I just messed up the proportions. In my zeal to use up the remaining vegetable stock in my freezer (since I was in the process of making another batch), I added way too much liquid. There were too many vegetables (if such a thing is possible) and not enough turkey and beans. In the recipe that follows, I have adjusted the quantities to more appropriate levels. The result should be a chili just as delicious as the one I had tonight, but more effectively balanced.

New World Chili
Adapted from What Would Cathy Eat?

2 tbsp olive oil
1/2 - 1 lb ground turkey (I used 1/2 lb here, but add more for a meatier chili)
3 tbsp chili powder
1 1/2 tbsp dried oregano
1 tbsp ground cumin
1 tsp cayenne pepper (this chili was pretty hot - if you're not a heat lover, definitely reduce or eliminate the cayenne)
salt and pepper to taste
2 onions, chopped
2 bell peppers, chopped (I used one red and one yellow - any color you have on hand will do, although sweeter peppers are preferable)
4 cloves garlic, minced
2 jalapeno peppers, minced
2 chipotles in adobo, minced
2 lb tomatoes, peeled, cored and chopped (I used regular slicing tomatoes, but plum tomatoes would be preferable if you have them - mine are reserved for canning)
2 c winter squash, diced (I used acorn and carnival)
1 c vegetable stock (or a combo of stock and your favorite beer)
3 15 oz cans black beans, rinsed
1/2 c cilantro, chopped
sour cream or Greek yogurt for serving

In a large Dutch oven (mine is 5 quarts and I nearly filled it - even with the adjusted proportions, you'll want a big pot!), heat the oil. Add the turkey, chili powder, oregano, cumin, cayenne, salt and pepper and stir, breaking the turkey up into small chunks, for 2-3 minutes, until cooked through. 


Add the onions, bell peppers, garlic, jalapenos, and chipotles and stir to combine. Cook, stirring occasionally, for 4-5 minutes, until the onions begin to look translucent.


Add the tomatoes (and any juices), squash and stock to the pot and stir to combine. Bring to a boil, then cover and simmer 10 minutes, or until squash begins to soften. Add the beans and cook 5 minutes more. Stir in the cilantro and serve, garnished with a dollop of sour cream or Greek yogurt.