Showing posts with label canning. Show all posts

Monday, August 26, 2013

Preserving: Peaches in Syrup


Back when I visited my grandmother in early July, I noticed an abundance of pears developing on the tree in her backyard. Last year, I used them to make a couple batches of pear sauce, but this year, the gears in my brain started going and I came up with a more ambitious list. Now that the pears are ready, I went with my mom and brother this past weekend to pick some. 


Last year, I attempted to pick pears on my own. Unfortunately, Grandma only had one rickety five-foot ladder and couldn't tell me where the long pear picker was. I attempted to get up onto the roof of the carport, but being out of shape and short, it didn't go very well. This year, I made sure there were reinforcements. My mom knew where the pear picker was, my brother was able to hop up on the carport roof and pick the good high ones, and I just scurried around on the lawn, collecting the pears as they were tossed down.

Most of the pears need to soften just a bit before they're usable, but I still managed to make a few things with Jeff yesterday. We made one batch of pears in syrup and some pear jelly (using the leftover peels and cores).

So what does all of this have to do with peaches, you ask? Making these peaches in syrup a week or so ago made the pears go so much more easily. We'd never canned fruit this way before, so the peaches were our trial run before dealing with the more difficult pears (which are hard to peel, have rotten spots, hard spots and sometimes worms inside - working with them is never straightforward). The hang-ups we had with the peaches taught us how to manage better with the pears. For example, we learned that our kitchen is not quite equipped to process ten pounds of peaches at one time. We simply do not have pots or bowls (at least, not nonreactive ones) large enough to manage this recipe. We were forced to split it in half, filling three jars, returning them to the canner, then peeling and prepping the rest of the peaches before filling the remaining jars and processing. Not ideal, of course, but there was not much to be done at that point and they seem to have come out fine. When we worked on the pears yesterday, we knew not to double the recipe, which calls for six pounds of fruit, or we would exceed our working capacity.

Since we still have pears distributed in bowls all over our house, I know a few more batches of this are in our future. Hopefully, each one will go even more smoothly than the last!

Peaches in Syrup
From Put 'Em Up.

6 500 mg vitamin C tablets, crushed (I made sure to get very plain, white tablets without any additional ingredients)
3 quarts cold water
4 c ice
10 lbs freestone peaches (you can, of course, use clingstone varieties, but it will mean a lot of extra work and will probably not be pretty in the long run)
6 3/4 c water
1 1/4 c sugar
1/2 c honey (I realized, as we worked on this recipe, that the honey we used came from the same farm as the peaches - talk about local!)

Clean and prepare six quart jars for processing.

In a large, non-reactive, extremely clean bowl, cooler or sink, add the vitamin C tablets to the cold water, stir to dissolve, and add the ice to create an anti-browning bath for the fruit (I used a large Pyrex mixing bowl and, as I mentioned above, had to do my peaches in two batches).


Bring a large pot of water to a boil. Add peaches, two at a time, blanching for 30-60 seconds, to loosen the skins. Remove the peaches to the anti-browning ice bath. Repeat with remaining peaches.


Cut the peaches in half, remove the pits and peel off the skin (you may be able to do this with your fingers, but some less ripe peaches may require the use of a paring knife to get every bit of skin off), returning each peach half to the ice bath as you finish with it. (If you end up having some smaller pieces, that's fine as well - just include them as well.)

Meanwhile, bring the 6 3/4 c water, sugar and honey to a boil in a non-reactive saucepan, stirring until the sugar is dissolved (you can do this after completing the peaches, as they sit in the anti-browning bath, or have them all going simultaneously).


Pack the peaches into the six hot jars.


Ladle the syrup into each jar, covering the peaches by about 1/2" and leaving 1/2" headspace. Release the air bubbles, screw on the lids and process in a boiling-water canner for 30 minutes. Store in a cool place for up to a year.


Friday, August 23, 2013

Farm Fridays: Heirloom Tomato Salsa


The tomatoes have really started coming in around here, so it's time for some serious canning.

I've found that we go through our canned goods rather slowly - so much so that I have to work at planning recipes that will use them up. For example, we put up fifteen quarts of canned tomatoes last year (plus a few pints), and five of them are still sitting in the basement. Somehow, despite going through applesauce like water the year before, most of last year's supply is still down on the shelf as well. While these things are delicious and useful, strategizing is often necessary to ensure they actually get used. However, there is one canned item that this does not apply to - in fact, I have to strategize about how to keep it  on the shelf. That item, my friends, is salsa.

I absolutely adore this heirloom tomato salsa recipe. I love how vinegary it is, the pretty mixture of colors, and how the assortment of heirlooms used gives each batch a slightly different flavor. Last month, I wrote about my sadness at cracking open the last remaining jar, which I had been jealously hoarding for months. But the time for sadness is past - now it's time to replenish those stores! We've made two batches of this salsa this month, and another one will likely go down this weekend. Since we were making this all the way into October last year, I think we've gotten a pretty good jump on things. This year, I hope to be able to give my salsa away freely and still have plenty to enjoy for my own afternoon snacks!

Heirloom Tomato Salsa
From Put 'Em Up, my go-to canning book. 
(The original recipe says that this makes 7 cups, but I like a thicker salsa, so I usually get about 5 out of it. I didn't cook this particular batch down far enough, so I ended up with 5 1/2.)
 
1 c distilled white vinegar
1/4 c sugar
1 tbsp salt
3 lbs heirloom tomatoes, seeded and diced (skins are fine here - how finely you chop them depends on how chunky you like your salsa)
1/2 lb onions, diced
1 jalapeno, seeds removed and minced
1 c cilantro, chopped

Combine the vinegar, sugar and salt in a large, nonreactive saucepan and whisk together. Bring to a boil (definitely put your vent fan on - boiling vinegar is hard on the eyes!).


Add the tomatoes, onions and jalapeno. Return to a boil for 15-20 minutes, until the salsa reaches the desired consistency.


Remove from heat and stir in cilantro.

Ladle into clean, hot half-pint canning jars, leaving 1/2" headspace. Process 15 minutes in a boiling-water canner.

Saturday, June 29, 2013

Cherry Walnut Relish


Oops. I seem to have missed Farm Fridays this week. Yesterday turned out to be quite a busy day when my usual Friday errands turned into an all-out shopping spree. I spent money on a level that I've never reached before (at least, not in a single day!). Slipping into Sur La Table at the mall for a new tea kettle (I sorta melted the top of the old one) meant getting sucked into several stores having awesome sales and dropping into Sephora to replenish my foundation led me into a long conversation with a saleswoman who evaluated my skin and recommended several products that I really should have been using already (somehow in all these years I never learned about primer). And after months of mostly vain searching for shoes that I can wear with my bulky orthopedic inserts, I hit the jackpot, coming home with five new pairs. The gist of all this is that I spent far more time shopping than originally planned, which didn't get me home in time to make all the dinner recipes I'd had planned. And the stuff we did manage was done before I thought to grab my camera.

But I thought I'd make it up to you with a few of the cherry recipes we worked on last week. Last Saturday Terhune Orchards opened for cherry picking! You may remember that I went last year and blogged about how much fun I had. This year Jeff was available to come along and help, so we planned a big day of cherry picking and canning. Cherry picking is so easy, and cherries are so delicious and tempting, that we picked far more than we'd intended - we brought home thirteen pounds of cherries (see the above picture of our dining room table laden with cleaned and sorted fruit). And by the end of the weekend, most of them had been dispatched in a variety of tasty recipes.

We made this cherry-walnut relish, cherry preserves and almond and sweet cherry galette on Saturday and on Sunday, after I'd realized how much we still had (and fearing we wouldn't get through them before they started to go bad), I obsessively searched through my files and the internet to find more possibilities: brandied cherries, individual cherry crisps and roasted cherry brownies (don't worry - those are the subject of my next post!). The crisps and the brownies were frozen for future consumption, so we will be enjoying cherries for several weeks to come.

This cherry walnut relish was the first project that came to mind when we decided to go cherry picking. When I got my copy of Put 'Em Up a few years ago and prepared to start canning, it was one of the first recipes that caught my eye. I jumped at the chance to do it this year. I chose the most luscious and velvety of the cherry varieties we had (while I divided them all into bags and pint boxes to keep the varieties separate, I of course failed to remember the names of the cherries we'd picked) to go with the richness of the spices and nuts. While cherries are a summer fruit, I thought this sounded like a winter treat, to top pork roasts or a turkey sandwich (I have my heart set on a roasted turkey panini with this relish and some Gruyere some time this fall). I was absolutely right -the tang of the vinegar lends complexity to the rich sweetness of the cherries. Even though the walnuts were added all the way at the end, their flavor manages to permeate the relish as well and the bigger pieces add a nice crunchy texture. I look forward to putting this on many winter sandwiches!

Cherry Walnut Relish
From Put 'Em Up by Sherri Brooks Vinton. 

4 c sweet cherries, stems and pits removed
1 c sugar
1 c cider vinegar
1 onion, diced
1 cinnamon stick
1/2 c crushed walnuts


Add the cherries, sugar and a splash of water to a large, nonreactive pot (I prefer my enameled Dutch oven for all canning activities) and bring it to a boil. Reduce heat and simmer for about 5 minutes, stirring and crushing the cherries with a potato masher to help them release their juices.


Add the vinegar, onion and cinnamon stick, stir to combine, and return the mixture to a simmer. Cook until thickened (but not dry), about 20 minutes


Add the walnuts and return to a boil for 5 minutes. Remove from heat and take out the cinnamon stick.

Spoon into half-pint canning jars, covering the solids with 1/4" of liquid and leaving 1/4" headspace. Process for 15 minutes in a boiling-water canner. 


Friday, May 31, 2013

Farm Fridays: Strawberry Rhubarb Jam


First canning project of the year! I must say that canning is pretty easy once you've got the hang of it. At the beginning of my third canning season I have no problem throwing down a batch of jam in the middle of the afternoon, working alone while also working on some bread dough. (Obviously, since I was making jam, I needed to bake some bread to slather it on. Isn't that how everyone does it?)

I learned that baking bread and canning jam actually go pretty well together. The heat and humidity produced by my boiling water canner created a wonderful environment near the top of my fridge for my dough to rise in. I've been having a lot of trouble lately with dead yeast, but this time either I got a really live batch or the conditions were ideal, because my dough rose like crazy! It's so big that it doesn't fit in any of my tupperwares (usually I have to squish the top of the loaf a little, but even squished, these loaves don't come close to fitting). I finally found a container to fit one loaf after Jeff suggested cutting large slices off to leave out for French toast tomorrow morning. (Did I mention that my husband is a genius?) But I digress . . .

Jam had to be made because I am now officially on a rhubarb kick. I'd never had it before last week - I'd been wondering what all the hype was about, so I decided to make a strawberry rhubarb crumble I found on smitten kitchen. It was glorious - the sour tartness of the rhubarb was a lovely complement to the sweetness of the strawberries. And the filling turned out rather jam-like, planting the seed of an idea in my brain. I found myself, late at night, combing the internet for a great strawberry rhubarb jam recipe to try. Lo and behold, I found one by one of my favorite bloggers, Marisa from Food in Jars, posted on Food52. The recipe was really simple - just strawberries, rhubarb and sugar - and straightforward. The jam cooked down exactly as she said it would, into a bubbly, rich red mass. I got so excited by my success that I failed to take any pictures of the jam before getting it into the jars. No matter how many times I do this, I can't get over how easy it can be. If I can do it beautifully in the middle of the afternoon, with no help, only half paying attention, I think there will be a lot of small-batch jam making this summer!


Strawberry Rhubarb Jam
Recipe by Marisa from Food in Jars, posting on Food52.

1 lb strawberries, cleaned, hulled and diced
1 lb rhubarb stems, cleaned and sliced into 1/2" pieces
1 1/2 c sugar


Add the strawberries and rhubarb to a glass or ceramic bowl and cover with sugar. Stir it around a few times so that all the fruit is coated. Let sit for at least an hour, until the sugar draws the juices out of the fruit.


Pour the contents of the bowl into a stainless steel saucepan. Bring to a rapid boil, then cook about 8-12 minutes (on my powerful burners in a wide skillet, I think it was done even before 8 minutes). Marisa says " It is done when it is quite thick; you can tell that it's ready when you draw your spoon or spatula through the jam and it doesn't immediately rush in to fill that space. It will also make a vigorous sizzling noise when stirred." (I knew I was done when that sizzling noise became more pronounced.)


(I wish I had pictures of the jam cooking to share, but as I said above, I got excited and filled my jars too quickly!)


Spoon the jam through a funnel into half-pint canning jars. Depending on how much moisture you got to evaporate, you may get three half-pints (I got just shy of three - you want 1/4" of headspace for jam, so that third jar was too low for me to try to seal). Process in a boiling water canner for 10 minutes.


Happy canning!

Tuesday, October 23, 2012

Canning Round-Up


CNN tells me that it's National Canning Day! What a great time to do a round-up of all the canning Jeff and I have done this season. 

We began canning last summer, starting in early June with two kinds of pickles. We planned two projects for a weekend, doing one each day because it was so time-consuming. Just a year and a half later, we've found ourselves tackling three and four projects on a single Saturday morning. Clearly, our confidence has improved. We no longer need to consult instructions for some of our most frequent canning projects - I think I canned whole tomatoes on eight separate occasions this year. I've got the process down pat. In all this time, not a single jar has failed to seal for us - a huge victory in my book. We've also never had a jar go bad (knock on wood!). This year, however, we did manage to break three quart jars - two in a row last Saturday morning. There's a lesson to be learned there - if you bash a jar against the rim of the sink, even if there is no visible damage, there's probably an internal flaw that will manifest itself later (like when you're adding cold tomatoes to the heated glass). Note to self: be more careful in the future.


We have definitely been busy bees this season. I was away through July and half of August, so our canning got a late start, but once I was back in the country we were at it pretty hard nearly every weekend. Our final tally is as follows:

Classic Grape Jam: 6 half-pints
Cantaloupe Vanilla Jam: 4 4 oz jars
Pear Sauce: 2 pints, 3 half-pints and 2 4 oz jars
Heirloom Tomato Salsa: 5 pints and 8 half-pints (plus several more we've already eaten!)
Dilly Beans: 2 pints
Roasted Red Pepper Ketchup: 9 4 oz jars
Roasted Tomato and Corn Salsa: 4 half-pints
Apple Butter: 1 pint, 3 half-pints and 2 4 oz jars
Chopped Tomatoes: 3 quarts
Whole Tomatoes: 12 quarts and 3 pints
Green Tomato Pickles: 4 pints and 1 half-pint
Apple Cranberry Jam: 4 pints and 12 half-pints

I am quite impressed and pleased at the hoard of jars hiding in our basement. Hopefully we've chosen our recipes wisely, making things that will actually be consumed throughout the winter. We also should get quite a few Christmas gifts out of our stash - if you're on our list, maybe slip us some suggestions now!


Unless we develop a pressing need for more applesauce, I think our canning season is over. While I do enjoy doing this every weekend, I'm looking forward to some lazier Saturdays in the future - hopefully eating jam and salsa rather than making it. At least, until we start again next summer!

Thursday, August 16, 2012

Preserving: Classic Grape Jam


Let me just say that my jam-making skills are in their infancy. All I have to my name are a batch of chili-tomato jam (which is so hot that we've been afraid to use it on anything!) and a batch of strawberry jam afflicted with fruit-float. Delicious, but wanting. But that doesn't faze me in the slightest. Success only comes through perseverance, so I will persevere. 


After coming home from Peace Valley Winery with our half sinkful of  grapes, Jeff and I rolled up our sleeves and began prepping for jam-making. I had a blast separating the grapes from their skins - just pinch them and the green centers pop right out of the purple skins. (A fun task for kids, I'd imagine, and more hands would prevent it from becoming tedious.)

So far, we're thrilled with this batch. The recipe doesn't call for added pectin - it uses what is naturally in the grape skins to set the jam. All of my jars sealed nicely, popping as soon as they were removed from the hot water. We've yet to open one and try it out, but based on the pan leavings we consumed, the set seemed fine and the jam tasted delicious! And, wonder of wonders, we managed to get fifty percent more jam than the recipe called for (six half-pints instead of four). This is a miracle, as we have a history of managing to reduce recipe yields by half. I imagine this has something to do with differences in stove heat and pan size and cooking time. But in this case, it doesn't matter - it just means that there's more jam for us to enjoy!

Important note: What makes this recipe so wonderful is that we used fresh, in-season grapes. I'm sure you could use seedless supermarket grapes and save yourself some hassle, but you'd be losing out on flavor. Supermarket grapes are sweet and unassuming; the more delicate seasonal varieties explode in your mouth, the sweet balanced with tart and a flavor that is quintessentially grapey. Go to the farmers market and grab yourself some in-season, local grapes if you really want good jam!


Classic Grape Jam
From Put 'Em Up. 

8 cups grapes (about 2 lbs)
1/2 c water
4 c sugar 
1/4 c lemon juice

Pinch the grapes to separate the skins from the flesh, putting them in separate bowls. Place the skins in a large nonreactive saucepan, add the water and bring to a boil. Reduce the heat and simmer 15-20 minutes.


Meanwhile, simmer the grape flesh until it loses shape, about 8-10 minutes. Cool slightly and put through a food mill to remove the seeds.


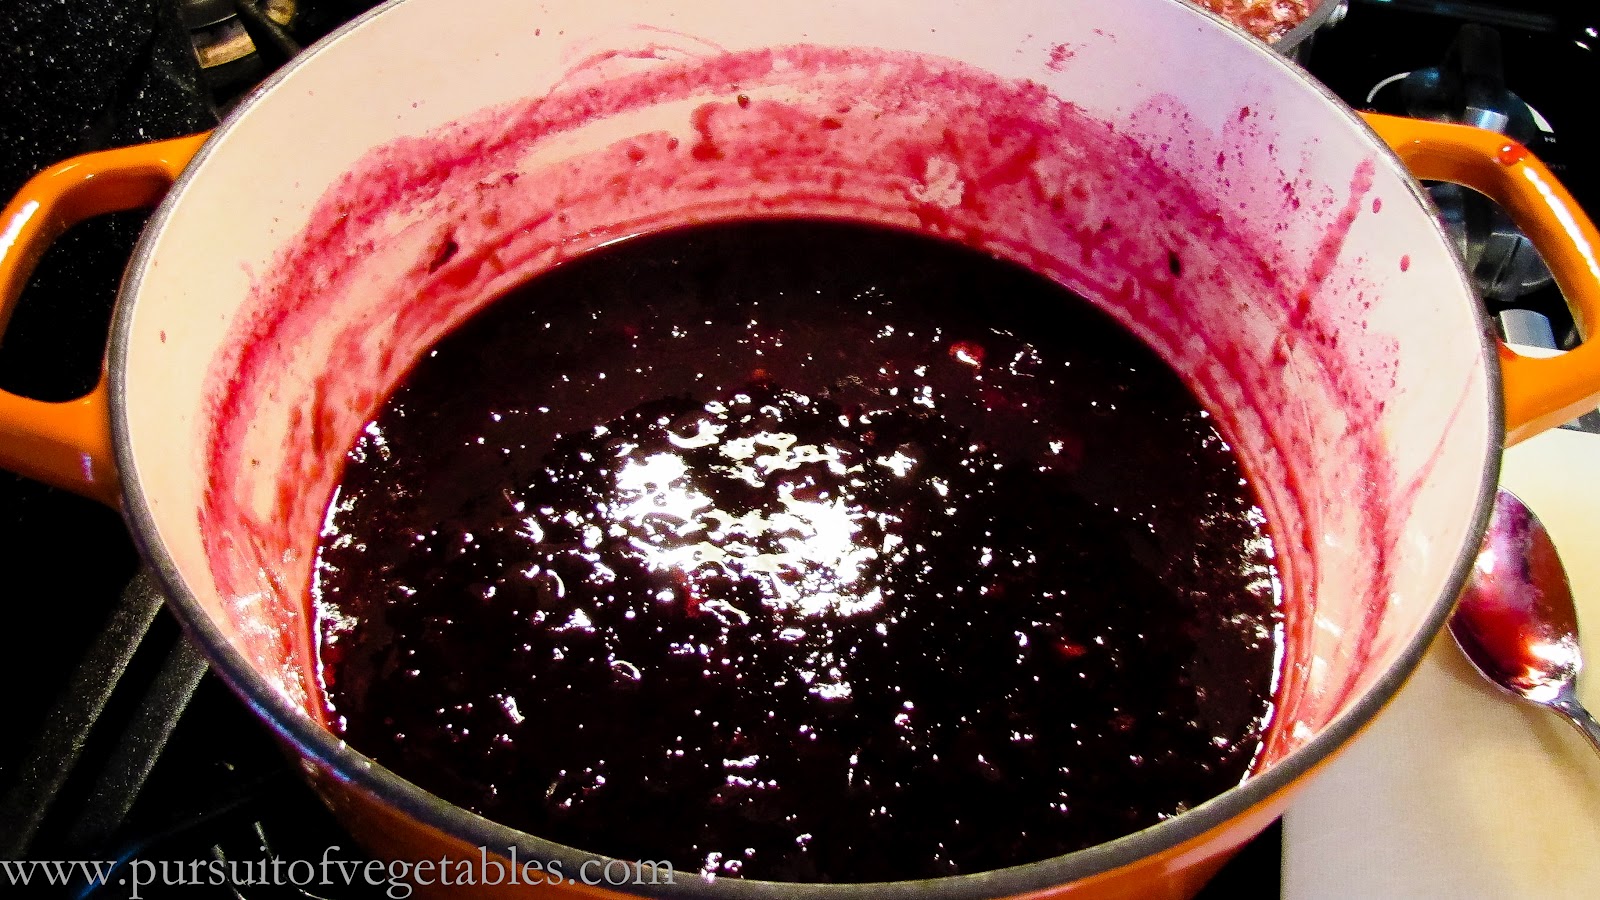
Add the seedless flesh to the grape skins. Stir in sugar until it dissolves, then add the lemon juice. Bring to a boil, then simmer, stirring, for about 10 minutes, until you reach the gel stage (I was using the sheet test, recommended by Marisa from Food In Jars).


Remove from the heat and let rest for 5 minutes, skimming off any foam. Process 10 minutes using boiling water method. (The recipe claims it will yield 4 cups, but I got 6 and the set seemed fine.)


Monday, June 11, 2012

Preserving: Strawberry Jam


In the previous post, I mentioned getting two quarts of strawberries from the farm this weekend. One quart would have meant gorging ourselves on delicious berries, but two quarts meant it was finally jam time! (Don't worry - there were still some to spare for gorging.)

Strawberry season is short and precious. I spend months looking forward to it, hoarding recipes that I will make when I am flooded with delicious berries. Yet, once those berries arrive, I find myself loathe to do anything but eat them straight up. I want to preserve the flavor, but I don't want to deprive myself of any berry-eating in the process. So while I've purchased and picked a number of pints and quarts so far, it took until this weekend, with its two days in a row of berry-picking, for me to be willing to sacrifice some berries for my future enjoyment.

I've only made jam once before and was surprised at how easy the process was. Of course, since the jam I made was chili-tomato, the process wasn't much fun. I seem to recall wearing sunglasses as I stirred the mixture, to keep the noxious pepper fumes from singeing my eyeballs. It was hard to breathe in that kitchen. And poor Jeff, who chopped all those peppers, had tingly fingers for days. Strawberry jam is not at all like that. Hulling berries is simple, mashing them up is fun, and the jam gels up lickety-split. I just wish I got more out of the batch (somehow, the recipes I make from this book yield half as much as they should - this time I got two and a half cups, rather than four. I have no idea why).

Now that I have delicious jam, I need to bake a batch of fresh bread to enjoy it on!

Quick Strawberry Jam
From Put 'Em Up!, my go-to canning book.

1 c sugar
1 tsp Pomona's Universal Pectin
4 c strawberries, washed and hulled
1 tsp calcium water (comes with the pectin)
1/4 c bottled lemon juice (the acidity of fresh lemons can vary widely, so bottled juice is safer)

Whisk together sugar and pectin in a small bowl and set aside. Measure out the lemon juice and calcium water and keep them ready.

In a nonreactive saucepan, mash the berries with a potato masher (the fun part!) until they reach a fairly even consistency.


Slowly bring to a boil, stirring constantly to prevent scorching. Stir in the calcium water and lemon juice, then slowly add the sugar and pectin, stirring to dissolve. Bring back to a boil, still stirring. When the mixture reaches a boil, remove from the heat.


Let rest five minutes, stirring occasionally to release any air bubbles. Skim off the foam. (I neglected this step - all the stirring dissipated my foam so much that I couldn't corral it with a spoon. I'm not sure what difference it makes.)

Ladle into clean half-pint (or 4 oz jam) jars. Process in a boiling-water canner for 10 minutes, then rest 5 minutes more before removing.