Showing posts with label vanilla. Show all posts
Sunday, December 23, 2012
Classic Pizzelles
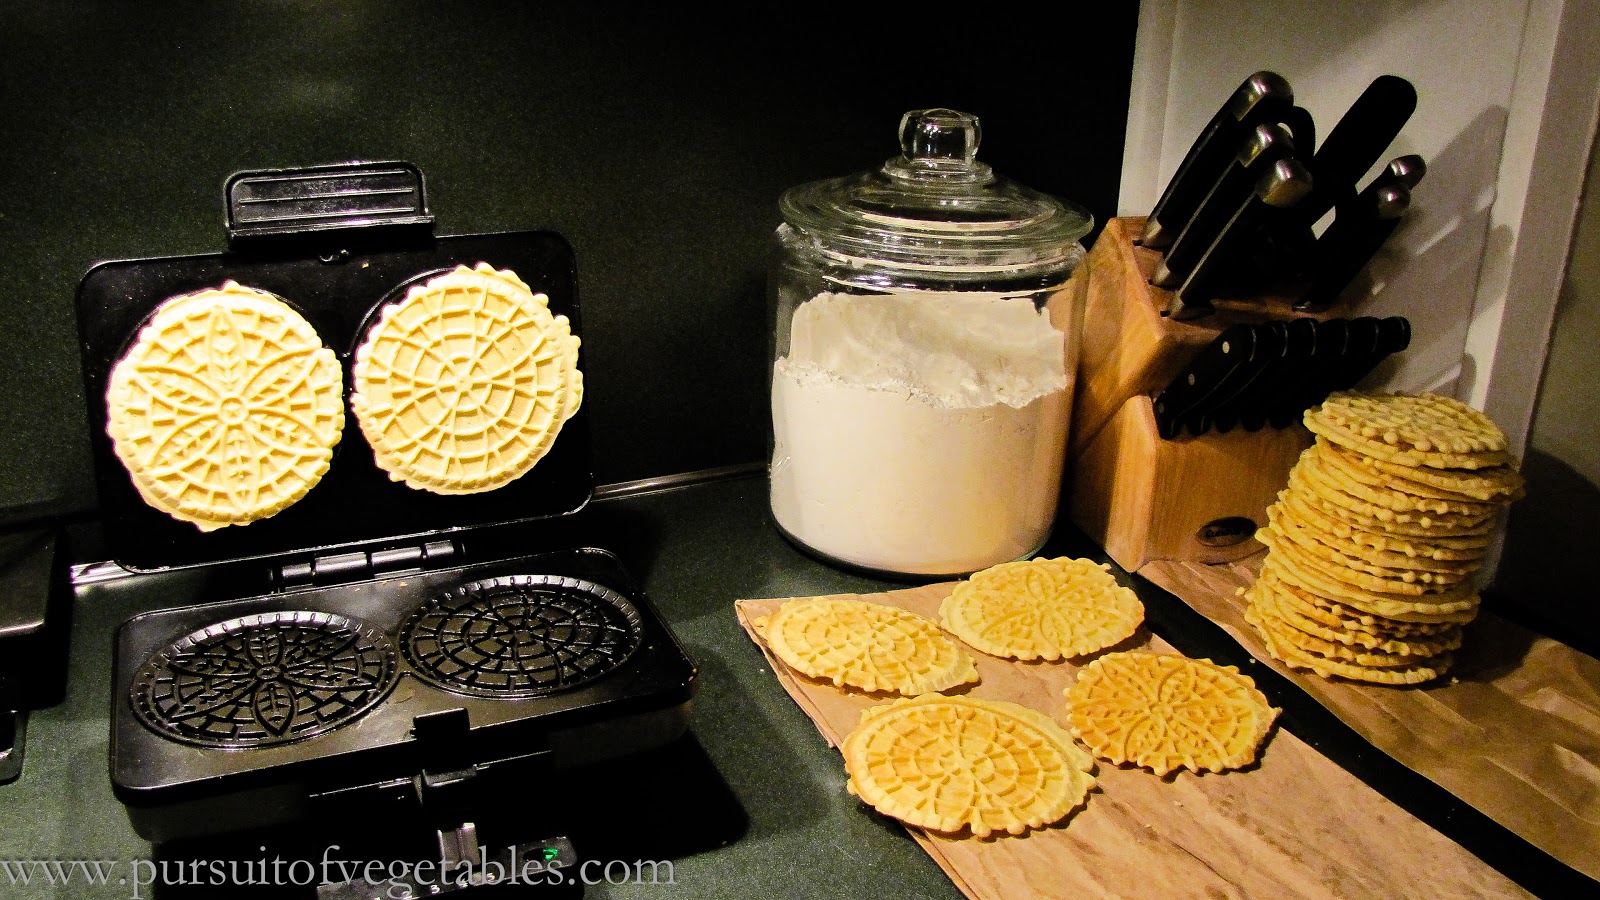
It's not Christmas without some pizzelles! I shared my chocolate pizzelle recipe with you a few years ago. This year, I thought it was time to share the real deal. I've made several pizzelle flavors over the years - vanilla, chocolate, chocolate hazelnut, pumpkin - but vanilla is always my favorite.
My mom has always limited pizzelle-making to the holidays because it can be a time-consuming process. Most presses only make two cookies at a time - the number that I used to eat as a kid would keep my mom busy for hours. I don't mind taking the time as much, since they're my favorite cookies, but I've still been saving them for special occasions. But now that we have a TV in our kitchen (merry Christmas to us!), pizzelle-making is no longer a chore. I can sit in the kitchen, monitoring the press and watching a good movie. It was seriously easy. I may be making these far more often in the future - especially since they store so well!
Classic Pizzelles
1 3/4 c flour
2 tsp baking powder
3 eggs
3/4 c sugar
1/2 c butter, melted and cooled
1 tbsp vanilla
First, set up your work station. You'll need an electric mixer for the batter, a hot pizzelle press, and a paper bag or some paper towels for the pizzelles to cool on. (Why not a cooling rack? This is the way my mom always did it. But I think the paper bags help draw the moisture out of the cookies as they finish cooking, creating a crispier result.)
Whisk together the flour and baking powder in a small bowl. Combine the eggs and sugar in the mixer bowl. Mix on medium speed for about a minute. Add the butter in a slow stream, then repeat for the vanilla. Add the dry ingredients and mix for another 20 seconds or so, until everything is moistened. The batter will be thick.
Drop the batter onto the pizzelle press in teaspoon-sized portions (my press came with a special little plastic spoon for this). Make sure you center each dollop on the pattern (I also find that positioning it slightly to the back of the press works well, since the batter is squeezed forward as the press closes). Close the press and cook 1-2 minutes until slightly golden, or until the press tells you they're done (mine has a convenient green light that goes off).
When the cookies are ready, gently peel them off (it shouldn't be too difficult - the vanilla ones are the easiest to work with of any pizzelles I've made) and place them on the paper bag or towel to harden (I stack them when they're cool to conserve space). Repeat with the rest of the batter (you'll probably want to find a good TV show to watch). These can be stored in a box or tin for several weeks - avoid air-tight containers, which might make them soggy.
Wednesday, April 27, 2011
Vanilla-Fudge Marble Cake
| Props to my brother for arranging his cake artistically for me. |
I talked to my mom about the recipe on Easter and realized that she used to do a few things differently than I do (even though I follow the recipe that she gave me!). First, she uses cocoa powder rather than chocolate syrup for the chocolate batter. She also really marbles the chocolate and vanilla when she adds them to the pan. I just pour the chocolate onto the vanilla. Now, since I use the chocolate syrup, this has an interesting effect - the more liquidy chocolate batter ends up sinking a bit and suspending itself inside the vanilla. It does it every time. I think this looks pretty neat. But a thicker, cocoa powder flavored batter marbled with the vanilla batter would look lovely as well. I don't know how much cocoa powder would be a valid substitute - maybe 1/3 c (for 2/3 c chocolate syrup)? If you're going to experiment, let me know how it goes! I'll probably just stick with my way (unless I'm out of chocolate syrup!).
I've included a picture of my workspace for your edification. This is the majority of the counter space in my kitchen. My kitchen is actually a good size, but the counters are very narrow for some reason. When I'm doing a recipe like this one, which involves several bowls, my mixer and pans, it gets pretty crowded. I long for a kitchen island, where I could spread all this out! But until then, I'll make do with obsessively putting everything away as I finish using it.
I also wanted to do a bit of showing off. I was particularly proud of myself this time around because the cake unmolded so beautifully. My mom used to make this in a tube pan, but I don't have one, so I make do with a bundt pan. That means that the top of my cake is really the bottom. While the top is the best part - awesome, marbley, and moist to the point of gooeyness - it gets hidden and instead the smooth, shiny bottom is visible. Usually, a good bit of that sticks to the pan, and my cake looks a bit of a mess - but not this time! May all your unmoldings be as successful!
Vanilla-Fudge Marble Cake
My mom's recipe, from some newspaper a few decades ago.
3/4 c butter, softened
2 eggs
2 3/4 c flour
1 1/2 tsp baking powder
1/2 tsp baking soda
1/2 tsp salt
1 1/2 c sugar
2 tsp vanilla
1 1/4 c buttermilk
2/3 c chocolate syrup
Preheat the oven to 350° F. Spray a 10" bundt or tube pan with baking spray.
In a medium bowl, stir together flour, baking powder, baking soda and salt. In the bowl of a stand mixer, beat the butter for about 30 seconds on medium. Add the sugar and vanilla and beat until fluffy. Add eggs one at a time, beating about a minute after each addition. Alternately add the flour mixture and the buttermilk, beating after each (I went with 3 additions of flour and 2 of buttermilk).
Reserve 2 c of batter, pouring the rest into the pan (unless you plan on marbling the batters - then set it aside in another bowl).
Add the chocolate syrup to the reserved batter and beat on low until combined (it will be much more liquidy than the vanilla batter, for obvious reasons).
Pour the chocolate batter into your pan, over the vanilla. (If you wish to marble them, you can alternate ladles full of each batter into the pan until it is full, then run a knife through it to blend them a little.)
Bake for about 50 minutes, or until a toothpick comes out clean. Cool 15 minutes on a wire rack before unmolding (I think I waited slightly longer, but the cake was still a bit warm when I did it and I had no trouble).
Labels:
buttermilk,
cake,
chocolate,
dessert,
vanilla
Subscribe to:
Posts (Atom)


