Showing posts with label cake. Show all posts
Monday, October 29, 2012
Vegan Chocolate Cake with Un-Vegan Peanut Butter Glaze
What to do when a hurricane is raging outside? Cook! At least, that's what I chose this morning. To be fair, we were driving up and down I-95 all weekend, so some of these are weekend projects we never got to - I wouldn't normally plan to do all this during a storm. Still, it was a great way to use my time earlier this morning when the storm wasn't so intense. Now I have a new batch of vegetable stock (soup tomorrow), a batch of white beans (dinner today), a loaf of whole wheat bread, another of banana bread, and a batch of granola. I also cleaned and prepped most of the greens that are in my fridge. We're definitely prepared to spend several days holed up at home.
I did not make this recipe today, but I easily could have. It's a wonderful quick cake using ingredients you probably have on hand already. Jeff and I first made the cake a few weeks ago when, half an hour before Monday night football, we decided we wanted dessert. It came together and went into the oven before the game and was ready to eat by halftime. We made it again for a Halloween party on Friday, this time with a peanut butter glaze to give it a little orange-and-black Halloween spirit. Again, the cake was ready in under an hour, and the glaze took seconds to whisk together. If you're looking for a nice dessert to throw together with little mess and no fuss, whether before a football game or in the middle of a hurricane, this is it!
Note: while the cake is vegan, the glaze does have a little milk. You could easily sub in soy milk or almond milk to make it vegan as well.
Vegan Chocolate Cake with Un-Vegan Peanut Butter Glaze
Cake is barely adapted from Joy the Baker. Glaze is adapted from Pixelated Crumb.
cake:
2 1/4 c flour
1/2 c cocoa powder
1 1/2 c sugar
1 tsp baking soda
1/4 tsp baking powder
1/2 tsp salt
1 c warm water
1/2 c + 1 tbsp canola oil
2 tsp vanilla extract
1/3 c bittersweet chocolate chips
glaze:
3/4 c powdered sugar
2 tbsp skim milk
2 tbsp smooth peanut butter
1/2 tsp vanilla extract
Preheat oven to 350° F. Coat a 9" bundt pan with cooking spray and dust with cocoa powder.
In a large bowl, whisk together flour, cocoa powder, sugar, baking soda, baking powder and salt. In a smaller bowl, whisk together water, oil and vanilla.
Add the wet ingredients to the dry ingredients and fold together until just moistened. Stir in chocolate chips, then spoon the thick batter into the prepared pan.
Bake for 30-35 minutes, until a cake tester comes out clean. Cool in the pan for ten minutes or so, then invert onto a rack to cool completely.
Once the cake is baked, whisk the glaze ingredients together in a small bowl (you may need to sift the powdered sugar to remove chunks). Pour over the top of the cake, letting it drizzle down the sides. The glaze will harden a bit after a minute or two. Serve and enjoy!
Labels:
cake,
chocolate,
dessert,
peanut butter,
vegan,
vegetarian
Wednesday, April 27, 2011
Vanilla-Fudge Marble Cake
| Props to my brother for arranging his cake artistically for me. |
I talked to my mom about the recipe on Easter and realized that she used to do a few things differently than I do (even though I follow the recipe that she gave me!). First, she uses cocoa powder rather than chocolate syrup for the chocolate batter. She also really marbles the chocolate and vanilla when she adds them to the pan. I just pour the chocolate onto the vanilla. Now, since I use the chocolate syrup, this has an interesting effect - the more liquidy chocolate batter ends up sinking a bit and suspending itself inside the vanilla. It does it every time. I think this looks pretty neat. But a thicker, cocoa powder flavored batter marbled with the vanilla batter would look lovely as well. I don't know how much cocoa powder would be a valid substitute - maybe 1/3 c (for 2/3 c chocolate syrup)? If you're going to experiment, let me know how it goes! I'll probably just stick with my way (unless I'm out of chocolate syrup!).
I've included a picture of my workspace for your edification. This is the majority of the counter space in my kitchen. My kitchen is actually a good size, but the counters are very narrow for some reason. When I'm doing a recipe like this one, which involves several bowls, my mixer and pans, it gets pretty crowded. I long for a kitchen island, where I could spread all this out! But until then, I'll make do with obsessively putting everything away as I finish using it.
I also wanted to do a bit of showing off. I was particularly proud of myself this time around because the cake unmolded so beautifully. My mom used to make this in a tube pan, but I don't have one, so I make do with a bundt pan. That means that the top of my cake is really the bottom. While the top is the best part - awesome, marbley, and moist to the point of gooeyness - it gets hidden and instead the smooth, shiny bottom is visible. Usually, a good bit of that sticks to the pan, and my cake looks a bit of a mess - but not this time! May all your unmoldings be as successful!
Vanilla-Fudge Marble Cake
My mom's recipe, from some newspaper a few decades ago.
3/4 c butter, softened
2 eggs
2 3/4 c flour
1 1/2 tsp baking powder
1/2 tsp baking soda
1/2 tsp salt
1 1/2 c sugar
2 tsp vanilla
1 1/4 c buttermilk
2/3 c chocolate syrup
Preheat the oven to 350° F. Spray a 10" bundt or tube pan with baking spray.
In a medium bowl, stir together flour, baking powder, baking soda and salt. In the bowl of a stand mixer, beat the butter for about 30 seconds on medium. Add the sugar and vanilla and beat until fluffy. Add eggs one at a time, beating about a minute after each addition. Alternately add the flour mixture and the buttermilk, beating after each (I went with 3 additions of flour and 2 of buttermilk).
Reserve 2 c of batter, pouring the rest into the pan (unless you plan on marbling the batters - then set it aside in another bowl).
Add the chocolate syrup to the reserved batter and beat on low until combined (it will be much more liquidy than the vanilla batter, for obvious reasons).
Pour the chocolate batter into your pan, over the vanilla. (If you wish to marble them, you can alternate ladles full of each batter into the pan until it is full, then run a knife through it to blend them a little.)
Bake for about 50 minutes, or until a toothpick comes out clean. Cool 15 minutes on a wire rack before unmolding (I think I waited slightly longer, but the cake was still a bit warm when I did it and I had no trouble).
Labels:
buttermilk,
cake,
chocolate,
dessert,
vanilla
Monday, April 4, 2011
Triple Chocolate Mousse Cake
Yesterday was my birthday. The awesome things about birthdays are that I get to plan my menu and choose whatever I want, guilt free. It gives me the opportunity to try some recipes I've had sitting around that were deemed too rich for most occasions (especially since I'm usually cooking for two, without anyone nearby to foist leftovers on). It's not just about eating what I want, but getting the opportunity to make it.
So I went for the triple chocolate mousse cake. The one that took the better part of the afternoon to make, using most of the bowls in our kitchen more than once. It was awesome (and will be for the better part of the week, I'd imagine - we're not finishing that baby any time soon). And it was fun. I got to test my mettle with a variety of different techniques, all but one of which were successful (you'll hear about my issues with the second layer in a bit). This was the first time I'd ever worked with gelatin, and that went extremely well - just look at that velvety smooth top layer!
| Props to Jeff who chopped so much chocolate he developed a blister from the knife. |
I made sure to buy excellent chocolate for the occasion. We used Callebaut 66% bittersweet and Mitica 44% milk chocolate. I'd never heard of Mitica before - I was buying bulk blocks of chocolate from Whole Foods and it was the only milk chocolate sold that way. I knew the Callebaut would be deliciously dark and bitter - perfect for baking. What I didn't know was that the Mitica milk chocolate would be so delightful! I thought it tasted almost like butterscotch - I have since found a website that claims it has toffee and caramel notes. Either way, it made a gorgeous mousse. As I read the recipe, I realized that the top layer was originally supposed to be white chocolate - it was changed by the blogger who I got the recipe from. I love white chocolate and would have probably chosen that route if I'd noticed sooner. But I'm glad I didn't, because I got to try a delicious new milk chocolate instead. I think that layer would be great as a stand-alone mousse dessert. I'll have to try it sometime.
Triple Chocolate Mousse Cake
Adapted slightly from Confections of a Serial Baker.
Flourless Chocolate Cake (bottom layer):
6 tbsp butter, cut into 6 pieces
7 oz bittersweet chocolate, finely chopped
3/4 tsp instant espresso powder (I left this out, as I usually do, because I hate coffee flavors - I think this is why my two bottom layers ended up quite similar colors, instead of a pretty gradient)
1 1/2 tsp vanilla extract
4 large eggs, separated
pinch of salt
1/3 c light brown sugar
Bittersweet Chocolate Mousse (middle layer):
2 tbsp cocoa powder
5 tbsp hot water (I got mine out of the double boiler I used for the first layer)
7 oz bittersweet chocolate, finely chopped
1 1/2 c heavy cream
1 tbsp sugar
pinch of salt
Milk Chocolate Mousse (top layer):
3/4 tsp powdered gelatin
1 tbsp water
6 oz milk chocolate, finely chopped
1 1/2 c heavy cream, divided
Bottom Layer:
Butter the bottom and sides of a 9" springform pan (parchment paper on the bottom is helpful, too). Center a rack in the oven and preheat to 325°. Combine the butter, chocolate and espresso powder in a double boiler (in my case, just a metal bowl set over a pot of boiling water).
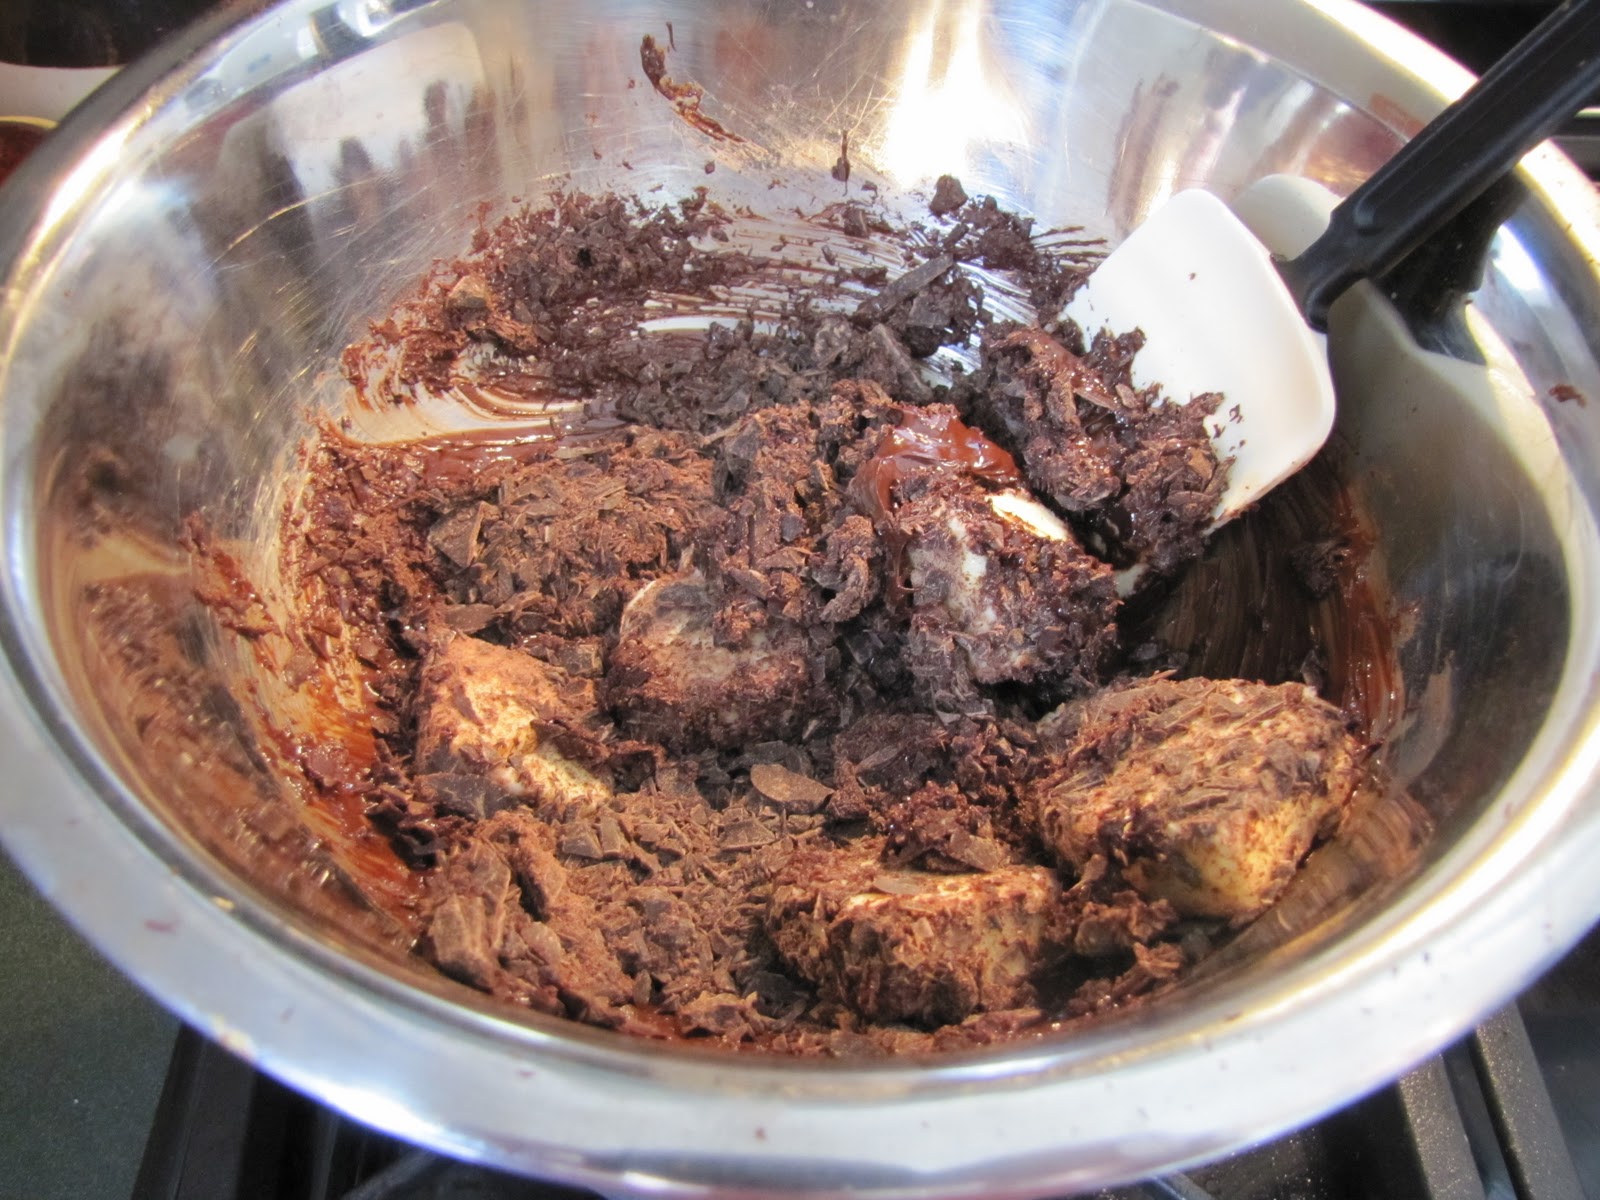
Stir with a rubber spatula until the mixture is totally smooth.
Remove from the heat and let cool for about 5 minutes, then whisk in vanilla and egg yolks (don't disassemble your double boiler - you'll need it again. I turned the stove off and put a lid on my water to keep it warm). Set aside.
While the mixture is cooling, beat the egg whites in a stand mixer with whisk attachment on medium speed for 30 seconds, until foamy. Crumble in half the brown sugar (removing any lumps with your fingers) and beat 15 seconds until incorporated. Crumble in the rest of the brown sugar and beat on high speed until stiff peaks form (the instructions say 1 minute, but it definitely took me a few). Take one third of the egg white mixture and add it to the chocolate mixture, whisking until smooth (this is to lighten the chocolate mixture, to make folding easier). Then fold in the rest of the egg whites with a spatula until no streaks remain (fold gently - the goal is to keep as much air in those egg whites as you can manage). Pour the batter into the prepared springform pan.
Bake the cake until the edges are firm and the middle is set but soft (meaning that it will spring back when your finger touches it), about 14-18 minutes. Transfer cake (still in the pan!) to a wire rack and cool for at least 1 hour (the cake will deflate a bit as it cools).
Middle layer:
In a small bowl, mix together the cocoa powder and hot water, then set aside. Melt the chocolate in the double boiler, stirring until smooth. Remove from the heat and cool slightly, 2-5 minutes (as I said above, I'd advocate a short cooling time, if possible).
In your stand mixer (hopefully you've cleaned the bowl since the first round), whip the cream, sugar and salt on medium speed until the mixture thickens, about 30 seconds (this can also be started while your chocolate is melting, to speed things along). Increase the speed to high and whip 30-60 seconds, until soft peaks form. Whisk in the cocoa powder mixture until smooth.
Then, add one third of the cream mixture to the melted chocolate and whisk in (again, this is to lighten it up, to facilitate folding the rest of the cream in). Fold in the remaining cream gently with a rubber spatula until no streaks remain.
Spread the mousse over the cake layer in your springform pan. Use a spatula to smooth out the top, and be sure to wipe any smears on the sides of the pan - they'll show up on the top layer later on. Refrigerate for 15 minutes before adding the top layer.
Top layer:
In a small bowl, sprinkle the gelatin over the water. Let stand 5 minutes (the gelatin will absorb the water). Place the milk chocolate into a medium bowl. Bring 1/2 c cream to a boil in a small saucepan. Remove the pan from the heat, add the gelatin mixture and stir until dissolved. Pour the hot cream mixture over the chocolate and let stand a few seconds so the cream can begin to melt the chocolate. Then, whisk until the mixture is smooth. Cool for a few minutes (I just let it cool for as long as it took me to finish the next step).
In your (clean!) stand mixer with whisk attachment, whip the remaining 1 c of cream at medium speed until it thickens. Then increase the speed to high until soft peaks form. Whisk one third of the cream into the chocolate mixture, then fold in the rest with a rubber spatula until no streaks remain. Pour the mousse into the pan over the middle layer and smooth the top with a spatula.
Refrigerate the cake until all the layers are set, at least 2 1/2 hours.
Wednesday, February 2, 2011
Rustic Cocoa Loaf Cake
I've been grumpy a lot lately. It's weird because so many things are going well. Even on days when good things happen, I find myself discontented and grumbly. I think it's the weather.
I was prepared for this to be a hard semester. I'm spending the vast majority of it home by myself. I figured I'd end up a little stir crazy. But it hasn't been so bad. Jeff's snow days and the job talks I've been going to campus for mean that I've been around people far more than I'd expected. This is good. I think my problem is the winter itself. I want to go outside. I want to watch my plants start to peep up out of the soil. I want to rake flower beds and trim branches to get ready for the new season.
But alas, my garden is buried under a few storms' worth of snow. And today, a fresh coat of ice.
What's a girl to do when the forces of nature are working against her? Bake something chocolate, of course!
Today's recipe came about entirely because I was grumpy. I thought chocolate might cheer me up. It did, a little. That and TMC's late medieval and Tudor movie marathon last night. But I'm sure the cake was a big part of it.
This is an interesting sort of cake. It comes out of the oven looking like a normal loaf, but as it cools the center collapses almost like a souffle. The center of the collapsed bit is a rich, dense bundle of chocolate goodness. The top crust seemed lighter and eggy to me, almost like the top of an angel food cake (makes sense - three eggs is a lot for one loaf). Overall, this was perfectly satisfying for a lousy, icy, grumbly day.
Rustic Cocoa Loaf Cake
Adapted from The Spiced Life blog.
6 tbsp high-quality Dutch cocoa powder (I confess, I just used the normal stuff I had on hand)
1/4 c heavy cream
1/4 tsp baking soda
1/4 tsp salt
1 stick butter, softened
1 1/2 c superfine sugar
3 eggs
1 tsp vanilla extract
1/2 c chocolate chips (my secret weapon - I definitely think they amped up the cake)(1/4 tsp espresso powder - The recipe includes this. Espresso powder is often used to enhance the flavor of chocolate. Since I don't like coffee and don't want to taste coffee in my chocolate, I always leave it out.)
Preheat the oven to 325°F. Grease a loaf pan with baking spray.
Sift the cocoa powder (and espresso powder, if you're going there) into a small, heatproof bowl (I confess again, I didn't actually bother sifting. It still came out fine). Add the cream to a small saucepan and put over low heat until it just begins to boil. Remove from the heat and pour over the cocoa. Use a spatula to mash them together into a thick paste.
In a separate bowl, whisk together the flour, baking soda and salt. Set aside.
Cream the butter and sugar together in the bowl of a stand mixer until smooth and fluffy. Add the cocoa paste and beat together until the mixture is smooth.
With the mixture on low speed (speed 2 on my Kitchenaid), add the eggs one at a time, scraping down sides between each one. Then add the vanilla and mix well. Finally, turn the mixer down to low and add the flour mixture in three batches, scraping down sides between each addition. After the last addition, increase the speed a bit for a few seconds until the batter looks thoroughly mixed. Add the chocolate chips and stir to combine.
Pour the batter into the prepare pan and smooth the top with a spatula. Bake about 70 minutes, until a cake tester comes out clean. Cool the cake in the pan for about 5 minutes, then transfer to a cooling rack. (The cake will collapse in the middle. That's what makes it rustic.)
Subscribe to:
Posts (Atom)