Showing posts with label apple. Show all posts

Wednesday, October 10, 2012

Baked Oatmeal Pudding


I don't usually make complicated breakfasts. I like the eat as soon as I get up in the morning, so something with a lot of prep doesn't appeal to me. Normally, breakfast is just some cereal or granola and milk.

Now that the mornings are getting colder, I'm craving something warm and comforting. I love oatmeal - as a kid I was addicted to those horrible sugary Quaker Oats packets. I've gotten used to plain quick oats sweetened with a bit of maple syrup, but it's not the same for me. I still want something a bit more interesting. This baked oatmeal fits the bill perfectly. It's packed with fruit and nuts and some brown sugar to amp up the flavor. The eggs and oats make it firm, while the milk makes it slightly creamy. It's a delicious and healthy dish to start the day with.

It makes a nice healthy dessert as well! Since it's more work than I would want to do first thing in the morning, I made this as a late-night treat, then had plenty of servings left to reheat for breakfast over the next several days. It reheats beautifully, whether in the microwave or the oven. 

Baked Oatmeal Pudding
From Whole Grains for Busy People.

3 bananas
1 c water
1 c rolled oats
1/4 tsp salt
2 tbsp butter
2 eggs, beaten
1 1/2 c 2% milk
1 grated apple
1/4 c + 2 tbsp brown sugar 
1/3 c dried cherries
1 tsp vanilla extract
1 tsp ground cinnamon
1/2 tsp ground ginger
1/2 c pecan halves
fresh berries, to serve

Preheat oven to 350° F.

Spray a 9 x 9 baking dish with cooking spray. Slice the bananas and layer them across the bottom of the dish. 


Pour the water into a medium saucepan and bring to a boil. Stir in the oatmeal and salt. Cover the pan, turn off the heat and let sit for 5 minutes. Then stir in the butter.

Meanwhile, combine the eggs, milk, apple, 1/4 c brown sugar, cherries, vanilla, cinnamon and ginger in a medium bowl. When the oatmeal is ready, add to the bowl and whisk well to combine all the ingredients.


Pour the oatmeal mixture into the baking dish over the bananas. Bake for 25 minutes, then remove and sprinkle the pecans and 2 tbsp brown sugar over the top.


Return to the oven for another 30 minutes, until the center is set. Cool 10 minutes, then spoon into bowls and serve, topped with fresh berries.


Sunday, September 16, 2012

Apple Day at Terhune Orchards


This weekend, Jeff and I visited Terhune Orchards for Apple Day! I love any opportunity to visit the Mounts' lovely farm, but it's especially fun during a special event.

Apple season is a wonderful time. I keep apples on hand for snacking during most seasons of the year, but there's nothing like one fresh off the tree. The crisp crunch when you bit into a truly fresh apple is irreplaceable. So, of course, when it comes to apple picking, I tend to get excited and overdo things.


When Jeff and I arrived at Apple Day, we went straight for the orchard to pick our own apples. I remember the first time we went apple picking at Terhune, a few years ago. We picked a dozen or so apples before we figured it was more than we could manage. Perhaps it was, back then. Today, with our canning and preserving expertise, we are made of sterner stuff. We ended up with over 18 pounds of Empires and 12 pounds of Stayman-Winesaps.


Our first apple-picking excursion last year focused on Empires, which we used for applesauce. The sauce was delicious and perfectly sweet without any additional sugar. We loved it, so we knew another batch would be in order this year. Stayman-Winesaps are nice crispy tart apples - one of my favorite eating varieties. They're also good for all sorts of cooking. We made a batch of applesauce with them last year, as well, but it needed some sugar (which I'd prefer not to add if I don't have to). We ended up making a batch of apple butter with this year's batch, since that required sugar anyway. We still have a vast quantity of apples to find a use for. More applesauce, at the very least, is in order for this week.


Once we'd picked our apples and stashed them in our car, Jeff and I were free to roam around the farm.


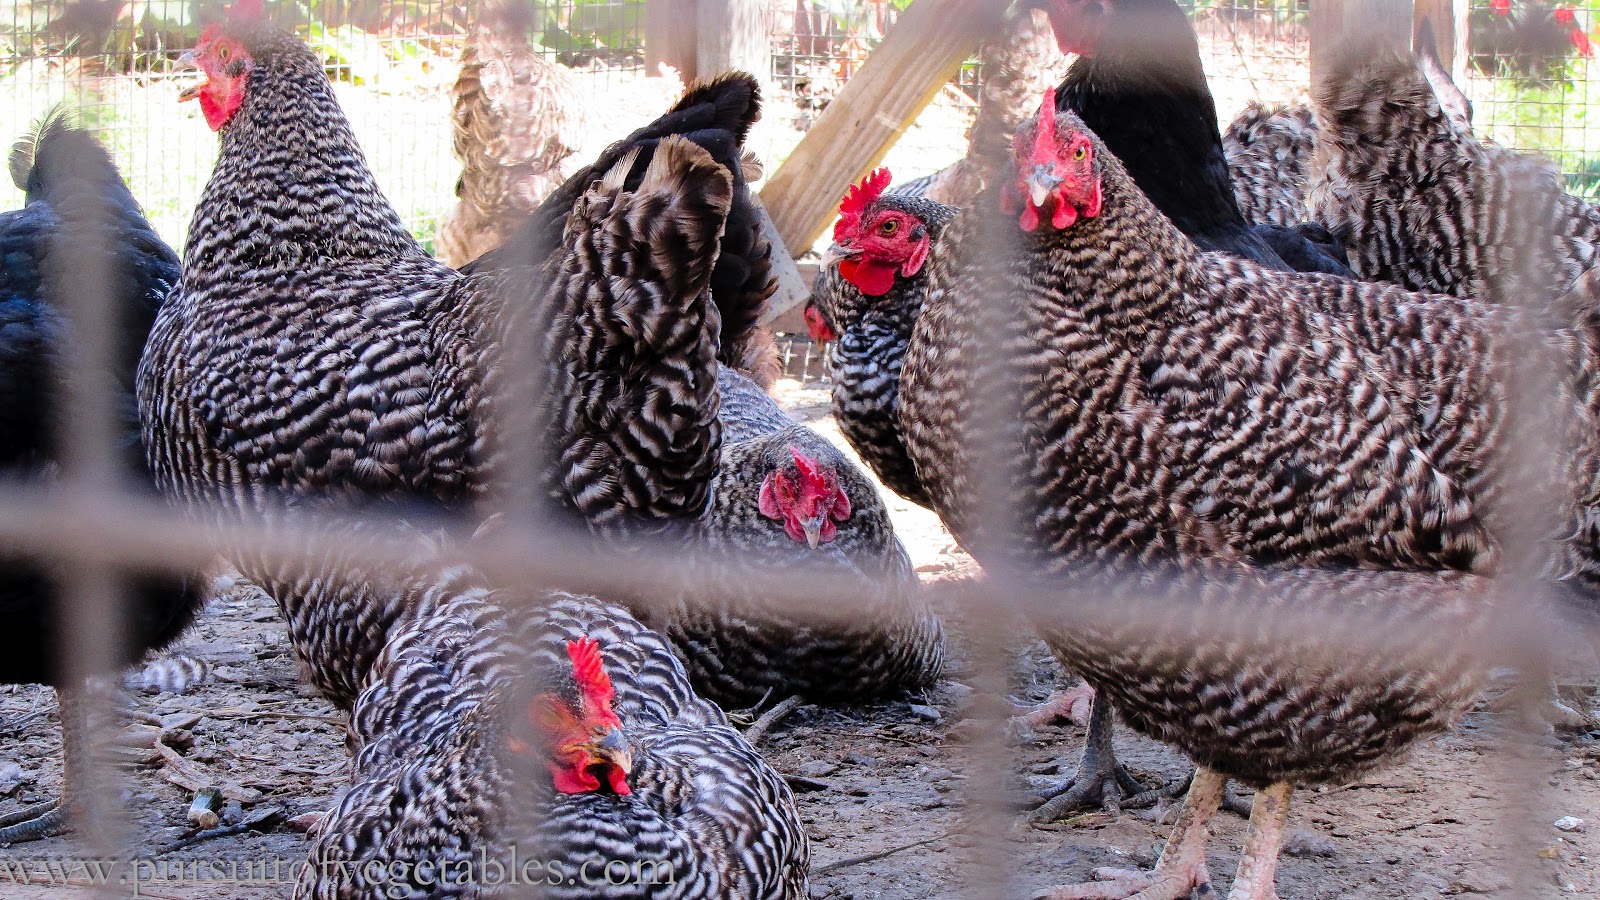
We visited the lovely chickens in their coop. I find the idea of fresh eggs every day so enticing!


It was an absolutely gorgeous day to be roaming around the farm. I took this picture from down by the pond. Check out the solar panels on the roof - all 21st-century farms ought to be so sustainable!


We wandered to the other end of the farm and made our way through the corn maze. It was not as challenging as last year's, since we managed to stumble on the correct path almost right away. Then we stopped by the food tent for some barbecue chicken and apple treats.


Finally, we examined the collection of pumpkins. We decided it was a bit early to buy ourselves carving pumpkins, though (and it's likely we'll get them from the CSA anyway). Instead, I opted for a picturesque cheese pumpkin to decorate my living room until I decide to eat it. Yummy.

Apple Day may be over, but Terhune still has apple picking every day and fall festival events most weekends (pretty similar to Apple Day, from the sound of them, but probably less crowded). Even if you don't live near Terhune, do yourself a favor and get to a farm some weekend. In my opinion, there's no better way to spend a crisp, sunny fall afternoon!

Thursday, March 1, 2012

Pumpkin-Apple Granola Bars with Chocolate Chips


I'm currently sitting on a train through the lovely snow-covered Hudson Valley, headed to Toronto for a weekend conference. One of my big worries leading up to this trip has been about food. This is the first traveling I've done since instituting my low cholesterol diet. To top it off, I'm not eating meat right now either. While a twelve-hour train ride is otherwise a rather enjoyable way to travel, I worried that the cafe car offerings would not work for me.

My solution was to bring a cooler bag full of food. I packed myself a chickpea and spinach salad for lunch. I brought a large chunk of the tasty focaccia I made the other day. I made some buttermilk ranch popcorn and a batch of these awesome granola bars. I was going to pack some clementines, and then I remembered the last time I took this trip, when customs officials confiscated the orange of the man sitting in front of me (don't try to bring citrus fruits across the border - it's not worth it). Now I sit on the train in comfort, worry-free. I will buy a cafe car salad for lunch, while they're still stocked (last time they ran out of substantial food by dinnertime), then eat the rest of my stash in comfort as the day goes on. Tricky diet + travel = no problem.

The granola bars are definitely the most important item in my cooler bag. Not only are they healthy and filling, but they keep really well. Most of my food won't last past today (the popcorn could, but it tends to get stale quickly), but these granola bars will keep me happy all weekend long. Besides binding things together, the applesauce keeps them nice and chewy. I think my homemade applesauce is really the key to these. I canned a big batch using tart Stayman Winesap apples from Terhune Orchards in October. The tartness and the fresh apple flavor are shine through more strongly than the pumpkin in these bars (my homemade pumpkin puree is also a bit weak). I don't think store-bought applesauce would pack the same punch.

I don't mean to deter you, of course, from trying this recipe with store-bought ingredients! I have made these with store-bought pumpkin as well and gotten a stronger pumpkiny flavor. They will be a delicious snack whatever your ingredients - I just get the added bonus of autumn memories with mine!

Now that we've passed through Albany and are heading down the Erie Canal, I think it's high time for my snack. Excuse me while I enjoy a chewy, spicy, appley, chocolatey granola bar and enjoy the view.

Pumpkin-Apple Granola Bars with Chocolate Chips
Slightly adapted from Comfort of Cooking.

3 1/4 c rolled oats
1/4 tsp ground nutmeg
1/8 tsp ground ginger
1/8 tsp ground cloves
1/2 tsp ground cinnamon
1/2 tsp salt
3/4 c light brown sugar
1/2 c pumpkin puree
1/4 c unsweetened applesauce
1/4 c honey
1 tsp vanilla extract
3/4 c chocolate chips

Preheat oven to 350°F. Spray an 8 x 8 baking pan with baking spray.

Whisk oats, spices and salt together in a large bowl. In a smaller bowl (or Pyrex measuring cup), combine the sugar, pumpkin, applesauce, honey and vanilla. Pour over oat mixture and stir well until all the oats are coated. Stir in chocolate chips.


Spread the mixture in the prepared pan. (If your 8 x 8 pan is in use, like mine was, you can use a portion of a larger pan. The mixture stays where you put it.) Press the granola together firmly, or it will crumble when you try to cut it later! (I actually liked using a big pan for this very reason - it allowed me to pack everything together more tightly. I still had some bars fall apart as I cut them, but not as many as last time.)


Bake for 30-35 minutes(around 40 if you use a glass baking dish), until golden brown and set. Let cool completely before cutting.

Tuesday, November 8, 2011

Collard Greens with Apple and Balsamic


It's been a while since I've posted. I've had a billion things to do and have felt like I've been falling behind in everything. Only in the last few days have I been able to tie off some of my loose ends and move on. That means that I have the leisure to blog again, and perhaps get caught up on some posts that I've had on the back burner.

I made these collard greens with apple and balsamic vinegar almost a month ago. Collards are incredibly healthy and can be very easy to prepare. This preparation blanches them before stir-frying to speed up the cooking process. The light, crisp apple is a nice contrast to the dense, almost meaty greens, and the balsamic provides a lovely acidic sweetness at the end.

This could be a nice addition to your Thanksgiving table - a nice light contrast to the heavy traditional side dishes.

Collard Greens with Apple and Balsamic
From The Best of Food and Wine 1995.
 
1/2 lb collard greens
1 1/2 tbsp canola oil
1 small onion, thinly sliced
1 small tart apple, peeled, cored and thinly sliced lengthwise (I used a freshly-picked Winesap)
1 tbsp balsamic vinegar
salt and pepper to taste

Remove the stems and center ribs from the collard greens. (I fold mine in half along the stem and pull the leaves down. They should tear off neatly from the stems. I learned this from Paula Deen before I'd ever even considered trying collards.) Chop the leaves into bite-sized pieces.

Bring a small pot of water to a boil. Cook the collards for 5 minutes, then drain and set aside.


In a large skillet, heat the oil over medium-high heat. Add the onion and cook 2 minutes, until softened, stirring frequently. Add the apple slices and cook another 2 minutes, until tender.


Add the collards to the pan and stir until well combined. Increase the heat to high, add the balsamic vinegar and cook, stirring constantly, for a minute or two, until greens are coated. Remove from heat, season with salt and pepper, and serve. Easy peasy.

Tuesday, October 18, 2011

Apple Crumb Pie and Blog-i-versary


Today marks my first blog-i-versary! My blog was born a year ago today. In that time, I've written eighty-four posts, between six and nine per month (except for those months when I was overseas). I now get around two hundred hits per month. Blogger tells me that I have nine followers, but I know there are more that follow via blog readers who aren't counted. Not bad for an enterprise that I am reluctant to promote.

I have two resolutions for my next year of blogging. The first is to try to promote the blog a bit. I'm toying with the idea of business cards. At the very least, I need to bring it up in conversation with people. The second resolution, which I'm already working on, is to take better pictures. I need to learn more about my camera and work on food styling. I can't fix the terrible lighting in my kitchen, or the ugly green countertop, but I can find new places to take my pictures. Here's to another fun year of recipe testing!

To celebrate my blog-i-versary, I made a pie from the lovely fresh apples I mentioned in my last post. I have grown to love apple pie, but I have no interest in the double-crusted varieties. I don't really understand the second crust - I suppose that I don't love pie crust enough to appreciate it. I'd much rather have sugary, cinnamony crumbs atop my pie. So that's what we have here. A little allspice and nutmeg gives the pie a nice kick. Served with a scoop of vanilla ice cream, it's the perfect fall treat!  

Apple Crumb Pie
Adapted from Baking Bites.

Crust: 
1 1/4 c flour
1 tbsp sugar
1/2 tsp salt
6 tbsp cold butter
4 tbsp ice water

Filling: 
3 large apples
2 tsp lemon juice
1/2 c light brown sugar
2 tbsp flour
1 1/4 tsp cinnamon
1/2 tsp allspice
1 tsp vanilla extract

Crumb topping:
1 1/4 c flour
1/2 c brown sugar
1 1/2 tsp cinnamon
1/4 tsp nutmeg
1/4 tsp salt 
1/2 c butter, melted and cooled

Prepare your crust:
Put flour, sugar and salt in a food processor and pulse to combine. Cut your butter into teaspoon-sized pieces and add to the flour mixture. Pulse until the butter is no bigger than pea-sized and blended into the flour. Add water until a ball of dough forms. Make that ball into a disc, cover in plastic wrap and chill about an hour.


Preheat the oven to 425°F. Remove the dough from the fridge and roll out on a floured surface into a circle that fits your pie pan (I used a 9" pan, but I think this recipe could fit any pan from 8-10").


Transfer the crust to your pie dish.(Mine was pretty firm, so I just lifted it with my hands. If your dough seems more delicate, you may want to wrap it around your rolling pin to make the transfer.)Press in gently to fill the dish.


Use your knife to cut off the excess dough, or run your rolling pin over it (my preferred method, although the little handles on my pie dish get in the way, so I need to touch it up with a knife). The extra dough can be re-wrapped and refrigerated or frozen for later use (I generally use these to make tiny pies later on).


Make the filling:
Put the lemon juice in a medium bowl. Peel, core and thinly slice the apples, adding them to the bowl and tossing with lemon juice as you go. Mix in the rest of the ingredients and toss to combine. Let stand a few minutes.


Prepare the crumb topping:
In another bowl, whisk together the flour, sugar, cinnamon, nutmeg and salt. Add the melted butter and stir until crumbs form.


Pour the apple mixture into your pie crust in an even layer.


Sprinkle crumb topping on top, being careful to cover the apples completely.


Bake for 20 minutes at 425°F. Lower the oven temperature to 375°F and bake for an additional 35-40 minutes. If the crumbs begin to brown too much (like mine did), you might want to cover the pie with foil. Cool before cutting. Serve with a nice scoop of vanilla ice cream!

Sunday, January 30, 2011

Apple Cheddar Scones


Every now and then I come across a recipe that looks so delicious that I need to try it immediately. And still, somehow, it takes me a long while to get around to most of them (like this one). I saw this recipe on Smitten Kitchen back in October and knew it would be a winner, but didn't get around to it until last week (this was my second batch!). It's a little sad because I know how perfect this scone would be for the fall. But I suppose its flavor is hardly diminished by waiting until winter. Obviously we like them, since the best final product picture I could get had a bite taken out of it. You're lucky Jeff showed restraint - mine was half gone before I realized I hadn't taken the picture.

I'm a fan of scones, in general (the tender, flaky ones you make at home, not the hard, crumbly ones served at many cafes), and yet I rarely ever make them for myself. My grandmother loves scones, so I've gotten in the habit of baking them for her, and not saving any for myself. This recipe has assured that they will come up in my own rotation more often.

Apple and cheddar is such a great combination. I wasn't quite sure what to expect with these - would they be sweet or savory? My conclusion is that they're still sweet. Even the tartest of apples sweetens up when roasted, and the sugar inside also seals the deal. And yet there is cheese. The cheddar is the first flavor to hit your tongue (especially any cheese that's migrated to the bottom and gotten golden-brown and crispy). After that, there's tender butteriness and sweet apple. It's a good way to start or end any day.

The one part of the recipe that scared me off a bit was Deb's comment that these taste amazing the first day, ok the second and terrible the third. I didn't want to do all this work and end up with bad-tasting scones, so I have been freezing them and only baking what I'm about to eat. They freeze really well - just toss them right on the baking sheet and add a few minutes to the cooking time. That way you'll have the delicious right-out-of-the-oven flavor every time. The step I've been haphazard about is the egg wash. I did it the first few times, but I only remembered to sprinkle on sugar once. Since I wasn't baking them all at once, I put the egg wash in a tupperware in the fridge to use when I needed it. While this was a good plan, adding salt to the egg first was not. I think the salt caused the egg to spoil somehow - it was a terrible color the next day, although it smelled ok. I still didn't use it. This time around, I'm skipping the salt entirely and storing the egg by itself. But the long and short of this is that I can attest that the scones are delicious whether or not the egg wash is used. You decide whether you want to put in the extra effort for a golden-brown finish. For me, I think it will depend on how much energy I have and how many vessels I want to wash!

Apple Cheddar Scones
From Smitten Kitchen.

1 lb tart apples (the original recipe said 2, but I used 3 - definitely depends on the apple)
1 1/2 c flour
1/4 c sugar
1 1/2 tsp baking powder
1/2 tsp salt
6 tbsp butter, cold and cut into chunks
1/2 c sharp white cheddar, shredded (the color may just be for aesthetics - I'm sure yellow would be ok)
1/4 c heavy cream
2 eggs

Preheat oven to 375°F. Line a baking sheet with parchment paper.

Peel and core apples, then cut into sixteenths. (I estimated this - I don't have a corer, so I could not quarter the apple effectively - and it worked fine. My chunks were probably a bit smaller than called for.) Place them in a single layer on the baking sheet and bake for about 20 minutes, until dry to the touch. Let cool completely.


In a medium bowl, whisk together flour, sugar, baking powder and salt. Set aside. Place small chunks of butter into the bowl of a stand mixer, along with cooled apple, cheese, cream and one egg. Sprinkle dry mixture on top. (If you don't have a stand mixer, I'd suggest cutting the butter into the dry mixture with a pastry blender and then stirring in the rest of the wet ingredients.) Mix on low speed until the dough just comes together. Try not to overmix - you'll get tough scones. (Yes, the dough is going to be pretty gooey.)


Flour the countertop and a rolling pin. Form the dough into a rough circle and then roll into a 6", 1 1/4" thick circle (I made mine a bit thinner and larger in diameter, so I could get more scones out of it).


Using a dough scraper or pizza cutter (at least, I think those would work best), cut the circle into 6-8 wedges. Place on a parchment-lined baking sheet (not the same parchment as before). (If you intend to freeze the scones, this is where you should put the whole baking sheet into the freezer. Then, once they're frozen through, transfer the scones to a tupperware or wrap them individually in foil.)


When you're ready to bake some scones, beat the remaining egg in a small bowl with a pinch of salt (as mentioned above, I think this is optional, especially if you intend to save the egg wash). Brush the scones with egg wash and sprinkle with a little sugar. Bake 25-30 minutes until firm and golden (since I've been making one at a time and mine are a bit smaller, 25 minutes has been enough). You can cool them before serving, but I've been eating them right out of the oven!

Monday, November 8, 2010

Apple-Turnip Mashed Potatoes


Yum. This has been a good few days for food. Sundays are football days at our house, and since the Giants were playing at 4, we wanted to keep our dinner menu simple - you know, something that could be put together at halftime. Pizza is always a good, quick option for times like these. We'd gone up to Trader Joe's on Saturday specifically for some pizza dough (and maple creme cookies - they're unbelievably good). For this pizza, I went for the garlic and herb dough. And since Jeff's birthday is tomorrow, I decided to make it a fancy one in his honor. Behold my awesome vegetable arrangement:


Even with the cheese in the way, you can see what a lovely job I did. It's one of the best-looking pizzas I've ever made. My new stove has two ovens, and the smaller top oven ensured that the pizza was close to the heat all around, resulting in a remarkably crispy crust and golden-brown top. I used to have to turn on the broiler to get that effect!

Then there was dessert. Jeff got to request whatever he wanted for his birthday, so, of course, it was peanut butter. A peanut butter pie. I certainly give it props for prettiness, but it's not my favorite recipe ever. The peanut butter cream is great, but the chocolate kisses on top did nothing for me (since they're hard and need to be chewed and the peanut butter is soft and creamy, it's impossible to get both flavors in your mouth at once). And the crust, which is crushed vanilla wafers and roasted peanuts, was overkill. I think it needs a nice layer of some chocolate ganache. When I find the time to attempt that experiment, you'll be sure to get a recipe.


Now, about today's concoction . . . this recipe, though it looks a tad bland sitting there at the top of this post, takes mashed potatoes to a whole new level. The nutritional value of turnips, the tang of buttermilk, the flavor and crunch of bacon, and the sweetness of sauteed apple, all wrapped up in a smooth, creamy side dish. Potatoes have vitamins, too, but something like 90% of those are in the skin (I think I got that tidbit from Alton Brown). When you peel them and mash them up, especially if you add things like butter and cream, you no longer have any semblance of a healthy side dish. I'm hoping the turnips, apples and low-fat buttermilk helped mitigate that in this recipe, because this is something I need to do again. Soon. Perhaps Friday?

Apple-Turnip Mashed Potatoes
From the Southern Living Farmers Market Cookbook, which I wholeheartedly recommend checking out.

2 garlic bulbs
1 tbsp olive oil
1/8 tsp salt
1 lb turnips, peeled and cut into 1" pieces
1 lb Yukon gold potatoes, peeled and cut into 1" pieces
3 bacon slices, cut into 1/4" pieces
2 medium-sized Golden Delicious apples, peeled and chopped
1 tsp chopped fresh thyme
3/4 c buttermilk
2 tbsp butter
 salt and pepper to taste


Preheat oven to 425°. Cut off the top of each garlic bulb, so that the all the cloves are showing. Place bulbs on a piece of aluminum foil, on a baking sheet. Drizzle with oil, sprinkle with salt, and fold the foil to seal. Bake for 30-35 minutes until soft. Let cool for about 15 minutes. Squeeze the pulp from the garlic cloves into a small bowl.

Meanwhile, put the turnips, potatoes and enough salted water to cover in a pot and bring to a boil. Cook for 15-20 minutes or until tender. Drain.

While that is going on, cook the bacon in a medium skillet over medium-high heat 5-6 minutes until crisp. (While there seems to be a lot going on at this point, the only active thing you should be worrying about is the bacon - the garlic, turnips and potatoes can tend to themselves. Just make sure to watch the time.) When the bacon is finished, remove it from the skillet, reserving about 2 tbsp of drippings. Saute the apples in the bacon drippings until tender and lightly browned, about 6 minutes.


Once all the pieces are ready to assemble, combine the apples, turnips, potatoes, roasted garlic and thyme in a large bowl (I like to use the still-hot pot that the potatoes cooked in). Toss in the butter and mash with a potato masher until well blended (the heat from the vegetables should melt the butter fairly quickly). Once the mixture has reached the desired consistency (it's fine if it's still a bit chunky), stir in the buttermilk and season with salt and pepper. Sprinkle with the crisp bacon just before serving.

The cookbook claims this is about 8 servings. This, of course, depends on how reasonable your idea of a serving is!

Tuesday, October 26, 2010

Apple Crisp


As recently as two years ago, I would not have eaten this. I have only just begun to eat fruit pies. I never liked the idea of cooked fruit. My idea of a pie was something custardy (like pumpkin) or chocolatey (like french silk). No fruit necessary.

I changed my tune, though. It started with making a pear tart. When I was younger, my parents had a pear tree in the backyard. My grandparents had two. Those trees had us swimming in pears from August to October. Many pear pies were baked. And I hated them. I wasn't a fan of pie crust (particularly if it burned) and mushy cooked pears didn't do it for me either. So I was more than happy to leave those to the grownups.

Fast forward to a few years ago. My parents' tree is gone but my grandmother still has hers. My parents unloaded a few bushels of pears on me one weekend. Now, there was no way Jeff and I could eat them before they went bad. You know pears - they ripen in about three seconds, and then they're mush. So I decided to make a pear tart. The recipe I found had a caramel glaze on the crust and an almond creme to go on top. There was enough to distract me from the cooked fruit that I was willing to eat it. Suddenly, I was eating cooked fruit and liking it.

Now I am a believer. I still prefer my old favorite pies, but cooked fruit isn't a turnoff for me. Good thing, too. I've learned that apple crisp is great. It's like a pie without the bother of a crust (although making crusts can be fun, too). It was the perfect solution to the giant bushel of apples I brought home from the farmer's market. Twice.


Apple Crisp
Adapted from Better Homes and Gardens some time this fall.

1 1/2 c + 1 tbsp flour
1 c + 1/4 c sugar
1/3 c brown sugar
3/4 tsp cinnamon
1 tsp kosher salt
2/3 c butter, cut in pieces
8 c peeled and cored apples, sliced 1/2" thick (this is the most time-consuming step)
2 tbsp lemon juice
1/8 tsp nutmeg

Preheat oven to 375°. Combine 1 1/2 c flour, 1 c sugar, brown sugar, cinnamon, and 1/2 tsp salt in a large bowl. Work butter into mixture with fingers until it just clings together in large crumbs. (I had wanted a picture of this stage, too, but my hands were all gunky and I forgot to whip out the camera.) In another large bowl, toss the apples and lemon juice. In a small bowl, whisk together 1/4 c sugar, 1 tbsp flour, 12 tsp salt and nutmeg. Sprinkle onto the apples and toss to combine. (It works better if you toss them with your hands.) Pile apples into a buttered 2 qt baking dish.


Cover the piled apples with the crumb mixture.


Cover the crisp with parchment paper, then foil. (The paper is so the crumbs don't end up tasting like foil.) Place on a foil-lined baking sheet (to prevent spills - and there will be spills!) and bake 20 minutes. Remove the foil and paper and return to the oven for 30-40 minutes more, until the top is golden and the apples are tender. You will see the thickened juices bubble up as well. Let cool 15-30 minutes before serving. It's good with whipped cream or ice cream!


Note on apples: This recipe is better with a tart apple. I used Jersey Macs, which taste fairly tart when eaten raw, but may be a bit too sweet for this recipe. When the crisp was still warm from the oven, it had an overpowering sort of sugariness. This is less noticeable once it has cooled off, but still there. I've done this recipe twice, and this time I dialed down the sugar that goes into the filling (the recipe recommended 1/4-1/3 c - the first time I used 1/3 c, this time 1/4 c). I think it could be dialed down even more. (In fact, I wonder if it's even necessary to have sugar in the filling . . .) At any rate, variety of apple will make a difference in the flavor, so definitely adjust that to match the apples you're using.