Thursday, March 31, 2011

Rustic Vidalia Onion Tart


I've been a little lax with my posting lately. I've been working on a conference paper that is the first fruits of my dissertation research. It took several weeks to drag all my disparate thoughts together into a reasonably coherent argument, but I was happy with the result and the presentation, which I gave this past weekend, went well. So now I can get back to focusing on cooking (which is really more important, right?). Fortunately for you, I made a killer recipe on Tuesday and actually remembered to take a few pictures.

I really am a baker at heart (my favorite words are "cream the butter and sugar together"), so any opportunity to bring those skills to the dinner table is a good one, in my eyes. This savory, rustic tart is just the thing. A buttery, flaky pie dough filled with sweet, delicate sauteed onions? Come on! Who wouldn't love it? And it's fairly quick - you just have to make the dough in advance. I love it so much, I think I'm going to make it again for the department potluck next week.

The recipe called for store-bought, frozen pie dough, but since I am now anti-prepared foods I threw one together myself. I did not use the savory tart shell recipe that I posted back in October. While delicious, it tends to be fairly difficult to roll out. Every time I've done it I've had lots of rips and tears to fix once it was in the tart pan. Since this is a free-form tart, it needs a sturdier dough than that - one that can handle being moved around without breaking. Instead, I used the basic pie crust from my Baking Bites cookbook, which produced a beautiful, buttery result. With the egg wash on top, it reminded me more of a flaky turnover dough than a tart dough. While I'm sure you could use frozen pie dough for this, I wholeheartedly recommend making your own. The result is better and so much more satisfying!

Single Pie Crust
From The Baking Bites Cookbook.

1 1/4 c flour
1/4 tsp salt
1 tsp sugar
8 tbsp cold butter, cut into small chunks
4-5 tbsp ice water (I needed just about 5)

Combine your flour, salt and sugar in a food processor. Pulse to combine. Add the chunks of butter and pulse until no pieces larger than a pea remain. Add ice water and mix until the dough comes together as a ball. (If you don't have a food processor, combine the butter with the flour mixture using your hands or a pastry cutter.) Form the dough into a small disc, wrap it in plastic wrap and store it in the refrigerator for at least one hour before using.

Rustic Vidalia Onion Tart
From the Southern Living Farmers Market Cookbook (my favorite!).

2 tbsp butter
4 medium-sized Vidalia onions, thinly sliced (or any other sweet onion - about 6 1/2 c total, or whatever will fit into your tart - I used three huge onions and it was far too much)
1 1/2 tsp chopped fresh rosemary (I used a large pinch of dried rosemary)
3/4 tsp salt
1/2 tsp pepper
1 egg white, beaten
3/4 c shredded Gruyere, divided
one 9" pie crust

Preheat oven to 425°. Melt the butter in a large non-stick skillet over medium-high heat. Add the onion, rosemary, salt and pepper (if you have too much onion for your skillet, just put in what fits - it'll be too much for your pie crust, too). Cook, stirring occasionally, about 8 minutes, or until tender (if the onion starts browning, turn down the heat).


Roll out the pie crust on a lightly floured surface into a 12" circle (yes, circle - try to keep it as close to round as you can, since the shape of your dough will end up being the shape of your tart!). Place the pie crust on a parchment-lined baking sheet (I was out of parchment so I just used baking spray and it turned out fine). Brush the dough with egg white. Sprinkle 1/2 c Gruyere around the center of the crust. Spread the onion mixture over the cheese, leaving a 2 1/2" wide boarder. Sprinkle the remaining 1/4 c cheese over the onion. Fold the pie crust border up and over the onion, pleating as you go, leaving a 4"-wide opening at the center. Brush the crust with egg white.


Bake at 425° on the bottom oven rack for 17-19 minutes, or until crust is golden (I did it in my small top oven which only has one rack, and it took about 25 minutes to get that golden look). Let stand 5 minutes before serving.

Tuesday, March 22, 2011

Roasted Asparagus with Parmesan


Spring is finally here! At least, in my neck of the woods. Soon - in about a month - the first crops of the season will come rolling in. And that means asparagus!

Clearly, I could not wait for this and purchased some imported-from-Mexico asparagus for this week. What can I say? It's hard to be a locavore in March. I'll more than make up for it this summer, between the ambitious garden I'm planning and the CSA I've joined.

I'm a big fan of asparagus. I love biting into the crisp-tender stalks. Just looking at these pictures makes me feel healthy. My biggest problem with it has always been the waste - when I snap off the ends, sometimes half the stalk comes off! I am not convinced that all of this is too woody to eat, and I generally work hard to ensure the stem breaks in a place that I find reasonable. This time, though, I had no worries - I am no longer throwing away (or even composting) the stems - they're going into my stock bag.


I started making my own vegetable stock earlier this year, and it's awesome. I've been using it in recipes in place of any store-bought vegetable or chicken stock. I've found that buying stock can be expensive and wasteful - once a container is open it should be used in 7-10 days. Now, I've definitely used leftover stock after 10 days, but there's a limit. Many times I've found an old half-used container of chicken stock in the back of the fridge that I had to throw out (old chicken stock tastes like old chicken - not good). By making my own stock, I avoid wasting food, I avoid wasteful packaging materials, and I reprocess waste into something I need (and my composter is still fed, since I still have other kitchen scraps). I simply freeze the stock into useful amounts (some in ice cube trays, some in one- or two-cup blocks), remove the cubes to a big freezer bag and remove them as needed. Making stock this way is easy (although the freezing part admittedly is a bit of work and can make a mess if you're sloppy like me). However, I think the result is worth it. If you want to try your own homemade stock, I've been following the directions here. I've only used vegetables so far, since I don't fancy the idea of saving animal bones in my freezer.


Roasted Asparagus with Parmesan

1 lb asparagus spears, trimmed
1 tbsp olive oil
salt and pepper to taste
1-2 tsp Parmesan cheese, grated
Preheat oven to 400° F. Line a baking sheet with foil and spray with cooking spray. Lime up your asparagus on the baking sheet. Season with salt and pepper, drizzle with olive oil and sprinkle with Parmesan (these ingredients can also be tossed together in a large bowl, for slightly better coverage). Roast about 5 minutes, until tender.

Friday, March 18, 2011

Brussels Sprout and Cauliflower Gratin

Brussels sprouts and cauliflower - possibly my two favorite vegetables united as one in this creamy, crispy baking dish of goodness. And believe it or not, it's fairly light!

Winter vegetables are my favorite, hands down. I love butternut squash, Brussels sprouts, cabbage and cauliflower. I have lots of delicious ways to prepare them. But by this time of the year, I'm ready for something different. I've been really trying to eat seasonally, but this is a pretty lean season (nothing local left except moldy potatoes) and the warm weather has me craving asparagus, snap peas and salads, which are not even close to ready. I even caved and purchased a few imported veggies - there are vine-ripened tomatoes from Maine in my refrigerator right now (I shudder at the thought of the fossil fuels they need to heat those greenhouses).

The only way to win here - to tide myself over until the spring harvest actually begins - is to use this time to say goodbye to my winter favorites. Goodbye, Brussels sprouts, with your mustardy kick. Goodbye, cauliflower, with your firm tenderness. Goodbye, creamy, cheesy baked dishes. Your time is nearly at an end. But don't worry - come October I'll once again be craving your goodness.


Crispy-Topped Brussels Sprout and Cauliflower Gratin
From Cooking Light, March 2011.

4 c cauliflower florets
4 c Brussels sprouts, trimmed and quartered
1/4 c flour
1 1/2 c 1% milk (I generally only have skim on hand, but I bought a special carton of 1% for this - I don't think you can make a proper bechemel sauce with skim milk)
2/3 c half-and-half (although, since there is half-and-half here, perhaps it could make up for using skim milk - if you try it, let me know!)
3/4 tsp salt
1/4 tsp pepper
1/8 tsp nutmeg
4 slices bacon, chopped (since we're going meatless, we left this out)
2 c sweet onion, chopped
3 garlic cloves, minced
1/2 c grated Parmesan
1/4 c panko

Bring a large pot of water to a boil. Parcook the Brussels sprouts and cauliflower for ~ 2 minutes. Drain and set aside.


Combine flour, milk, half-and-half, salt, pepper and nutmeg in a bowl and whisk well.

Heat a large skillet over medium heat. Add the bacon and cook 3 minutes, until it begins to brown (we skipped the bacon, so we melted 1 1/2 tbsp butter in the skillet instead). Add onion and garlic and cook 5 minutes, stirring occasionally. Stir in the milk mixture, bring to a simmer and cook 5 minutes, stirring constantly. Remove from the heat and stir in vegetables.

Spoon the mixture into an 11x7 baking dish coated with cooking spray. Cover with foil coated in cooking spray. Bake at 375° F for 20 minutes, until bubbly (I'd suggest putting a baking sheet under your dish in case it bubbles over). Remove from oven and remove foil.

Preheat broiler to high. Combine cheese and panko and sprinkle evenly over vegetables. Broil 5" from heat for 4 minutes until browned. (My gratin was positioned the right distance from the heat and it was about to burn after 2 minutes, so you might want to keep it a bit further from the heat or take it out sooner - either way, keep an eye on it. Parmesan cheese is awesome, but burnt Parmesan is not.) Let stand 5 minutes before serving.

Saturday, March 12, 2011

Curried Potato Fritters


Two posts in one day? And so close together? What could prompt this?

Well, I finished posting before and then immediately went to the kitchen with Jeff to work on dinner. And what a dinner it was! We made these deep-fried curried potato fritters and they were awesome. The outside was golden brown and crispy, but the cheesy filling was soft and gooey. The sweetness of the mango and heat of the ginger in the chutney complemented the spiciness of the curry beautifully. Even though I had no intention of blogging this one, once we'd tasted the first batch, I had to grab my camera and document as much as I could.

I think this is only the second time ever that we've deep fried something, primarily because it seems like a waste to me to use so much oil for one recipe (and, honestly, we even didn't use enough this time to make the oil as deep as it should have been), but for this recipe, I think it's worth it.

The recipe said that it should make 24 small fritters, and we managed to make exactly 24 (I'm pretty sure that's never happened to me before - it's because Jeff was forming them). Now that's too many fritters for two people in one meal, and our oil started to get a bit low, so we decided to experiment with them. We ate a third of them for dinner, fried another third and put them in the fridge, and froze the last third unfried. We're going to try baking the pre-fried ones in the toaster oven for dinner tomorrow. The frozen ones will be fried at a later date. I'll check back in and let you know how those go! I think this would make a fantastic party food - and an even better one, if it turns out they can be prepped in advance!

**We had the rest of the fried fritters the next day for lunch. We popped them into the toaster oven at 350° for ten minutes or so and they were nearly as good as the day before. We'll be frying up the frozen ones next week.

Curried Potato Fritters
From Food Network Magazine July/August 2010.

2 medium russet potatoes
1 c 4% cottage cheese (this is a substitute for the more traditional paneer)
1/2 c frozen peas, thawed (we used full-size peas, rather than petite)
2 tsp curry powder
1/2 c + 2 tbsp flour
2 tsp kosher salt
vegetable oil for frying (depends on your pot size, but you should definitely have a lot - we had a small bottle and used a small pot and it wasn't nearly as much as the recipe called for)
4 eggs
2 c panko
mango chutney, for serving

Prick potatoes all over with a fork and microwave 8-10 minutes, until tender. Peel the potatoes (I tried to just peel the skin off with my hands to mediocre results. Surprisingly, a vegetable peeler worked better - I had thought the potatoes would be too soft for it, but not so). Transfer the potato to a large bowl and mash with a fork until mostly smooth. Mix in the cheese, peas, curry powder, 2 tbsp flour, and salt. Let the mixture cool to room temperature.

Heat about 2" of vegetable oil in a heavy-bottomed pot over medium-high heat until it reaches 375° F (a deep fry thermometer would help with maintaining this temperature - although we let the temperature drop quite far - below 300° - and the fritters still came out fine. They just took a much longer time to get to that golden brown color).

Meanwhile, whisk the eggs in a shallow bowl. Add the 1/2 c flour to another bowl and the panko to a third. Form the potato mixture into about 24 golf ball-sized portions, then flatten each one into 2" patties. Dredge each patty in the flour (dusting off any excess), then the egg, then the panko (we had some trouble getting the egg to stick to all the flour - try to keep those bare spots to a minimum, though, because the cheese will leak out when they hit the oil).


Fry the patties in batches until golden, turning as needed. Each batch should take about 1-2 minutes, if your oil is properly hot.


Once the fritters are golden, transfer them to a paper bag or paper towels to drain. Once they've drained, serve with mango chutney.

Dill Yogurt Dip


I love vegetable dips. I actually learned to like raw broccoli (well, again - apparently I loved it as a toddler) in high school when I realized it was the perfect vehicle for a nice dip. The problem is that I can't handle that sort of fat in my diet anymore. I'm apparently getting too old to be shoveling full-fat sour cream and mayonnaise down my gullet without my body protesting.

But I have the perfect solution. Last year, I purchased some Greek yogurt for some recipe or other. Now I've never been a huge yogurt fan - I think it's the goopy texture - but this was different. It still has a yogurty tang, but the texture is closer to sour cream. So a lightbulb went off in my head - what if I exchanged the sour cream in my favorite dips for Greek yogurt? A gut-busting indulgence now becomes a healthy snack! It's seriously good and good for me. And it got me to eat tons of raw vegetables this summer - in fact, this was usually my lunch.

This is also a great way to use some dried herbs. What, you don't dry your own herbs? I think this is the easiest do-it-yourself kitchen project. Fresh herbs from the grocery store are expensive and go bad quickly. When I'm compelled to buy some, I use what I need and then hang the rest up to dry. After forgetting about them for a few weeks, I take them down, strip the leaves from the stems and put them into my handy magnetic containers. Below you can see my basil, thyme, dill, marjoram and sage.


I have parsley and rosemary as well, but they're in ceramic pots on my counter (I have more than will fit in the magnetic containers). Most of these came from store-bought herbs. Hopefully by the end of the summer, my own herb garden will be thriving both indoors and out, and I won't need to be buying herbs at the store again any time soon. I'll definitely need plenty of dill on hand for this dip!

Dill Yogurt Dip
1 - 1 1/2 c Greek yogurt
1 tbsp fresh dill (is you're using dried dill, 2 tsp should be plenty)
1 tsp dried parsley
1 tsp seasoned salt (why? my original recipe called for it - this is actually the only reason I keep it in my pantry!)
1 tsp onion powder
dash garlic powder

Combine all ingredients in a bowl and stir (and don't confuse garlic and onion powder like I did - I had to spend some time trying to fish out most of the garlic! That would have been super-strong!).


While you can eat it right away (I certainly did when I made this batch), it's at its best if you put it in the refrigerator for an hour or so to let all the flavors meld. Also, I've found that the Greek yogurt can separate a bit when refrigerated - the herbs and things will all float to the top. There's nothing wrong with it when this happens. Just give it a quick stir and it will be as good as new. Serve with your favorite veggies!

Thursday, March 10, 2011

Braised Cabbage with Pancetta


Didn't I say we were going vegetarian for Lent? Well, we are. I'm just behind on my posting because I acquired one of these on Sunday:


Her name is Chloe, she is just over a year old, and she cries miserably when you leave her sight. That means that I've been working off my laptop because I feel too guilty to go upstairs to my office. And my camera software is not on my laptop. So I only just uploaded the pictures from the recipe we made on Monday: braised cabbage with pancetta. 

This another great recipe from my Jamie Oliver cookbook. It's fast, simple and flavorful. I've done it twice already and the one thing I need to get right is the shred on the cabbage. While you can use any kind of cabbage, I used half of a small head of green cabbage. The first time, I chopped it with a knife. I tend to chop cabbage poorly - I try to get it nice and thin, but tend to fall far short. So that time we had a nice chunky cabbage mixture. This time, I tried the food processor. 


The cabbage was chopped very evenly, but I felt like the pieces were too small. Ideally, I think I'd like something right in between. Next time, instead of using the shredding ring, I'll try one of the chopping blades and see how it goes.

I think the best part of this recipe was frying the pancetta with shallots and garlic. It filled the whole house with a delicious odor that lingered long after dinner was over. Well worth a try, if only for that!

Braised Cabbage with Pancetta
Adapted from Jamie's Food Revolution.

1 cabbage, finely sliced (the recipe suggests green, Savoy or spring - I used green, and I halved the recipe)
1-2 tsp olive oil
2 cloves garlic, minced
2 shallots, thinly sliced
6 thin slices pancetta, chopped
2 tbsp Worcestershire sauce
2 tbsp butter
1 1/4 c vegetable stock (I used homemade stock that I froze into ice cubes)
salt and pepper

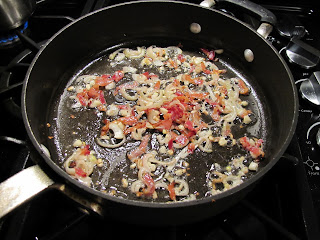
Heat a large lidded saucepan over medium heat. Once it's hot, add the pancetta to the pan and stir for a few minutes until crisp. Add the shallot and saute for a minute, then add the garlic (at this point, pause and enjoy the aroma).


When the garlic begins to get some color, add the Worcestershire, butter and cabbage. Stir well to combine, then turn heat to high.


Add the stock (since I used my own frozen cubes, I eyeballed the measurement - in retrospect, I think I used a bit too much, because the mixture ended up a bit soupy. A few more minutes on the stove mostly solved that, though). Put a lid on it and cook for 5 minutes. Then remove the lid and cook 5 minutes more. Season with salt and pepper to taste. Enjoy!

Wednesday, March 9, 2011

Vegetarian!

That's right, folks! We're going vegetarian for Lent this year.

All the reading I've been doing lately on food, ethics and the environment has inspired me to do something bigger than usual. Americans eat too much meat and it's destroying the environment. Cows produce 20% of the greenhouse gases going into the atmosphere. 20%! And this is not a wild cow overpopulation problem (are there wild cows anymore?) - these animals are mostly living on factory farms and in feedlots. These cows also produce waste in far greater quantities than the environment around them can handle. Runoff from animal waste cesspools pollutes the water for miles around these operations. And similar things can be said for pigs and chickens.

What is to be done about this? Eat less meat! We already eat about 50% more meat than we did back in the 70s. We need to get back to reasonable portion sizes (like 3-4 oz/day) and meals that don't revolve around a huge slab of beef on your plate (restaurants are the worst offenders on this point). I've been working on reducing the amount of meat we consume by cooking more stews, stir fries and other one-pot meals where a pound of meat will last for 6-8 servings. I think that this is a contribution that anyone can make. It's healthier for you, healthier for the environment and will cost less money. Everybody wins.

But to take this point even further, I've committed to 40 days without meat at all. I think there's no better way to convince myself that a meal doesn't need to revolve around meat than to try and plan several weeks' worth. And what better time to do so than Lent, a season of sacrifice that already involves some abstention from meat? Jeff is a little nervous about this, I think, because when I gave up caffeine for Lent last year, I never went back. But I don't think this will inspire me to give up meat entirely. I fully expect to be ravenous for meat by Easter. What I hope, though, is that it will bring me to appreciate the other things on my plate even more, so that meat will take on a much smaller role in the long run.

Note: fish will still be on the menu, in limited amounts. I don't eat fish or shellfish so it never ends up on our menu, but Jeff likes it a lot, so I'm conceding and will probably arrange for a fish-based dinner once or twice a week. I am also going to force myself to try some, since fish is something healthy that should be in my diet. Mentally, the idea of eating fish appeals to me, but I dislike both the taste and texture. But we'll see what happens - maybe I'll find a variety I can enjoy.

Saturday, March 5, 2011

Broccoli and Pesto Tagliatelle


We had the most delicious (and fast!) dinner on Thursday: lemony chicken saltimbocca with broccoli and pesto tagliatelle. That chicken recipe will certainly turn up here some day. Today we're going to focus on the side dish.

This pasta recipe comes from my newest cookbook, Jamie's Food Revolution. I got it for Christmas, marked a slew of recipes that I wanted to make, and ignored it until last week. Now I've made two recipes from it: braised bacon cabbage (which I'll be redoing this coming Tuesday and hopefully posting) and this. The cabbage was very quick, quite simply, and incredibly tasty. Oh, and the whole house smelled like garlic and pancetta (I didn't have any bacon). This dish was equally quick, light and yet very satisfying. Since Jamie Oliver is clearly a brilliant man, I have to wonder why I left this book sitting for so long. Perhaps it's the pictures. While there are plenty of them, they are a bit . . . messy-looking? out of focus? I'm not sure. Whatever it is, though, I am sure that it was on purpose. This book is intended to teach cooking to people who really don't know how, so I think the pictures are meant to make everything feel real, like something the average person could do at home.

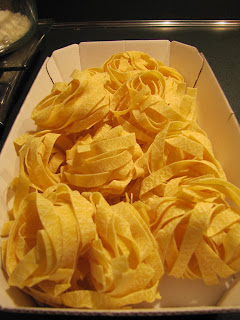
The simplicity of this recipe made it enjoyable to cook, despite my being sick and miserable at the time. Everything goes into one pot, drains, and then goes back in the pot to be tossed with the dressing. Very little mess. The hardest part was peeling the potato so thin - I don't have the right sort of peeler, so it was a bit of a chore. The most fun part was playing with the tagliatelle, which came in little nests. I'm not sure if it's the variety of pasta or the brand I bought, but it cooked incredibly quickly, too - just four minutes!


A few notes: I did not have any fresh basil so I just left it out. While this was definitely a solid pasta dish without it, I did feel like it was missing something. I think it would be killer with the basil. Next time I'll be sure to secure some. Also, I left out the broccoli stems. I love broccoli, but am not a fan of stems. However, I did feel like the recipe was a bit light on broccoli (this was particularly true of the leftovers, since I took a generous amount of broccoli the first night). Next time, I think I'll try including the stems to even out the proportions.

Broccoli and Pesto Tagliatelle
Adapted from Jamie's Food Revolution.

1 medium potato
1 head of broccoli
handful fresh basil
sea salt
1/2 lb dried tagliatelle
1/4 c green pesto
3 oz grated Parmesan

Bring a large pot of salted water to a boil.

Wash and peel the potato. Use the peeler to slice the potato into very thin shavings (as thin as you can manage - they need to cook quickly). Cut off the broccoli florets and set them aside. Cut off the base of the stem and discard. Halve the stem the long way, then slice thinly (not quite so thin as the potato- 1/4" would be fine).

When the water is boiling, add the tagliatelle and broccoli stem and cook according to the directions on the pasta package. 2 minutes before the pasta is finished, add the broccoli florets and potato shavings to the water. When done (check the potato to make sure it cooked through), drain into a colander and return the pot to the stove.


Roughly chop half the basil leaves and add them to the pot. Combine with pesto and half the Parmesan. Return the pasta mixture to the pan and toss to combine with dressing. Serve garnished with remaining Parmesan and basil.


Thursday, March 3, 2011

Beef Stew


I've told you about this stew before. I made it when I had my family over for dinner last month, and it went over very well. Although we were left without any leftovers that day, I had some stew beef left over in the freezer, so I knew I'd have to make it one more time before winter ended. Fortunately, I chose this week to do it - I have a cold and nothing currently sounds better to me than that leftover stew gracing the refrigerator.

I always felt stew would be complicated and involved - it does have complex layers of flavor - but this recipe couldn't be easier. It just involves a little pre-planning, since most of the ingredients go in five hours before the stew is ready to serve. Just pop the prepped stew in the oven, and remove to the stovetop to finish off with vegetables an hour or so before serving. The vegetables probably could go in from the beginning, making your work even easier, but the blogger I got this recipe from says she adds them later so they don't get as soggy. That sounds good to me, so I've done it the same way.

This may be the only regret I have about winter going away. You should make it soon, while it's still a bit chilly out there! I think I'm going to go finish off those leftovers for lunch right now . . .


Beef Stew

1 lb stew meat
1 sweet yellow onion, chopped into large pieces
6 cloves garlic, chopped
1 tbsp olive oil
14 oz can diced tomatoes
1-2 tsp dried thyme
2 bay leaves
salt and pepper to taste
6 c beef stock
1 c diced carrots
1 c diced celery
2 c diced baby red potatoes (I recommend you cut them smaller than I did this time - they still came out nice and soft, but were a little large in comparison to the other ingredients)

Preheat oven to 250° F (also, check to make sure your pot will fit in the oven - I usually forget to remove a rack until it's done preheating, which is awkward). Heat olive oil in a large Dutch oven (mine is 5 quarts) or other oven-safe pot over medium heat (I imagine this could be made in a crock pot as well, but I'd brown the meat on the stove first, for flavor). Add the stew meat and onions and cook for about 5 minutes (you should have more beef than this - I used less than half a pound because I was trying to get rid of leftovers - but the stew was still excellent with reduced meat!).


Add the garlic and cook about 30 seconds, until fragrant. Add the tomatoes, thyme, bay leaves, salt and pepper, and stock. Cover and move to the oven. Cook for at least 4 hours.


Remove from the oven and return to the stovetop over medium heat (I even turned it a bit lower, since mine kept threatening to boil over). Add the carrots, celery and potatoes.


Taste the broth and re-season if necessary. If it's too thin, you can add a slurry of cold broth and corn starch to thicken it up (I did this the first two times I made it, since I like a thick broth, but I forgot to this time and never noticed the difference). Cover and cook 1-1 1/2 hours more. Remember to remove the bay leaves before serving!