Friday, August 31, 2012

Farm Fridays: Cucumber-Yogurt Gazpacho


Leeks! Sunflowers! Edamame! Two watermelons! This week's CSA share is going to be fun. There's also a nice bunch of cilantro that I plan on using to can some heirloom tomato salsa this weekend! 


I've been in a bit of a rush today, since I'm going up to Rutherford tonight (soon, actually) but I stumbled upon the perfect recipe to blog on a busy day. This cucumber-yogurt gazpacho is really quick and easy. Just five ingredients and a whisk in the blender. It's the perfect cool, refreshing meal for a hot day like this. Hopefully my family will like it as much as I do!

Cucumber-Yogurt Gazpacho
Based on a recipe from Cooking Light: Way to Cook Vegetarian. ("Based on" means I glanced at the recipe and then did things my own way.)

2 large cucumbers
3 c Greek yogurt
2 c vegetable stock
3 tbsp lemon juice
1 clove garlic, minced
salt and pepper to taste 

Peel and seed your cucumbers (I find a melon baller really handy for tasks like this - I should start calling it my seed-scooper, since I've never even considered using it to make melon balls!), then chop them roughly.


Throw everything into a blender (my blender couldn't fit it all, so I divided everything into two mostly-even batches) and blend to your heart's content. Serve chilled, with minced cucumber for garnish.


Wednesday, August 29, 2012

Pear Reminisces and Pear Bread


Pears have never been my favorite fruit. I've never disliked them, they've just never thrilled me. I probably just knew too much about them to find them appetizing.

You see, when I was growing up, we had a pear tree in our backyard. Not only that, but my grandparents, who lived a few miles away, had two more of them. In my present canning-crazy state, I keep  fantasizing about how wonderful it would be to have a fruit tree in the yard, with piles of free fruit to can and preserve every year. I have to keep reminding myself that I have had a fruit tree, and that parts of it really sucked.

My ambivalence to pears comes from having seen them in every possible state of decay. Picking up the fallen pears was a task that generally fell to me and my brother (often with a monetary reward per pear we collected - as my mom recently pointed out to me, she had to pick up pears through her whole childhood as well and was sick of it by the time we came along). It meant braving the swarms of yellow jackets to pick up gooey, bug-ridden fruit and hurl it into garbage cans (to which the swarms of yellow jackets quickly moved). I did not enjoy this.  When I smell a pear today, while I can appreciate the floral juiciness, it also reminds me of that familiar too-sweet smell of fruit decay.

I guess I remember the icky parts so well because there weren't many good parts to compensate for them. Picking pears was fun, on those occasions when the squirrels left them in the trees long enough to ripen. Once, in a particularly productive year, my brother and I had a pear stand in front of our house. That was cool, too. But eating them was too much of a chore to be fun. One of my grandparents' trees began to fruit in mid-August. A few weeks later, our tree was ripe, as was their second one. From that point, it was a pear-eating marathon. You know how pears ripen - one minute they're hard as rocks and then the next they're sitting in a pool of their own juices snickering at you. Imagine whole baskets of pears doing this at once. Since my family didn't can, there wasn't any good way to get rid of them, other than the ubiquitous pear pies (and back then I didn't like fruit pies at all). Pear season was more of an ordeal than a pleasure, most of the time.


Fast forward to today. My parents' pear tree is gone - my brother and I cut it down six or seven years ago. Its production had really dipped - the squirrels had been getting most of the pears for some years - and the trunk had begun to rot. A few years later, my grandparents' big tree was also cut down. For the most part, I forgot about the pears, since I don't live near enough to have them unloaded on me. But last week, I visited Grandma (who is recovering from a broken hip and has finally moved back home) and the surviving pear tree - the early one - was in full swing. I came home with sixteen pounds of pears and a new appreciation for them. Now that I'm canning, the idea of a vast supply of free fruit is thrilling once again (and I guess I've had nearly a decade to get over the pear glut of my childhood).

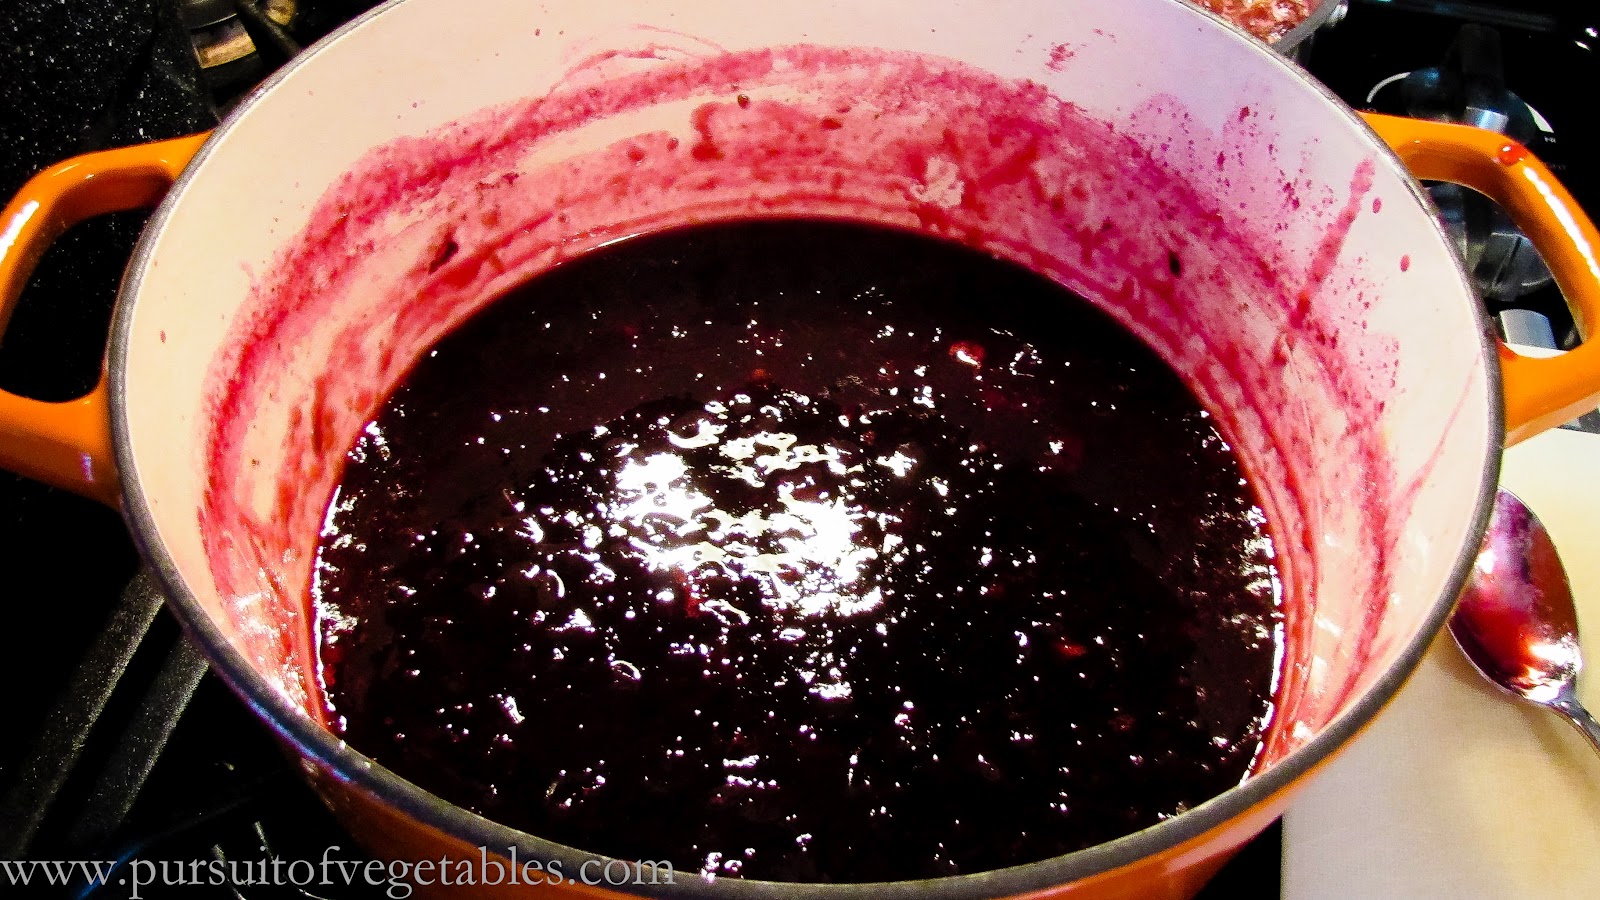
A few days later, Jeff and I made a batch of pear sauce. I had planned to use nine pounds of my pears for this, and perhaps another few pounds for some jam. The pears did not sign on to these plans. I washed them and separated them into two piles: rotting and hard as rocks. I decided to cut up the ones that were most ripe, discarding the ugly bits, and see how much I had to work with. Somehow, many of the pears were rotten from the inside (rotten to the core?), leaving very little usable material. I ended up with three pounds of chopped pears to make into sauce, returning seven or eight pounds of unripe ones to the back room for another day. (I had planned to blog about the pear sauce, but the process was long, annoying and fraught with difficulty - not because sauce is hard to make, but because of the pears themselves and our cheap food mill which keeps falling apart during use.)

Somehow, despite these memories and setbacks, I still haven't abandoned my dream of a fruit tree. I know parts of it suck, but the idea of free fruit, in whatever state, hasn't ceased to be alluring. Despite the difficulties the pears are giving me, I keep wondering if there will be more for me to take when I visit later this week. And maybe I'm being a bit dramatic in saying that pear season was an "ordeal." As a kid, it was just part of my routine (I'm serious about disliking picking them up, though - it was pretty gross). I keep looking at that pile of pears in my back room and seeing the possibilities. Yes, it's possible that half of them will turn out to be rotten inside like the others, but maybe they won't. And if they're not, think of all the tasty  things I can make with this free fruit . . . like this pear bread.

I've delayed this post so long that I'm already on my second batch of pear bread (and sauce, too - the second batch came out much better). I played with the original recipe a bit, to fit my materials better. The original called for grating the pears, but I've had to cut so many rotten spots out of these I didn't want to risk it. Instead, I used regular chunks of pears. Also, I used canola oil rather than butter or olive oil (which I was out of). That cuts the saturated fat down in the recipe. While I'm not a huge fan of canola oil in baking (it can make a batch of brownies unappealingly gooey - not mmm gooey but sticks-to-everything gooey). In this case, though, it worked nicely. The bread forms a crispy outer crust while the insides stay soft and moist. I just hope it freezes well!

Pear Bread
Adapted from Smitten Kitchen.

3 c flour
1 tsp baking soda
1/4 tsp baking powder
1 tsp salt
1 tbsp cinnamon
1/2 tsp ground ginger (optional)
1 c chopped pecans
3/4 c canola oil
3 eggs, lightly beaten
2 c sugar
3-5 pears (the number of pears will depend on the pears' size and how much usable flesh is available after peeling - in my first batch, I used all five pears that appear in the picture)
2 tsp vanilla extract

Preheat oven to 350. Spray loaf pans with cooking spray (the recipe says this fills one 10" tube pan or two regular loaf pans. I made eight mini-loaves and had enough batter left over for six muffins).

In a large bowl, whisk together the dry ingredients: flour, baking soda, baking powder, salt and spices. Remove 1/4 c of the flour mixture to a small bowl and toss the nuts in it.


In another bowl, whisk together the oil, eggs, sugar and vanilla. Peel, core and slice the pears into 1" chunks, tossing each chunk into the wet mixture as you cut it (I found this kept the pears from browning, which they surely would have done if I'd chopped them before preparing the rest of the recipe, since I'm a slowpoke in the kitchen). When the pears are all added, add the nuts to the wet mixture and stir to combine.


Pour the wet mixture over the dry mixture and stir until everything is just moistened.


Pour into prepared pans and bake 30 minutes (for muffins and mini-loaves) or 55-60 minutes (for full loaves) or possibly longer (for a tube pan). Cool on a wire rack (or your stove top) for ten minutes, then remove the breads from the pans to finish cooling (mine seemed a bit sticky at first, but every one came out cleanly with a little prodding).


Friday, August 24, 2012

Farm Fridays: Watermelon Agua Fresca


Another Friday, another CSA pick-up. This week's produce looks suspiciously like last week's, which is not a bad thing in my opinion. (I skipped the flowers today because I was in a hurry and there were no scissors available - I really do need to remember my own scissors next week!) The produce variety is wonderful at this time of year.


The watermelon crop, in particular, seems to have been excellent this year. I love pulling in the driveway and seeing piles of huge melons waiting for me. I'm not a big watermelon person, but Jeff likes it, so I generally try to take a small one so he can manage to eat it in a week. That changed last week when I stumbled on this recipe for watermelon agua fresca. I will worry no more! In fact, I may be trying to take a big one so I can have this lovely drink all week!

The recipe is super simple - just throw everything in a blender and strain. The sourness of the lime sets off the sweetness of the watermelon beautifully. And while I don't always like mint, it really does add a refreshing touch to this drink. Today I had no mint available so I left it out. The drink is still good, but something is definitely missing. Even so, I think this batch will be polished off pretty quickly. I will definitely be bringing this to my next summer barbecue!

Watermelon Agua Fresca
From The Way the Cookie Crumbles.

 8 cups watermelon
6 tbsp lime juice
3-4 springs fresh mint
ice
sparkling water

Toss watermelon, lime juice and mint into a blender and puree. Pour pureed mixture into a fine mesh strainer set over a bowl. Let sit for an hour or so, stirring occasionally, until all the liquid has drained.


Toss the solids in the compost and store the liquids in a pitcher. To serve, add ice to a glass, fill halfway with the watermelon mixture and top off with sparkling water. Enjoy!


Sunday, August 19, 2012

Pork Wasabi Tacos


Let me let you in on a little secret: I cook all sorts of delicious things that I don't share with you.

It's nothing personal. Really. While I do love my blog and love to share the wonderful things we cook, there are some days when I just don't feel like snapping photos of every step, trying to make my kitchen look pretty in the background (this usually fails - there's no hiding the ugly green counter top). Other days, I plan to blog about a recipe, get all excited for it, and the photos are blurry or the recipe turns out badly. Finally, on a few rare occasions, I have made a delicious recipe, taken lovely pictures, loaded them into blogger and left them there to rot. Some day, I promise, you will hear about the amazing pork schnitzel Jeff made back in the fall. Pinky swear. This recipe is one of the latter. I have made the effort to drag it up out of the archives, dust it off and present it to you now, with plenty of summer grilling season left for you to try it out.

This is one of those dishes where everything comes together in blissful harmony: hot pork meets cool cucumber, crunchy cabbage butts up against a soft flour tortilla, sinus-clearing wasabi washes over the sweet hoisin glaze. The biggest bonus? It takes no time at all to pull together. Put the super-thin strips of pork on the grill, whisk together the five-ingredient sauce, slice a few veggies, remove the pork, assemble the tacos, done. That leaves you more time to get back to the important things, like enjoying the summer evening. There's nothing wrong with being a little lazy in the summer.

Pork Wasabi Tacos
Adapted from Better Homes and Gardens summer 2010.

1-1 1/2 lb pork tenderloin, cut into thin strips
1/3 c hoisin sauce
6 flour tortillas
2 tsp wasabi paste
2 tbsp water
2 tbsp vegetable oil
1/2 tsp white wine vinegar
1/2 tsp sugar
1/4 head Napa cabbage, chopped
2 carrots, shredded
1/2 cucumber, thinly sliced

Marinate pork in hoisin sauce.


Thread onto skewers and cook on grill over medium heat for 2-3 minutes a side, turning once. 


Meanwhile, combine wasabi, water, oil, vinegar and sugar in a small bowl and whisk well to combine. Serve pork on tortillas with cabbage, shredded carrot, cucumber slices and a drizzle of wasabi dressing.


Friday, August 17, 2012

Farm Fridays: Mexican Jacket Potatoes


Every week something new appears on the farm or at the farmers market, I declare that this is the best week of the year. I guess it's because the harvest is back-loaded with all my favorite things. I was glad to see it get going in May, and especially thrilled for strawberries, peas and asparagus. Those soon gave way to summer squash, which I also love, and beautiful greens. After that came peaches and tomatoes. Then I couldn't wait for bell peppers. There's always something to look forward to (cauliflower and winter squash are next on my list), but right now things are pretty good. All the summer crops are in their glory, and early fall crops are starting to trickle in. The variety is awesome. Life is good.


Such variety makes it a bit difficult for me to plan my weekly menu - it's hard to know what to start with. I've been opting for recipes that use a little bit of lots of things. This is one of them. I was inspired by my trip to England, where jacket potatoes were often advertised outside lunch shops. I ordered one with a spicy chicken filling one day - it was basically a baked potato split open with spicy chicken salad piled on top. It was a good idea, but I wasn't keen on the mayonnaise-heavy salad and the potato was undercooked. I thought I could do better.

When I designed my jacket potato, I went with a Mexican filling in order to use the red beans that have been languishing in my pantry, as well as some of my bell peppers and shallots (shallots did really well at the farm this summer - we still have a big stockpile in the basement). Though my inspiration for this dish was British, I think I Americanized it a bit. By hollowing out the potatoes slightly, piling on some cheese and finishing them under the broiler, I made them a bit more like potato skins. The end result is about halfway in between, but I'm still calling them jacket potatoes. (When you invent a recipe, you can name it whatever you'd like and I'll be cool with it, ok?)


Mexican Jacket Potatoes

2-3 baked potatoes (we used two and had extra filling, but it also depends on the size of the potato and how far you hollow them out)
1 1/2 tbsp olive oil
1 large shallot, diced
1/2 bell pepper, diced
1 jalapeno, finely chopped
1 cup red beans, cooked
1/2 tsp paprika
1/2 tsp chili powder
1/2 tsp dried oregano
salt and pepper, to taste
1/3 c shredded cheese (I used a Mexican cheese blend)
salsa and Greek yogurt or sour cream to serve

Heat the oil in a skillet over medium high heat. Add the shallot and peppers and cook 4-5 minutes, until softened.


Add the beans and spices to the pan and cook until well blended and heated through. Remove skillet from heat.

Slice potatoes in half and hollow each half out slightly (what do you do with the extra potato? I just ate it while I worked). Mound the bean mixture into each hollow and top with shredded cheese. Put the potato halves on a baking sheet under the broiler for 2-3 minutes, until cheese is melted. Serve with salsa and Greek yogurt or sour cream.


Thursday, August 16, 2012

Preserving: Classic Grape Jam


Let me just say that my jam-making skills are in their infancy. All I have to my name are a batch of chili-tomato jam (which is so hot that we've been afraid to use it on anything!) and a batch of strawberry jam afflicted with fruit-float. Delicious, but wanting. But that doesn't faze me in the slightest. Success only comes through perseverance, so I will persevere. 


After coming home from Peace Valley Winery with our half sinkful of  grapes, Jeff and I rolled up our sleeves and began prepping for jam-making. I had a blast separating the grapes from their skins - just pinch them and the green centers pop right out of the purple skins. (A fun task for kids, I'd imagine, and more hands would prevent it from becoming tedious.)

So far, we're thrilled with this batch. The recipe doesn't call for added pectin - it uses what is naturally in the grape skins to set the jam. All of my jars sealed nicely, popping as soon as they were removed from the hot water. We've yet to open one and try it out, but based on the pan leavings we consumed, the set seemed fine and the jam tasted delicious! And, wonder of wonders, we managed to get fifty percent more jam than the recipe called for (six half-pints instead of four). This is a miracle, as we have a history of managing to reduce recipe yields by half. I imagine this has something to do with differences in stove heat and pan size and cooking time. But in this case, it doesn't matter - it just means that there's more jam for us to enjoy!

Important note: What makes this recipe so wonderful is that we used fresh, in-season grapes. I'm sure you could use seedless supermarket grapes and save yourself some hassle, but you'd be losing out on flavor. Supermarket grapes are sweet and unassuming; the more delicate seasonal varieties explode in your mouth, the sweet balanced with tart and a flavor that is quintessentially grapey. Go to the farmers market and grab yourself some in-season, local grapes if you really want good jam!


Classic Grape Jam
From Put 'Em Up

8 cups grapes (about 2 lbs)
1/2 c water
4 c sugar 
1/4 c lemon juice

Pinch the grapes to separate the skins from the flesh, putting them in separate bowls. Place the skins in a large nonreactive saucepan, add the water and bring to a boil. Reduce the heat and simmer 15-20 minutes.


Meanwhile, simmer the grape flesh until it loses shape, about 8-10 minutes. Cool slightly and put through a food mill to remove the seeds.


Add the seedless flesh to the grape skins. Stir in sugar until it dissolves, then add the lemon juice. Bring to a boil, then simmer, stirring, for about 10 minutes, until you reach the gel stage (I was using the sheet test, recommended by Marisa from Food In Jars).


Remove from the heat and let rest for 5 minutes, skimming off any foam. Process 10 minutes using boiling water method. (The recipe claims it will yield 4 cups, but I got 6 and the set seemed fine.)


Tuesday, August 14, 2012

Grape Picking at Peace Valley Winery


One of the things that I don't like about traveling abroad during the summer is missing out on the best of canning season. I've been trying to time my trips around the tomato crop, so poor Jeff isn't forced to attempt to can ten and twelve pound batches by himself. Even so, the whole time I was away, I was thinking about what I might be missing. I really wanted to can some peaches this year - what if the season ended before I got home? What if the berries were done as well? What if there was nothing good left to can? (As you can see, I'm a worrier.)

Clearly, I should not have worried: peaches are still available, berries are still available, tomatoes have not yet peaked. I haven't missed anything. And, in fact, I have arrived just in time for the opening of new delicious crops. While I was in London last week, I was thrilled to get an email from Peace Valley Winery announcing the beginning of pick-your-own grape season. Jeff and I have visited the winery a few times. When we were there last winter, the lady manning the wine tasting counter told us a story about the pick-your-own grapes they offered. While there are lots of pick-your-own places near us, I'd never heard of anyone having grapes before. I filed this away in my brain for later. So when I got the email, I was thrilled and immediately informed Jeff that we would be going on Sunday.


Sunday morning came and, after church, we drove over with basket at the ready and were directed to a dozen rows of ripe Fredonia grapes. The smell was amazing - a sticky, heady aroma that took me back to running around my grandparents' backyard as a kid, stealing grapes off the vine. The flavor is so familiar, I think that they had Fredonias as well - I'll have to compare when I go see Grandma later this week.


I'm not sure what I expected grape picking to be like. I guess I must have thought the grapes would be at different stages of ripeness. I certainly didn't think it was going to be so easy (as easy as picking cherries). We chose a spot (which really just amounted to spreading out from the people in other rows - every spot was a good one!) and then started clipping heavy, juicy bunches from their vines.


There were grapes everywhere. It wasn't a difficult task. The difficulty lay in trying not to take too many! The grapes were a bargain at $0.75 a pound, so money wasn't an issue - eating them before they went bad would be the tricky part! We were planning a few canning projects and wanted some left over for eating, so we tried to use moderation. After a few minutes we ended up with eight or nine pounds of gorgeous opaque purple grapes in our basket.

We did visit the pick-your-own vegetable fields as well, but since our produce bins are already overflowing from the CSA, we ended up stopping after half a dozen ears of corn. From what I could see, though, it would be a fun place to bring kids and load up a wagon with summery goodness. As it was, I was happy to take my basket of grapes and hie back home to cook up some jam, which you'll be hearing about soon!


Friday, August 10, 2012

Farm Fridays: Tortellini Pesto Salad


I am back in the country and it is Farm Friday! After spending several weeks in pursuit of vegetables on foreign shores, I have found the mother lode in Pennington. My CSA share today was epic. Behold the glory: 


Blackberries, watermelon, summer squash, tomatoes, green beans, jalapenos, potatoes, chard, basil, parsley, shallots, bell peppers and eggplant, along with a lovely large bouquet of flowers. There was so much going on that it was difficult for me to decide on a menu for the week. Normally, I give top priority in my planning to things that are very perishable and any leftovers from the previous week. Today, overwhelmed with options (and feeling the jet lag), I was a bit more haphazard. Hopefully we will get through a good portion of this pile without it spoiling! I may have to make a ton of pesto this weekend to use up my half pound of basil.

Pesto was on the menu for today, but instead of making some fresh, I felt obliged to try and use up the last of my frozen pesto from last summer. Last July, to be precise. It's quite a bit past its peak (which was technically in December), but it tastes fine and I can't countenance wasting it. So fresh pesto will have to wait another day or two. Until then, old pesto or not, I will be enjoying this delicious tortellini salad, packed with summer vegetables. If it pleases you, feel free to make yours with fresher stuff.

Since I'm finally back home, expect to see more recipes on the site soon!  

Tortellini Pesto Salad
Adapted from a recipe found in the Wegman's circular a few summers ago.

1 package cheese tortellini (I used tricolor because it looks pretty)
1 bell pepper, thinly sliced (red might be nice, but green's what's available)
1 large shallot, thinly sliced
1 small bunch asparagus, cut into 2" pieces (I know what you're thinking - asparagus is not in season. But, if you remember, I froze some back when it was, to have it available for recipes just like this! Feel free to leave it out if there isn't any available locally.)
2 tbsp olive oil
1 zucchini, sliced into half moons or quarters
3 tbsp pine nuts
1 cup cherry tomatoes, sliced in half
3-4 oz basil pesto
15 basil leaves, thinly sliced

Preheat oven to 450°F.

Cook the tortellini according to package directions. Drain and rinse with cold water. Set aside.

Season the pepper, shallot, asparagus and zucchini with salt and pepper, then drizzle with olive oil. Transfer to a foil-lined baking sheet and arrange in a single layer. Roast for 10-12 minutes, stirring halfway through, until the vegetables are cooked through and soft, though not yet browned. Remove and set aside.

Meanwhile, toast pine nuts in a small pan on the stove top for 2-3 minutes, shaking frequently, until they begin to brown. Remove from pan and set aside.

In a large bowl, combine tortellini, vegetables, pine nuts, pesto and sliced tomatoes. Gently stir to distribute the pesto. Season with salt and pepper, if needed. Serve room temperature or chilled, as either a main course or a side dish.