Wednesday, April 27, 2011

Vanilla-Fudge Marble Cake

Props to my brother for arranging his cake artistically for me.
 When my mom asked me to make a dessert for Easter this year, I knew it had to be something light, so I turned to an old classic - her vanilla-fudge marble cake. When she got this recipe out of the newspaper 20-25 years ago, it was referred to as a pound cake, but I hesitate to call it that. This is much lighter, perhaps due to the addition of buttermilk. It's a good all-purpose cake. While I've always eaten it plain, for Easter I dolled it up with homemade whipped cream and a raspberry sauce (just raspberries, some sugar and a bit of water cooked down in a pan - you'll get a recipe someday when I'm satisfied with the proportions - it keeps turning out too watery for me).

I talked to my mom about the recipe on Easter and realized that she used to do a few things differently than I do (even though I follow the recipe that she gave me!). First, she uses cocoa powder rather than chocolate syrup for the chocolate batter. She also really marbles the chocolate and vanilla when she adds them to the pan. I just pour the chocolate onto the vanilla. Now, since I use the chocolate syrup, this has an interesting effect - the more liquidy chocolate batter ends up sinking a bit and suspending itself inside the vanilla. It does it every time. I think this looks pretty neat. But a thicker, cocoa powder flavored batter marbled with the vanilla batter would look lovely as well. I don't know how much cocoa powder would be a valid substitute - maybe 1/3 c (for 2/3 c chocolate syrup)? If you're going to experiment, let me know how it goes! I'll probably just stick with my way (unless I'm out of chocolate syrup!).

I've included a picture of my workspace for your edification. This is the majority of the counter space in my kitchen. My kitchen is actually a good size, but the counters are very narrow for some reason. When I'm doing a recipe like this one, which involves several bowls, my mixer and pans, it gets pretty crowded. I long for a kitchen island, where I could spread all this out! But until then, I'll make do with obsessively putting everything away as I finish using it.


I also wanted to do a bit of showing off. I was particularly proud of myself this time around because the cake unmolded so beautifully. My mom used to make this in a tube pan, but I don't have one, so I make do with a bundt pan. That means that the top of my cake is really the bottom. While the top is the best part - awesome, marbley, and moist to the point of gooeyness - it gets hidden and instead the smooth, shiny bottom is visible. Usually, a good bit of that sticks to the pan, and my cake looks a bit of a mess - but not this time! May all your unmoldings be as successful!


Vanilla-Fudge Marble Cake
My mom's recipe, from some newspaper a few decades ago.

3/4 c butter, softened
2 eggs
2 3/4 c flour
1 1/2 tsp baking powder
1/2 tsp baking soda
1/2 tsp salt
1 1/2 c sugar
2 tsp vanilla
1 1/4 c buttermilk
2/3 c chocolate syrup

Preheat the oven to 350° F. Spray a 10" bundt or tube pan with baking spray.

In a medium bowl, stir together flour, baking powder, baking soda and salt. In the bowl of a stand mixer, beat the butter for about 30 seconds on medium. Add the sugar and vanilla and beat until fluffy. Add eggs one at a time, beating about a minute after each addition. Alternately add the flour mixture and the buttermilk, beating after each (I went with 3 additions of flour and 2 of buttermilk).


Reserve 2 c of batter, pouring the rest into the pan (unless you plan on marbling the batters - then set it aside in another bowl).


Add the chocolate syrup to the reserved batter and beat on low until combined (it will be much more liquidy than the vanilla batter, for obvious reasons).


Pour the chocolate batter into your pan, over the vanilla. (If you wish to marble them, you can alternate ladles full of each batter into the pan until it is full, then run a knife through it to blend them a little.)


Bake for about 50 minutes, or until a toothpick comes out clean. Cool 15 minutes on a wire rack before unmolding (I think I waited slightly longer, but the cake was still a bit warm when I did it and I had no trouble).

Saturday, April 23, 2011

Reflections of a Part-Time Vegetarian (and Potato-Leek Hash with Chard and Eggs)


As Lent comes to an end in a few short hours, so too does our vegetarian experiment. In many ways, I am sad to see it come to an end, as it forced us to become more innovative and interesting cooks. Jeff told me that it made him love to cook even more, since we attempted more complicated and involved recipes than usual, expanding our skill bases as well as our palates.

I learned that I do not need meat to survive. In fact, I am often better satisfied without it. I can't say that I had a single meal in the past 40 days during which I missed having meat on my plate. However, I also can't say that I didn't crave it - especially as the weather grew nicer and the scent of burgers wafted off of our neighbors' grills. I would really like a burger right now. But I can't say that I really want a large amount of meat, either. I've missed meat more as an accent than the star of the show - I want some ground sausage in my stuffed shells and some bacon on my twice-baked potatoes. I am going to make a greater effort to try and keep meat in this subsidiary capacity - like Thomas Jefferson, I will use meat "as a condiment to the vegetables which constitute my principal diet." At least, on the days that we're not grilling burgers.

For lunch today, we made one of the recipes on my must-do list: potato and leek hash with Swiss chard and eggs. This is the perfect example of a satisfying vegetarian meal. While it is a bit time-consuming for a lunch, on a lazy, rainy day like today we didn't mind spending some extra time in the kitchen. I think this dish would be suitable for any meal, but would be particularly nice for a weekend brunch.

Chard is the second vegetable on my 30 by 30 list. I actually made it earlier in the week as well, in an asparagus ragout that didn't come out as planned, and so did not make it on the blog. I had never had chard before this week - I find it an earthy tasting vegetable - not my idea of a good time on its own. Combined with other things, that earthiness is suppressed and it becomes palatable. In this dish, it was actually pretty tasty. I would definitely have it again in this context. If you don't like or don't have chard, I think spinach would be the perfect substitute here (and it's currently in season in NJ farmers' markets - I saw some yesterday!).

Interestingly, for the penultimate meatless dish of our Lenten project, this dish tasted like it had meat. If you had told me there was bacon in there, I could easily have believed it - something about the caramelized leeks and garlic evoked a bacony flavor. And if you are eating meat, I think some crumbled bacon on top might be quite nice, too! And if you are like me and do not like runny eggs, scramble some and serve alongside the potato-leek-chard mixture.

Potato-Leek Hash with Swiss Chard and Eggs
From Cooking Light April 2011.

2 tbsp olive oil
2 large sliced leeks (whites and light greens only, chopped and then soaked for a bit to remove the grit)
12 oz fingerling potatoes, halved lengthwise
2 garlic cloves, minced
1 1/4 tsp paprika, divided (the recipe called for Spanish smoked paprika, which we couldn't find)
1/2 tsp salt, divided
1/2 tsp pepper, divided
4 c thinly sliced Swiss chard leaves (about one bunch)
1 oz shredded Gruyere


Heat a large skillet over medium heat. Add the olive oil and heat. Add the leeks to the pan and cook about 8 minutes, stirring frequently (maybe a little less time or heat, if it starts to brown too soon, as mine did).


Add the potatoes and garlic to the pan. Cook 15 minutes, until the potatoes are tender, stirring occasionally. (Try to keep the skin-side of the potatoes up so that the flesh browns nicely!)


Stir in 1 tsp paprika, 1/4 tsp salt and 1/4 tsp pepper. Add the chard and cook 4 minutes, stirring constantly.


Make four egg-sized wells in the mixture with a spoon (like I mentioned above, since I don't like my eggs this way, we only made two eggs in the pan for Jeff and scrambled the others in a separate pan for me). Crack one egg into each space and sprinkle with the remaining 1/4 tsp salt, 1/4 tsp pepper and 1/4 tsp paprika. Cover and cook 3 minutes. Sprinkle the cheese over the potato mixture , cover and cook 2 more minutes, until the egg yolks are lightly set.

Saturday, April 16, 2011

30 by 30: Sauteed Kale with Pine Nuts


I mentioned my birthday was last week. I've come to the conclusion that I'm getting old. And since this will continue to happen with or without my consent, I'd better get with the program.

Enter my 30 by 30 list. I had actually tried to come up with one of these lists last fall (so I had some time to get a jump on it), but I didn't even come up with fifteen items. I looked at other people's lists for inspiration (this concept is quite popular in the blogosphere) - people wanted to write a novel or climb Mt Everest before they turned 30. Personally, I find these "goals" a little silly. Writing a novel is not some sort of mandatory requirement for adulthood, and if everyone were to write one before their 30th birthday, there would be a lot more garbage on the shelves of Barnes and Noble than there already is. Unless you already have pretensions of authorship, it's a ridiculous goal. And I have no pretensions of climbing Mt Everest. So my list included some more plebeian things like starting a retirement account, getting a puppy and writing a few dissertation chapters (some of which I managed to accomplish already). But since I couldn't even come up with 30 things to do that seemed meaningful and achievable, this idea has lost a bit of steam.

Until now, that is. I have come up with a great twist on the 30 by 30 idea: I will try 30 new foods before I turn 30! This is good because I continue to be a picky eater and I really don't want to go through the rest of my adult life this way. I don't have to like everything, but I need to at least give these foods a good try. And it is a challenging goal because this is something I've already been consciously working on for a year or so, so it's going to be more difficult to find new foods to try. I'm going to be keeping track of these on a separate page of the blog, so you can all play along at home.


I inaugurated this list last night with . . . kale! I actually have no experience with dark leafy greens like kale, chard or collards, and they've been on my list of things to try. As I tore the leaves from the stems, I was surprised at how firm and almost sharp the kale leaves were. That firm almost-sharpness stuck around, too - I felt it pricking the sides of my stomach after dinner! I had a taste of it raw and thought it had a cabbage-like tang, so I was not surprised to learn (via Wikipedia later in the evening) that it belongs to the cabbage family. Cooked, though, I did not get much flavor from it. It is definitely fibrous and time-consuming to chew (which can be good - eating your food slowly gives your stomach time to realize it's full!), but not tough or otherwise unpleasant. In short, I give kale an average review.

This recipe, however, makes me want to eat the kale: mix in red onion, garlic and toasted pine nuts (ok, I managed to burn mine rather than toast them - twice) and this is something I want to eat. It was like a treasure hunt: find the tasty little bits among the kale! But in doing so, I ate the nice, healthy, vitamin-rich kale, which is a good thing.

And did I mention that it looks gorgeous? It cooks to a beautiful, appetizing bright green color. With the bits of purpley-red onion and toasty pine nut accents scattered through it, it was truly an ornament for the table.

Would I do this again? Probably. But I'm not sure if I'm totally on the kale bandwagon yet. Let's see if I start craving those leftovers . . .

Sauteed Kale with Toasted Pine Nuts
Adapted from Bon Appetit (not sure which issue - sometime in the winter of 2010-11).

2 bunches kale (1 lb)
2 tbsp olive oil
1/2 red onion, chopped
2 cloves garlic, minced
1/4 c pine nuts, toasted (definitely do this in a dry pan, and keep them moving - I tried to cheat and use the toaster oven and burnt two separate batches)

Tear the kale leaves off the stems and shred them coarsely.

Heat the oil in a Dutch oven (or other large, heavy-bottomed pan) over medium-high heat. Add the onion and garlic and sautee until soft (about 3 minutes, in my case, since I chopped the onion small).


Add the kale and cook until it wilts, tossing often (about 3 minutes). The kale should be just tender and still a very bright green. (If you have too much kale for your pan, sautee half for the first three minutes, then add the second half for three minutes more - this is advised by the original recipe, which involved two pounds of kale). Toss with pine nuts and season with salt and pepper to serve. 

Sunday, April 10, 2011

Indian-Spiced Cauliflower and Tomatoes


Have I mentioned that I love cauliflower? I think I have. Roasted cauliflower is the best - the roasting brings out an almost nutty flavor. The only negative might be that the cauliflower can dry out a bit with roasting.

This recipe fixes that - the juice from the tomatoes soaks into the cauliflower and adds moisture, as well as flavor. On top of that, the Indian spices, cilantro and lemon juice provide a huge flavor kick. It's a tremendously tasty side dish, and incredibly simple - just toss everything in a bowl and roast. This is quickly becoming my favorite way to eat cauliflower - and, for that matter, tomatoes, which I do not normally eat. I'm not a fan of their squishy texture, but the roasting takes some of that away. The other thing I like about this recipe is that I can really taste every one of the flavors - it seems to have a lot of ingredients, but all of them make a difference. And who doesn't mind cranking up the stove on a chilly April evening?


Indian-Spiced Cauliflower and Tomatoes
From Food Network.

7 c cauliflower, cut into florets (I just chose the biggest head I could find at the store)
3 plum tomatoes, chopped (I didn't use plum tomatoes, but I have a hunch they would work better - less pulp and seeds to deal with)
1/4 c olive oil
2 garlic cloves, minced
1 1/2 tsp cumin seed
1/4 tsp turmeric
pinch cayenne
1/2 tsp salt
pepper to taste
lemon juice
cilantro


Toss all ingredients except lemon juice and cilantro together in a bowl. Transfer to a foil-lined baking sheet.


Roast at 450° F for 25 minutes (didn't I say this was easy?). Garnish with a squirt of lemon juice and some cilantro and serve.

Friday, April 8, 2011

Farfalle with Asparagus, Sun-Dried Tomato and Boursin


Is this the perfect light pasta dish? I think so! Am I obsessed with asparagus? Absolutely!

I don't really think of asparagus as something that has a whole lot of flavor on its own. It's flavor isn't even something I really remember afterward (I can sit here and imagine what a fresh floret of broccoli tastes like, or a carrot, but asparagus eludes me). What it does have going for it is a beautiful fresh crispness. I love the texture - substantial, yet delicate. That is what keeps me coming back for more.

I think asparagus is great in this dish because it doesn't compete with all of the other strong flavors, but its texture complements the whole. This dish has tangy, chewy sun-dried tomatoes, creamy, garlicy boursin cheese, crisp, toasty pine nuts and fresh-tasting parsley and dill. Each one of these flavors is wonderful on its own, but I think they harmonize even more beautifully. I know this is a dish I'll be coming back to again and again, for its deliciousness as well as its simplicity.


Farfalle with Asparagus, Sun-Dried Tomatoes and Boursin
From Bride and Groom: First and Forever cookbook.

1/3 c pine nuts
8 oz farfalle pasta (any pasta will work, of course, but I prefer a bite-sized shape here)
1 1b asparagus spears, cut into 1 1/2" pieces (make sure you trim or peel the ends!)
1 tbsp olive oil
4 cloves garlic, minced
1/3 c sun-dried tomatoes, chopped (if you use oil-packed ones, be sure to drain them)
1/4 c grated Parmesan cheese
2 oz garlic and fines herbes Boursin
1 tbsp fresh dill, chopped (or 1 tsp dried)
3/4 tsp lemon pepper
fresh parsley for garnishing

Add the pine nuts to a dry skillet over medium heat. Toast, shaking frequently, for 2-3 minutes.


Cook the pasta in a large pot of salted boiling water for about 8-10 minutes. Add the asparagus to the pot and cook 1-2 minutes more, until crisp-tender. Drain the pasta and asparagus, reserving 3/4 c cooking water.


In the same pot, heat the olive oil over medium heat (make sure the pot is dry or the oil might splatter!). Add the garlic and cook about 30 seconds, until fragrant and beginning to brown. Return the pasta and asparagus to the pan, along with the reserved cooking water. Add the remaining ingredients and stir well to combine. Season with kosher salt and more lemon pepper, to taste, and a garnish of parsley.


This dish is best if served immediately. The recipe says it makes two servings, though I thought it was more like three. Be warned that the leftovers don't reheat very well - the cheese doesn't take well to the microwave. I ate the leftovers and lived, but the dish was not nearly so enjoyable as the first day, so plan your portions accordingly!

Monday, April 4, 2011

Triple Chocolate Mousse Cake


Yesterday was my birthday. The awesome things about birthdays are that I get to plan my menu and choose whatever I want, guilt free. It gives me the opportunity to try some recipes I've had sitting around that were deemed too rich for most occasions (especially since I'm usually cooking for two, without anyone nearby to foist leftovers on). It's not just about eating what I want, but getting the opportunity to make it.

So I went for the triple chocolate mousse cake. The one that took the better part of the afternoon to make, using most of the bowls in our kitchen more than once. It was awesome (and will be for the better part of the week, I'd imagine - we're not finishing that baby any time soon). And it was fun. I got to test my mettle with a variety of different techniques, all but one of which were successful (you'll hear about my issues with the second layer in a bit). This was the first time I'd ever worked with gelatin, and that went extremely well - just look at that velvety smooth top layer!

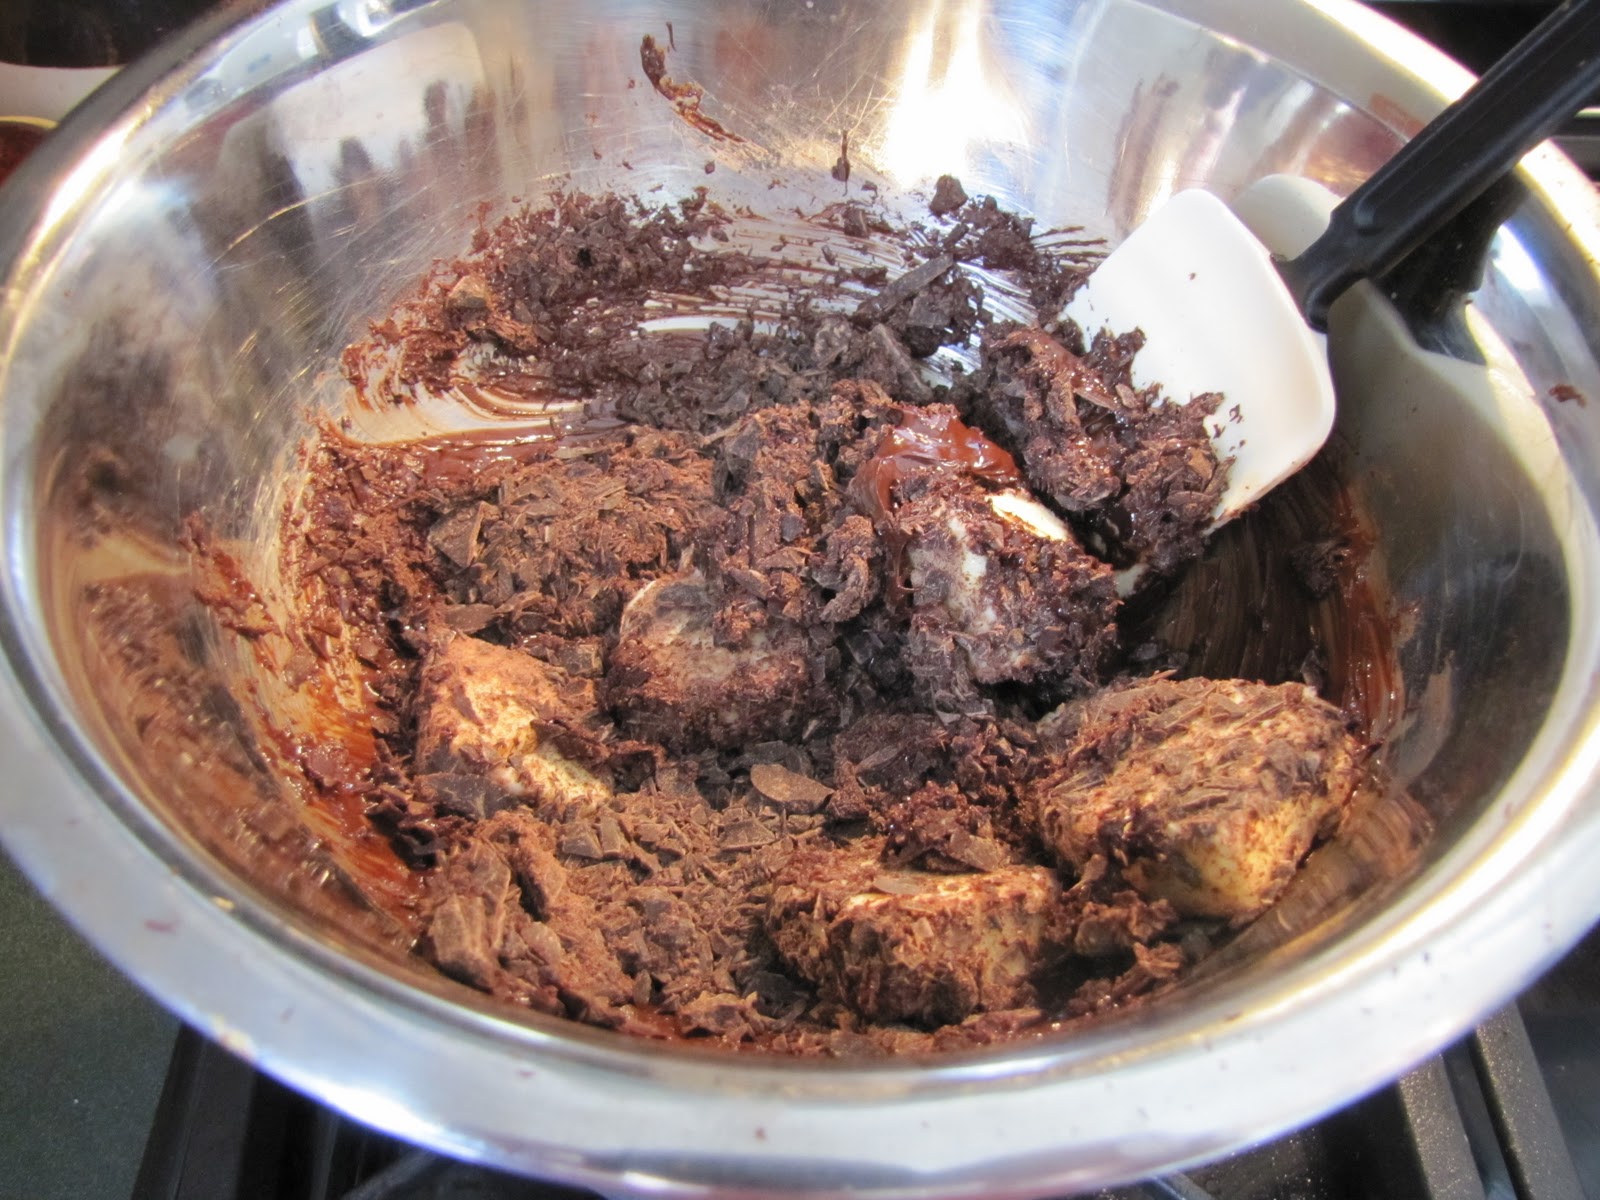
Props to Jeff who chopped so much chocolate he developed a blister from the knife.
I made sure to buy excellent chocolate for the occasion. We used Callebaut 66% bittersweet and Mitica 44% milk chocolate. I'd never heard of Mitica before - I was buying bulk blocks of chocolate from Whole Foods and it was the only milk chocolate sold that way. I knew the Callebaut would be deliciously dark and bitter - perfect for baking. What I didn't know was that the Mitica milk chocolate would be so delightful! I thought it tasted almost like butterscotch - I have since found a website that claims it has toffee and caramel notes. Either way, it made a gorgeous mousse. As I read the recipe, I realized that the top layer was originally supposed to be white chocolate - it was changed by the blogger who I got the recipe from. I love white chocolate and would have probably chosen that route if I'd noticed sooner. But I'm glad I didn't, because I got to try a delicious new milk chocolate instead. I think that layer would be great as a stand-alone mousse dessert. I'll have to try it sometime.


If you're going to try this recipe, I would recommend choosing a day when you have plenty of free time. It takes quite a while, if you're slow like me. I also have a recommendation for the second layer, which I messed up. The first layer involves melting chocolate and butter, then integrating it into whipped egg whites. No problem. The second layer involves the same thing, except you're integrating melted chocolate into whipped cream. It seems like it will be the same process, but my experience says differently. I let my chocolate cool for about five minutes, like with the first layer, but I think that made it too cool. It was incredibly difficult to integrate into the cream, and, in fact, I did not totally succeed - my middle layer has some nice chunks of chocolate all through it. I think that mixing it with the cold cream caused the chocolate to harden too quickly, so that it could no longer integrate with the rest of the mixture. This wasn't a problem in the first layer, where the melted chocolate was mixed with other things before integration. Next time, I think I would whip the cream while the chocolate was melting and only let the chocolate cool for a minute or so before combining the two.

Triple Chocolate Mousse Cake
Adapted slightly from Confections of a Serial Baker.

Flourless Chocolate Cake (bottom layer):
6 tbsp butter, cut into 6 pieces
7 oz bittersweet chocolate, finely chopped
3/4 tsp instant espresso powder (I left this out, as I usually do, because I hate coffee flavors - I think this is why my two bottom layers ended up quite similar colors, instead of a pretty gradient)
1 1/2 tsp vanilla extract
4 large eggs, separated
pinch of salt
1/3 c light brown sugar

Bittersweet Chocolate Mousse (middle layer):
2 tbsp cocoa powder
5 tbsp hot water (I got mine out of the double boiler I used for the first layer)
7 oz bittersweet chocolate, finely chopped
1 1/2 c heavy cream
1 tbsp sugar
pinch of salt

Milk Chocolate Mousse (top layer):
3/4 tsp powdered gelatin
1 tbsp water
6 oz milk chocolate, finely chopped
1 1/2 c heavy cream, divided

Bottom Layer:
Butter the bottom and sides of a 9" springform pan (parchment paper on the bottom is helpful, too). Center a rack in the oven and preheat to 325°. Combine the butter, chocolate and espresso powder in a double boiler (in my case, just a metal bowl set over a pot of boiling water).


Stir with a rubber spatula until the mixture is totally smooth.


Remove from the heat and let cool for about 5 minutes, then whisk in vanilla and egg yolks (don't disassemble your double boiler - you'll need it again. I turned the stove off and put a lid on my water to keep it warm). Set aside.

While the mixture is cooling, beat the egg whites in a stand mixer with whisk attachment on medium speed for 30 seconds, until foamy. Crumble in half the brown sugar (removing any lumps with your fingers) and beat 15 seconds until incorporated. Crumble in the rest of the brown sugar and beat on high speed until stiff peaks form (the instructions say 1 minute, but it definitely took me a few). Take one third of the egg white mixture and add it to the chocolate mixture, whisking until smooth (this is to lighten the chocolate mixture, to make folding easier). Then fold in the rest of the egg whites with a spatula until no streaks remain (fold gently - the goal is to keep as much air in those egg whites as you can manage). Pour the batter into the prepared springform pan.

Bake the cake until the edges are firm and the middle is set but soft (meaning that it will spring back when your finger touches it), about 14-18 minutes. Transfer cake (still in the pan!) to a wire rack and cool for at least 1 hour (the cake will deflate a bit as it cools).


Middle layer:
In a small bowl, mix together the cocoa powder and hot water, then set aside. Melt the chocolate in the double boiler, stirring until smooth. Remove from the heat and cool slightly, 2-5 minutes (as I said above, I'd advocate a short cooling time, if possible).

In your stand mixer (hopefully you've cleaned the bowl since the first round), whip the cream, sugar and salt on medium speed until the mixture thickens, about 30 seconds (this can also be started while your chocolate is melting, to speed things along). Increase the speed to high and whip 30-60 seconds, until soft peaks form. Whisk in the cocoa powder mixture until smooth.


Then, add one third of the cream mixture to the melted chocolate and whisk in (again, this is to lighten it up, to facilitate folding the rest of the cream in). Fold in the remaining cream gently with a rubber spatula until no streaks remain.


Spread the mousse over the cake layer in your springform pan. Use a spatula to smooth out the top, and be sure to wipe any smears on the sides of the pan - they'll show up on the top layer later on. Refrigerate for 15 minutes before adding the top layer.


Top layer:
In a small bowl, sprinkle the gelatin over the water. Let stand 5 minutes (the gelatin will absorb the water). Place the milk chocolate into a medium bowl. Bring 1/2 c cream to a boil in a small saucepan. Remove the pan from the heat, add the gelatin mixture and stir until dissolved. Pour the hot cream mixture over the chocolate and let stand a few seconds so the cream can begin to melt the chocolate. Then, whisk until the mixture is smooth. Cool for a few minutes (I just let it cool for as long as it took me to finish the next step).

In your (clean!) stand mixer with whisk attachment, whip the remaining 1 c of cream at medium speed until it thickens. Then increase the speed to high until soft peaks form. Whisk one third of the cream into the chocolate mixture, then fold in the rest with a rubber spatula until no streaks remain. Pour the mousse into the pan over the middle layer and smooth the top with a spatula.


Refrigerate the cake until all the layers are set, at least 2 1/2 hours.